1.4: How to Create Your First AI Lookbook Image in Astria
 Watch lesson 1.4Astria Academy
 Astria Workshops · Series 1: Your first AI lookbook · Lesson 4
Create your first AI lookbook image for a product page by bringing together the clothes, a pose and a background. In this workshop, you’ll add a shirt, trousers and shoes, choose how the outfit is shown, and generate a pair of portrait images in Astria.
Follow the same steps as workshop 1.4, First AI Lookbook. The screenshots below are keyframes from the video, cropped to keep the relevant controls readable. Small Face previews are hidden; the selected reference name and controls remain visible. Click any image to enlarge it.
Before you begin
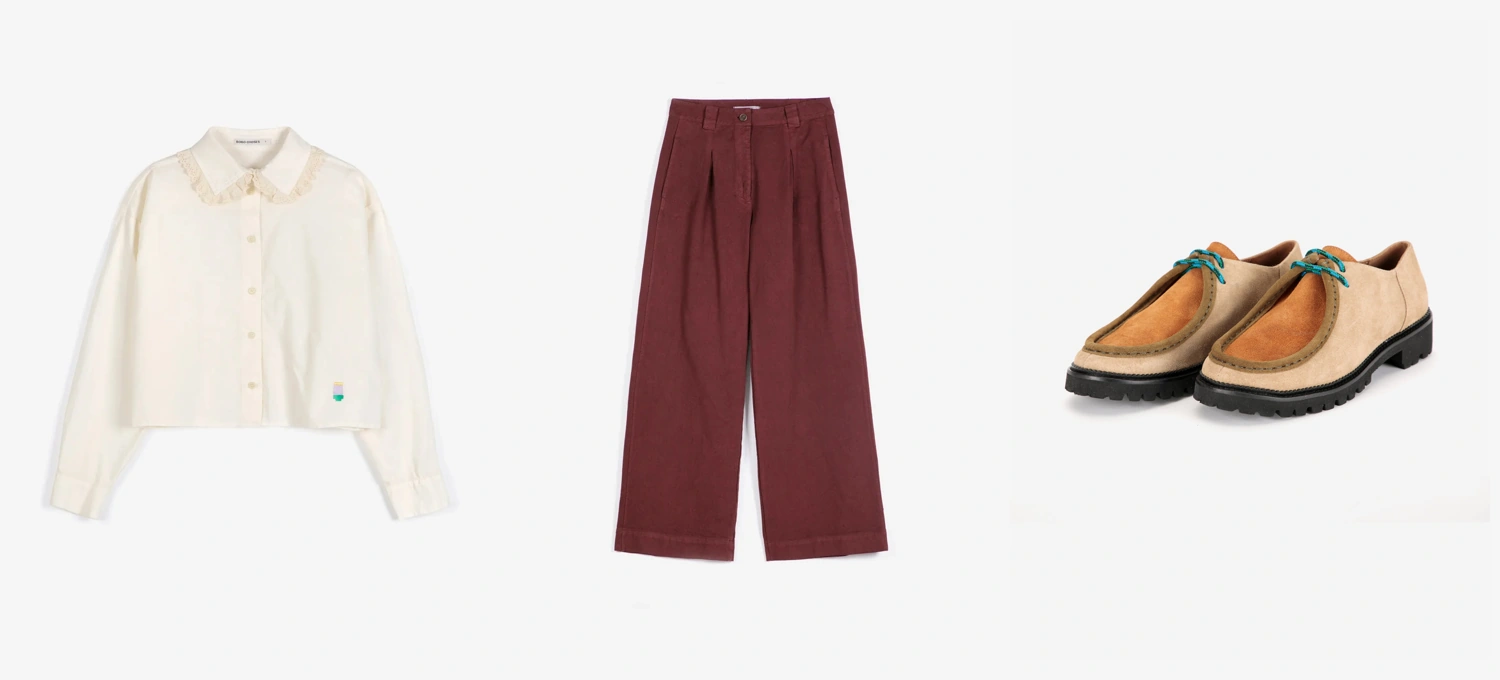
Open your brand’s workspace in Astria Generate. Have a clear product photo of each item you want in the outfit. This example uses packshots—studio photos of the products—of a cream shirt, burgundy trousers and suede shoes, plus a standing pose and a neutral background reference.
If you’re still deciding what the images should look like, start with the brand’s product photography. Use its background, styling and garment views to guide your choices. The AI lookbook guide explains that preparation in more detail.
Step 1: Choose Lookbook mode
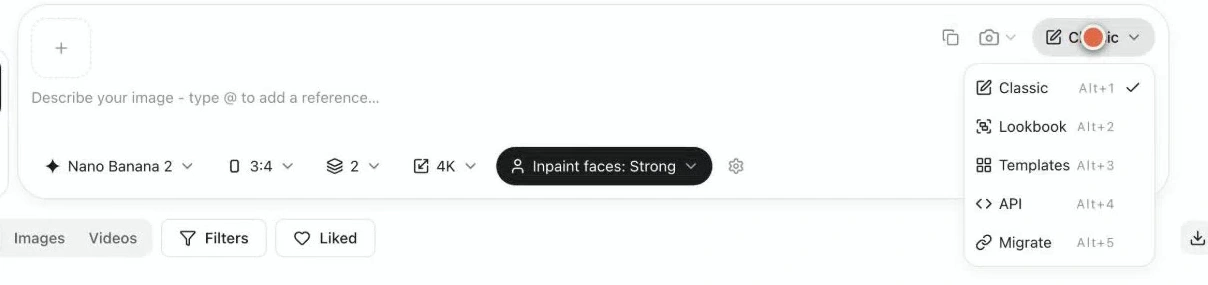
On Generate, open the mode menu at the top right of the prompt box and choose Lookbook. A prompt is the written instruction for the image you want to create.
Lookbook gives you separate reference squares for different parts of the outfit, including Top, Bottom, Jacket and Footwear. You’ll use these to tell Astria which products belong in the image.
Step 2: Add the shirt, trousers and shoes
If you’re continuing from the casting workshop, select your saved model in Face. The recording uses the Saoirse reference.
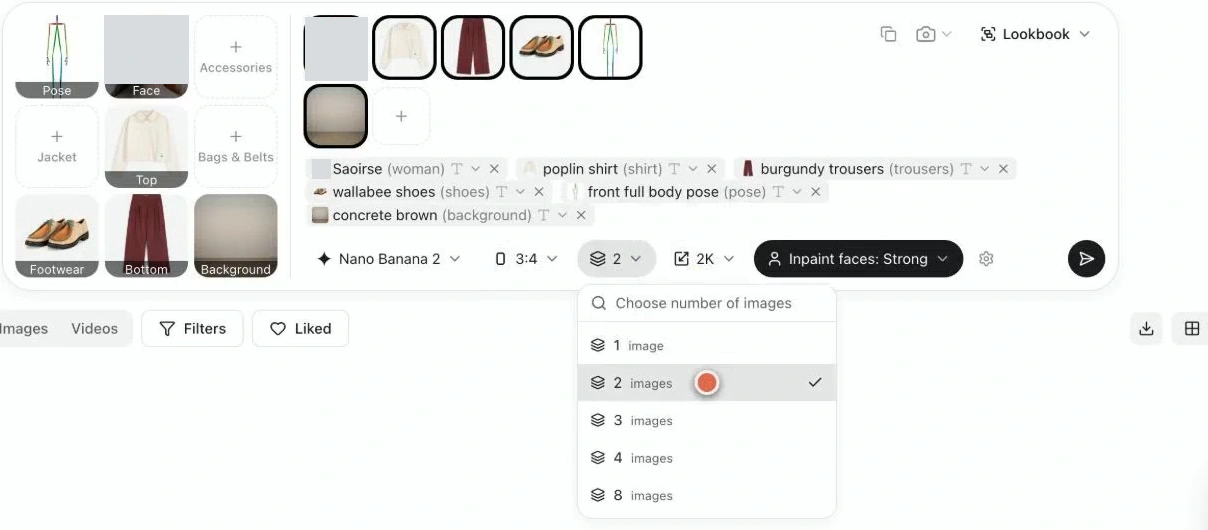
Select Top and add the shirt’s packshot. Add the trousers under Bottom, then the shoes under Footwear. Check the selected photo for each item before moving on: these references define the clothes you want the model to wear.
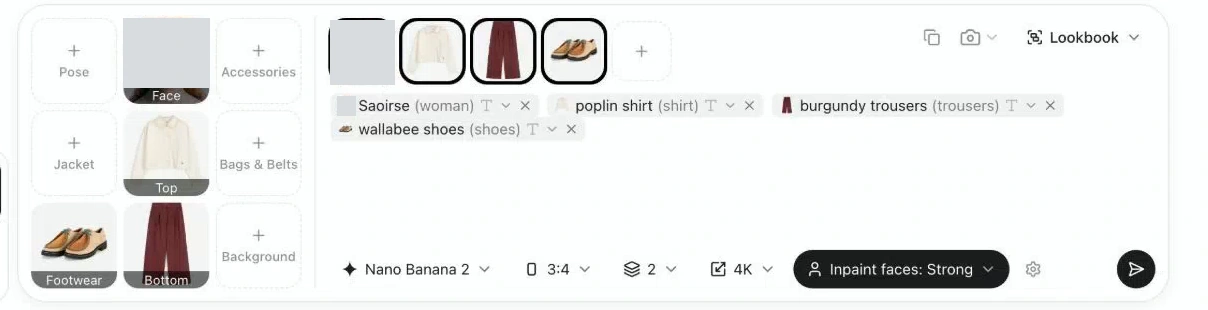
Step 3: Choose a pose and background
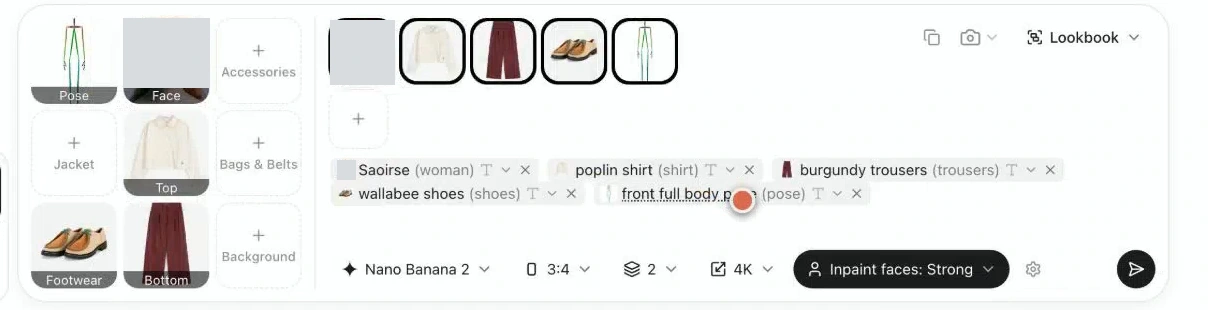
Open the Pose square and choose a stick-figure example that shows the outfit clearly. You can also describe the pose in words in the prompt. For this first image, use a standing pose that lets you see the full outfit.
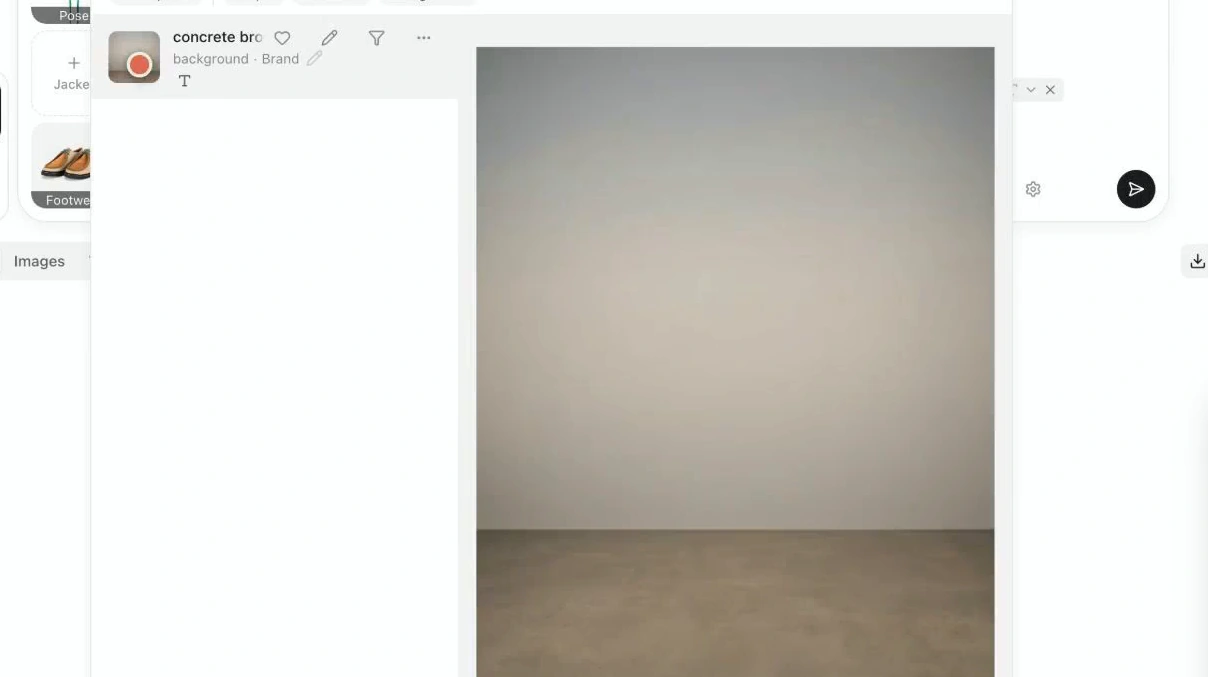
Next, open Background. Choose an image from the public library or upload your own background reference. The workshop uses a plain wall and floor so the clothes remain easy to see.
Step 4: Set the model, aspect ratio and output size
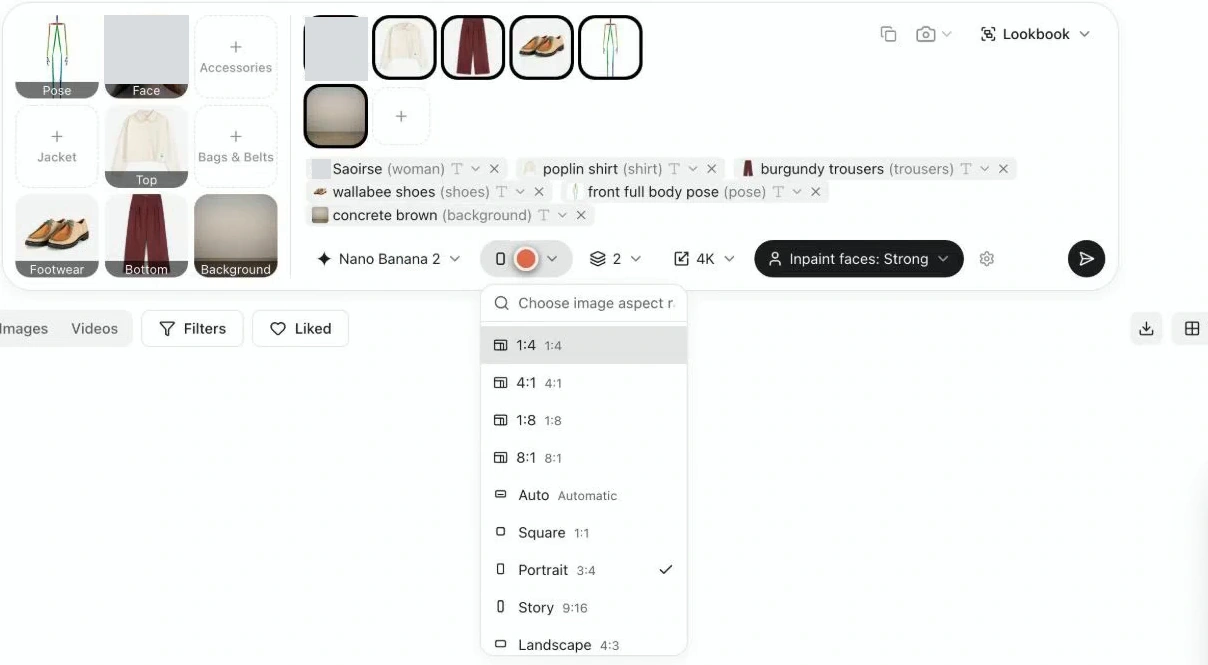
Before clicking Generate, check the settings below the prompt box. Work through them in this order:
| Setting | What to choose for this workshop | What it controls |
|---|---|---|
| AI model | The recording uses Nano Banana 2. | The model used to generate the image. |
| Aspect ratio | 3:4 | The width compared with the height. This portrait shape is taller than it is wide. |
| Output size | 2K | The resolution of the generated image. |
| Images per prompt | 2 | The number of results created from this one prompt. |
Step 5: Generate your first lookbook images
Click Generate, the arrow button at the right of the prompt box. When the images appear, look at how the clothes, pose and background work together.
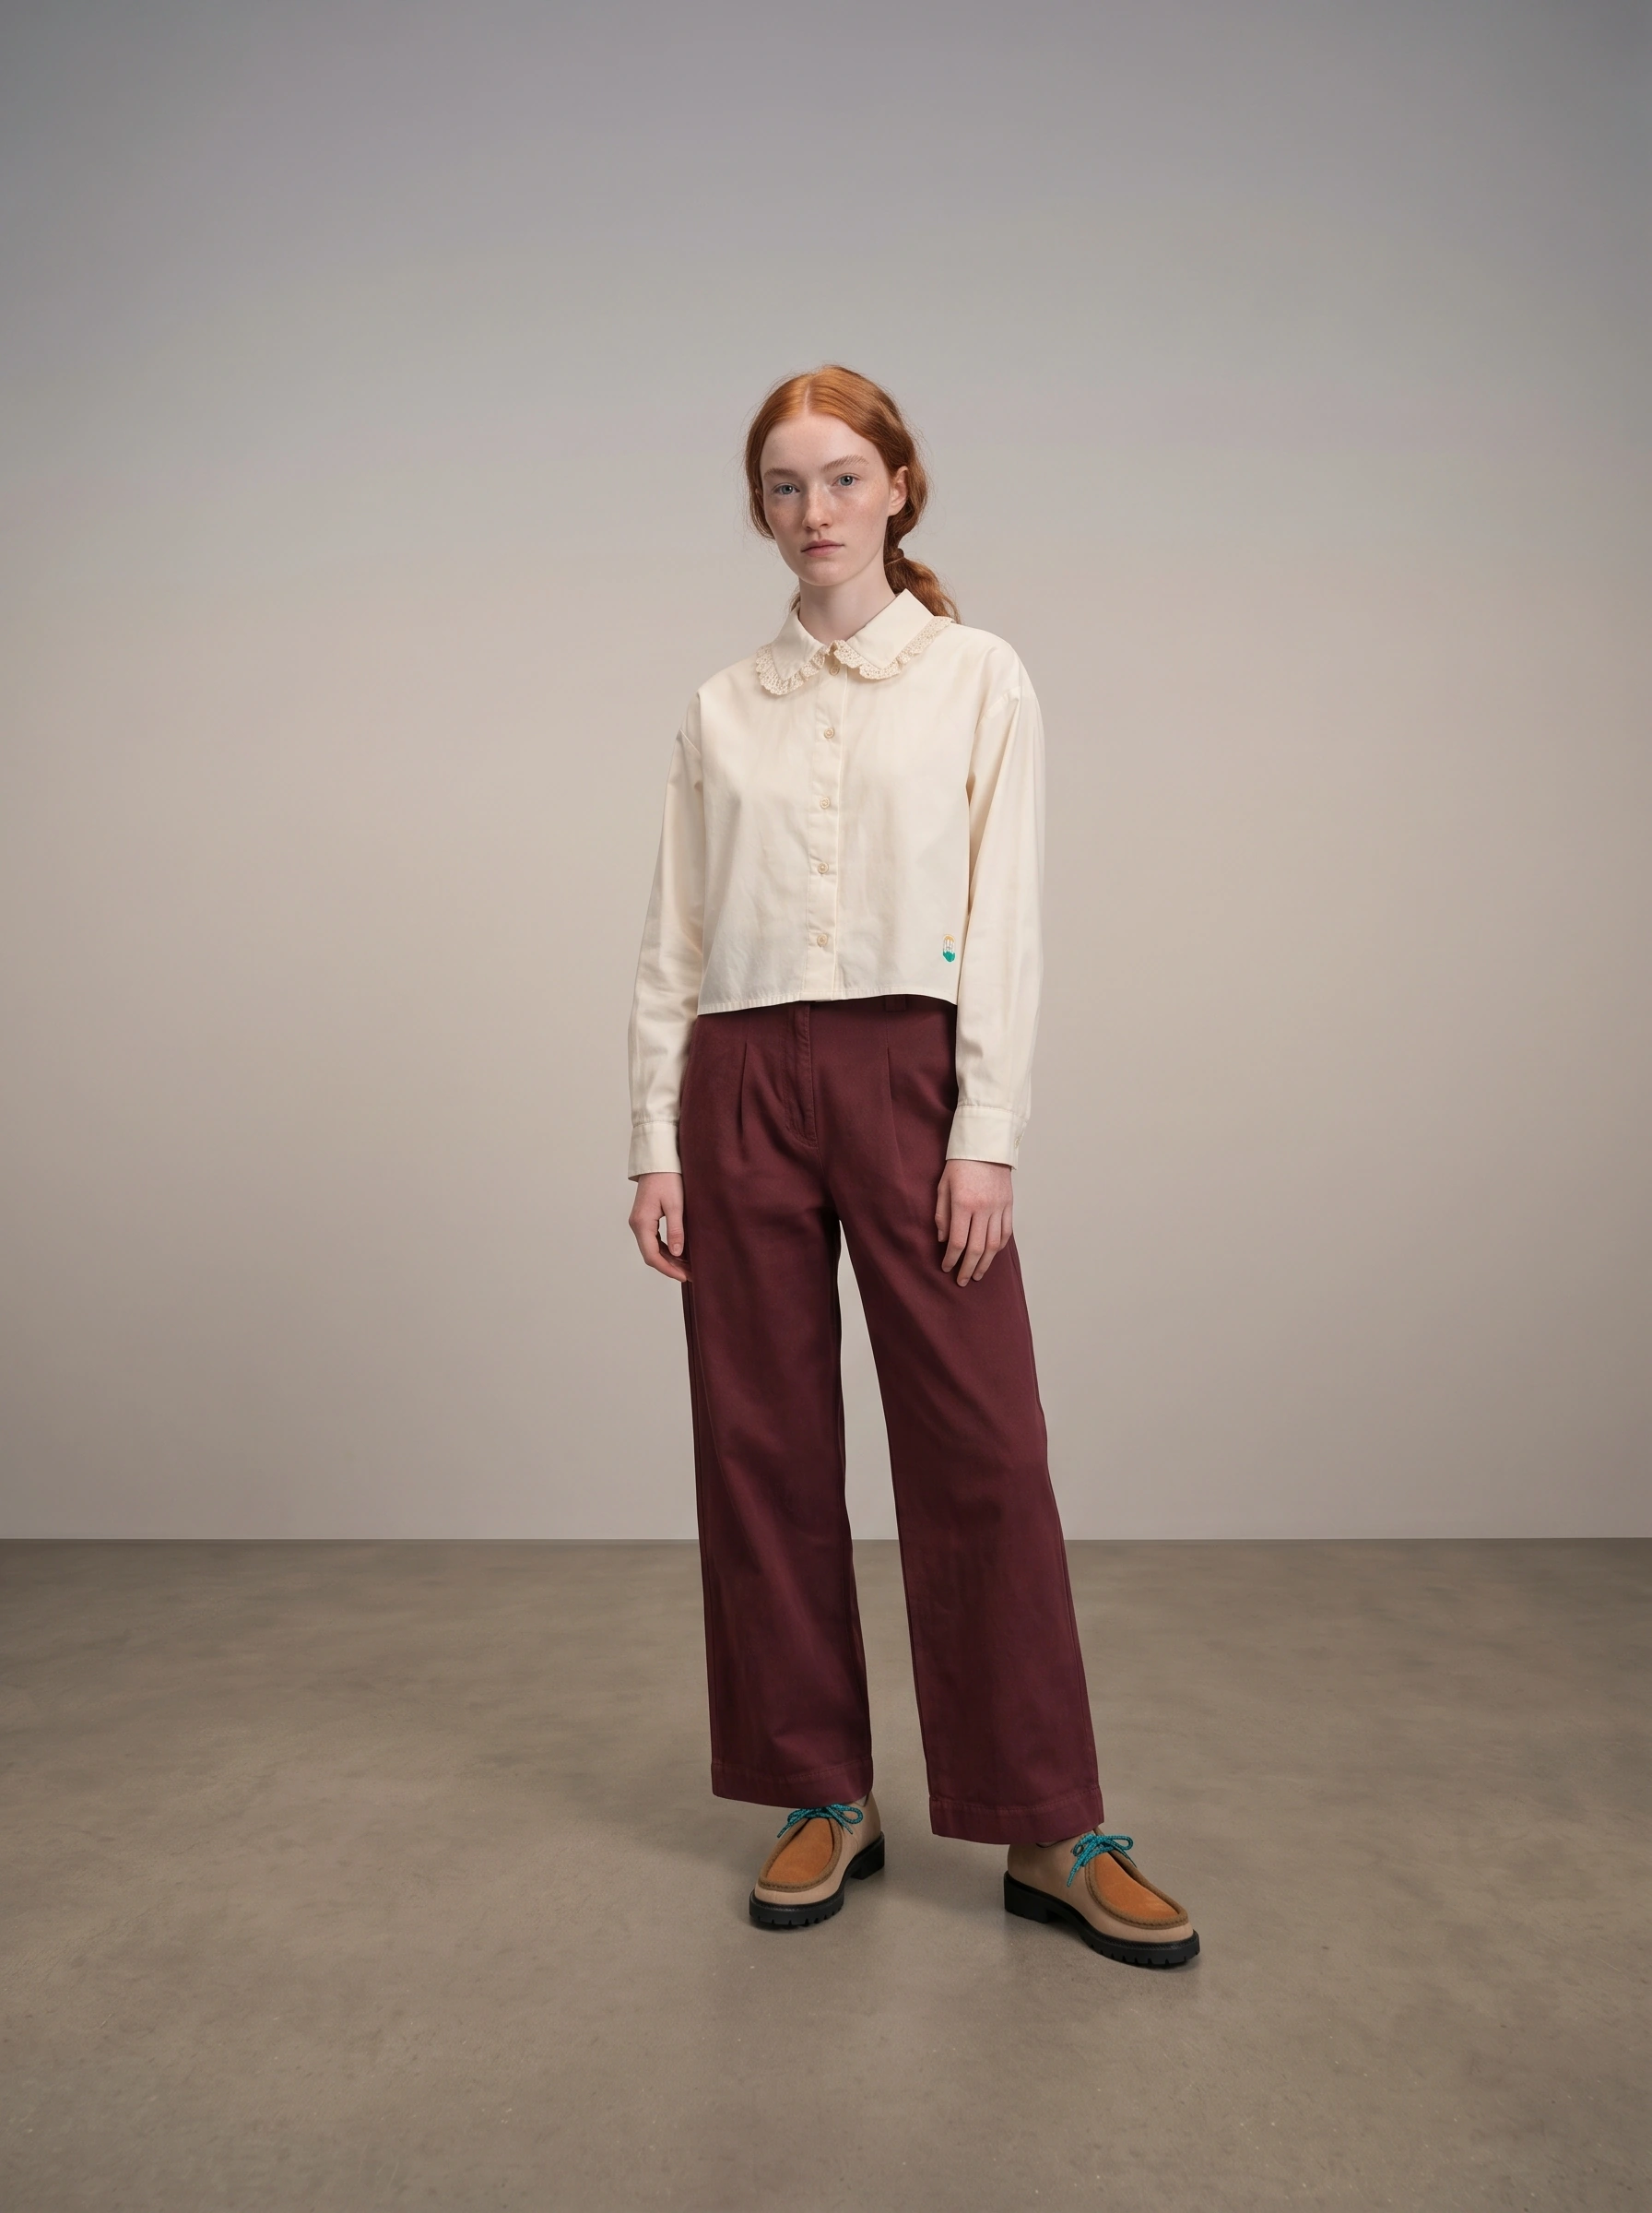
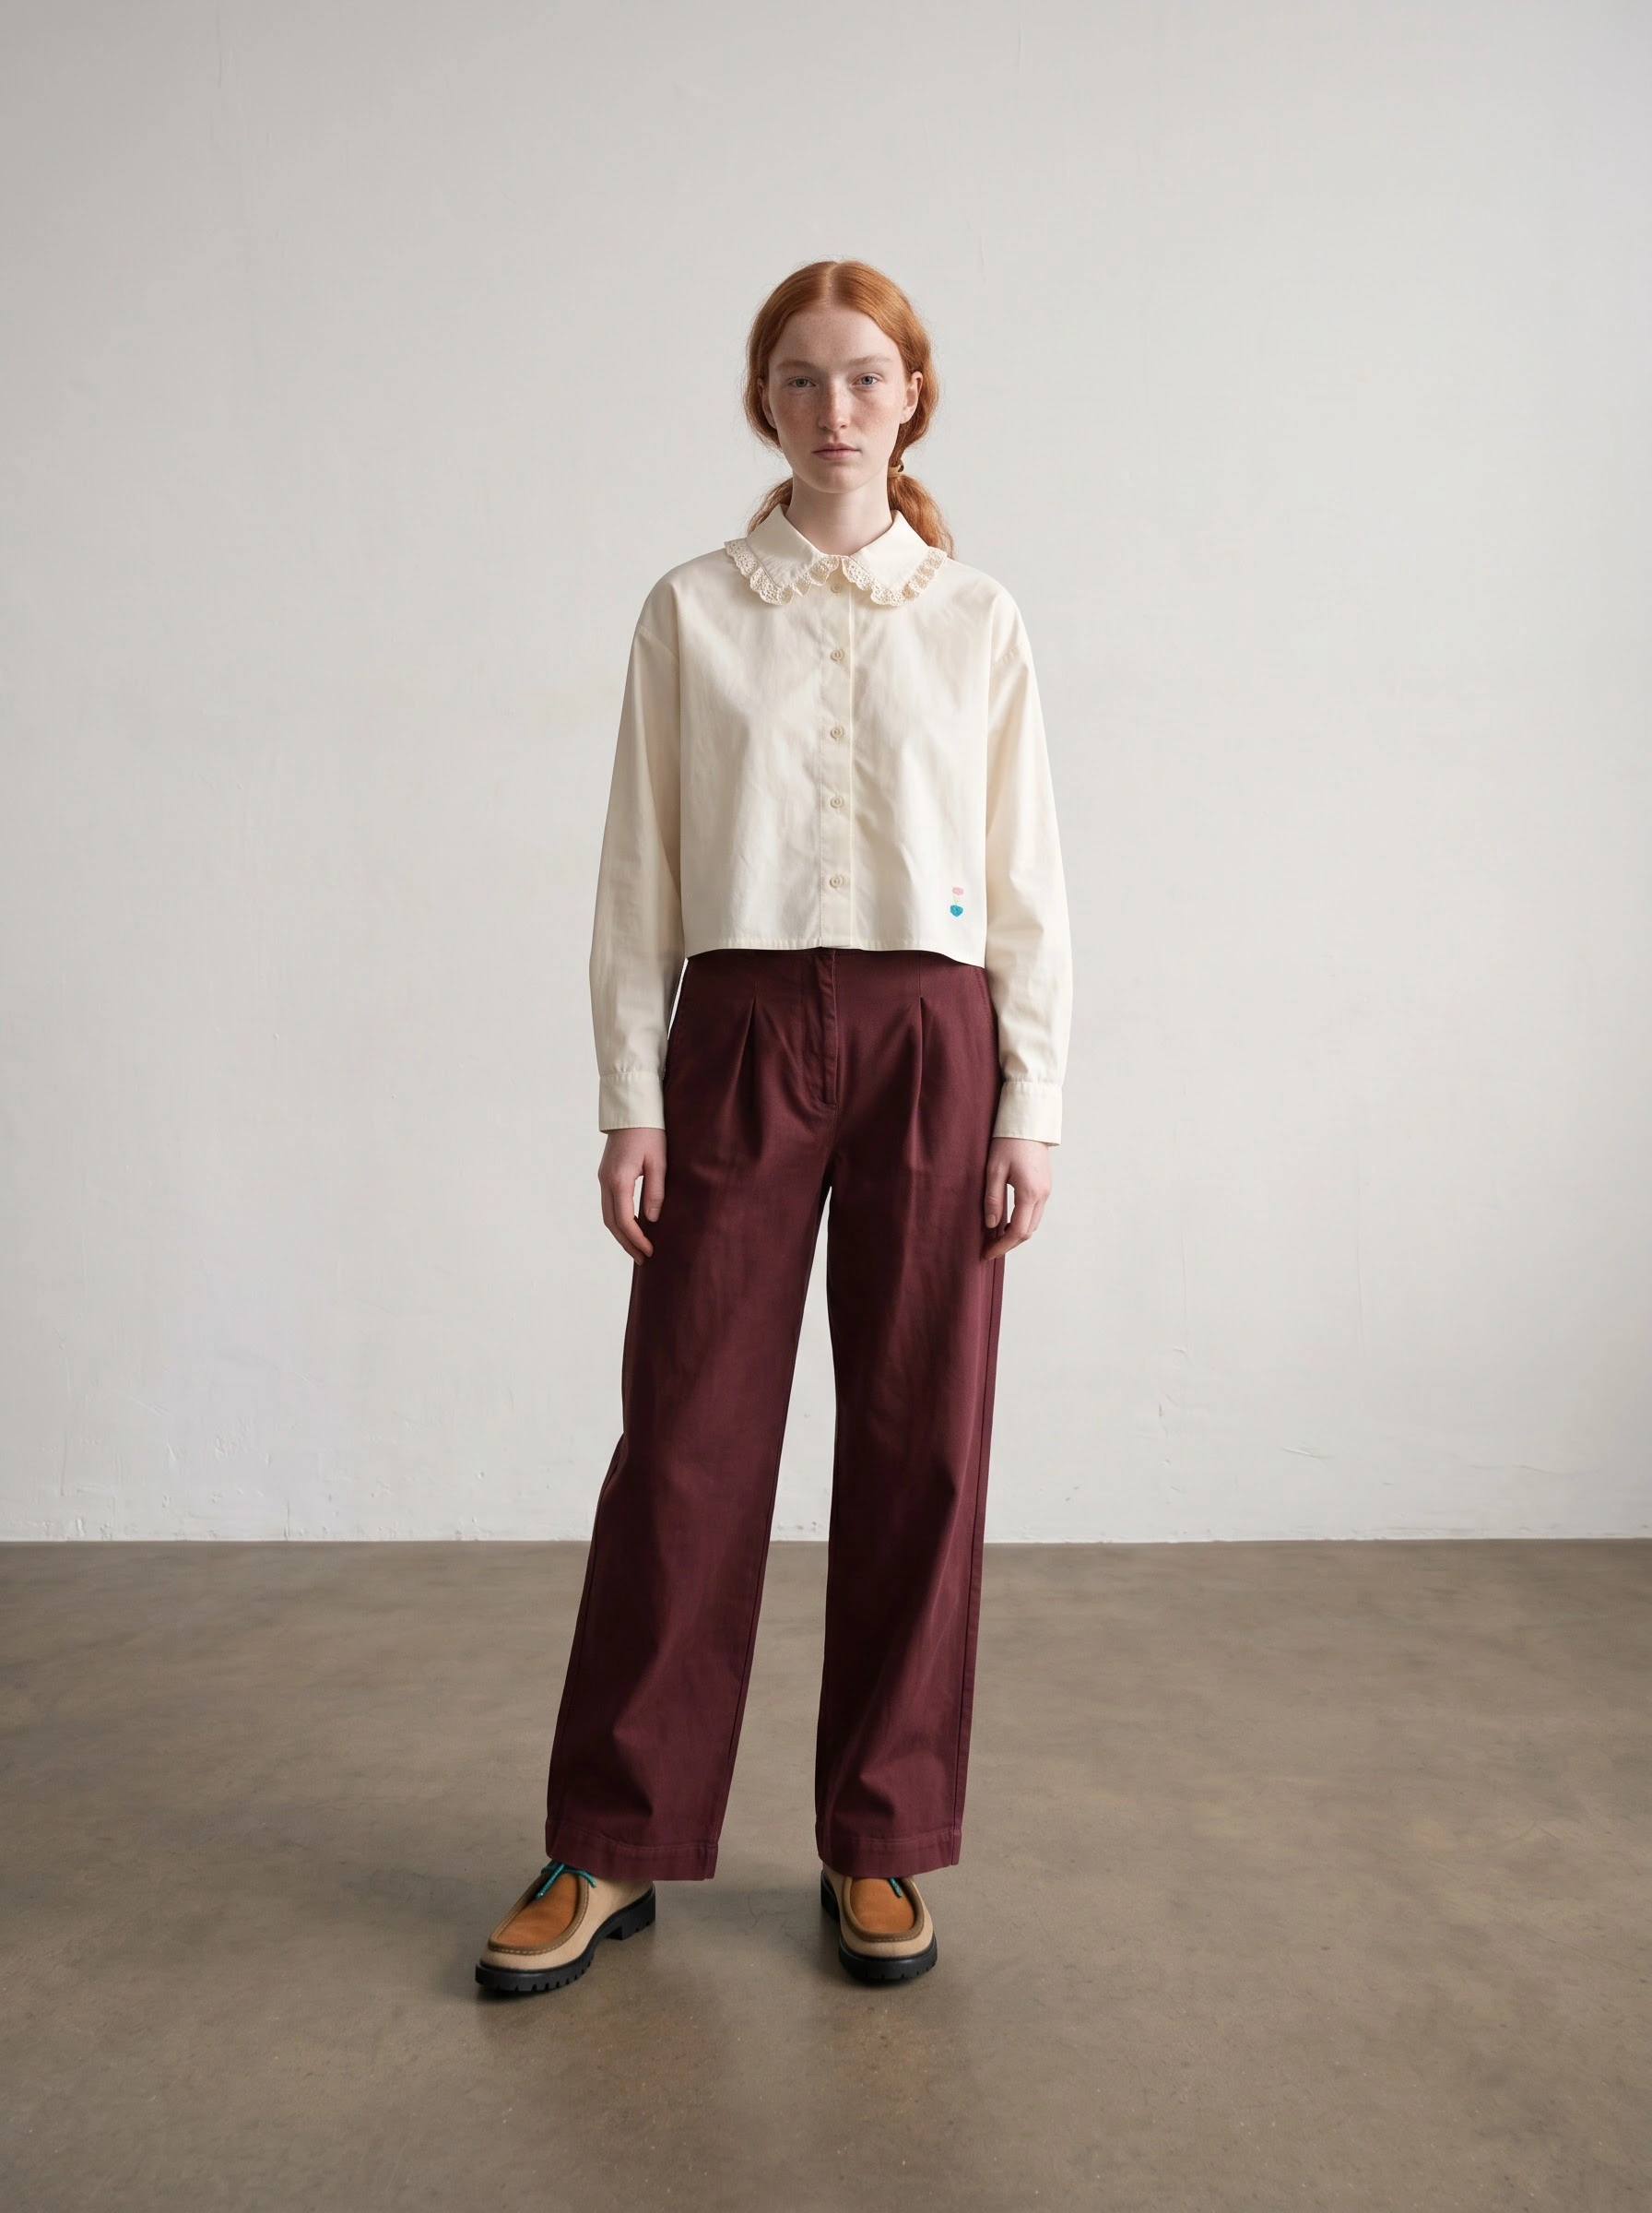
These are the original reference-based outputs from the workshop, shown here from their full-resolution image files.
Check your result
Keep the product photos beside the generated images. Check that the shirt’s collar and hem, the trousers’ shape and color, and the shoes’ details still represent the products you selected. Confirm that the pose shows the outfit clearly and that the framing includes the shoes.
You now have a first look to build on. Continue with workshop 1.5: Background & Lighting to bring the setting and light closer to your brand’s visual direction.