How Can I Create Consistent Photos for a Whole Clothing Collection?
In Astria, you can save a lookbook’s shot instructions as a template, replace the product references for each outfit, and prepare several outfits in separate rows. This lets you reuse the background, lighting and views while deciding how each new product should be styled.
Decide what stays the same across the collection
Each product needs its own photographs, but many creative choices repeat. You might want the same studio background, soft lighting, full-length front view and closer detail shot for every shirt in a collection.
Start with one outfit. In Astria’s Lookbook mode, choose its clothing references, model, pose and background. Develop the views you need and choose the images that suit the brand. Those decisions become the starting point for the next product.
Save the shot instructions as a template
In the course example, the first lookbook uses a cream shirt with burgundy trousers and tan shoes. Its five shots include different views and a detail image.
To reuse that set:
- Select the prompts behind the chosen images using the selection circles on their thumbnails.
- Click Create template in the selection toolbar.
- Name the template for its use, such as Shirt.
- Open it and replace the original shirt references with photographs of the next shirt.
- Select the shots you need, check the settings and click Generate.
A prompt is the instruction behind an image. Saving those instructions lets you carry the chosen poses, background and lighting into the next run without writing the set again. The template’s preview images show its original shots; select the new product in References.
The course shows this change from a cream shirt to a blue striped shirt. Here are the new shirt’s source photograph and its generated lookbook image:
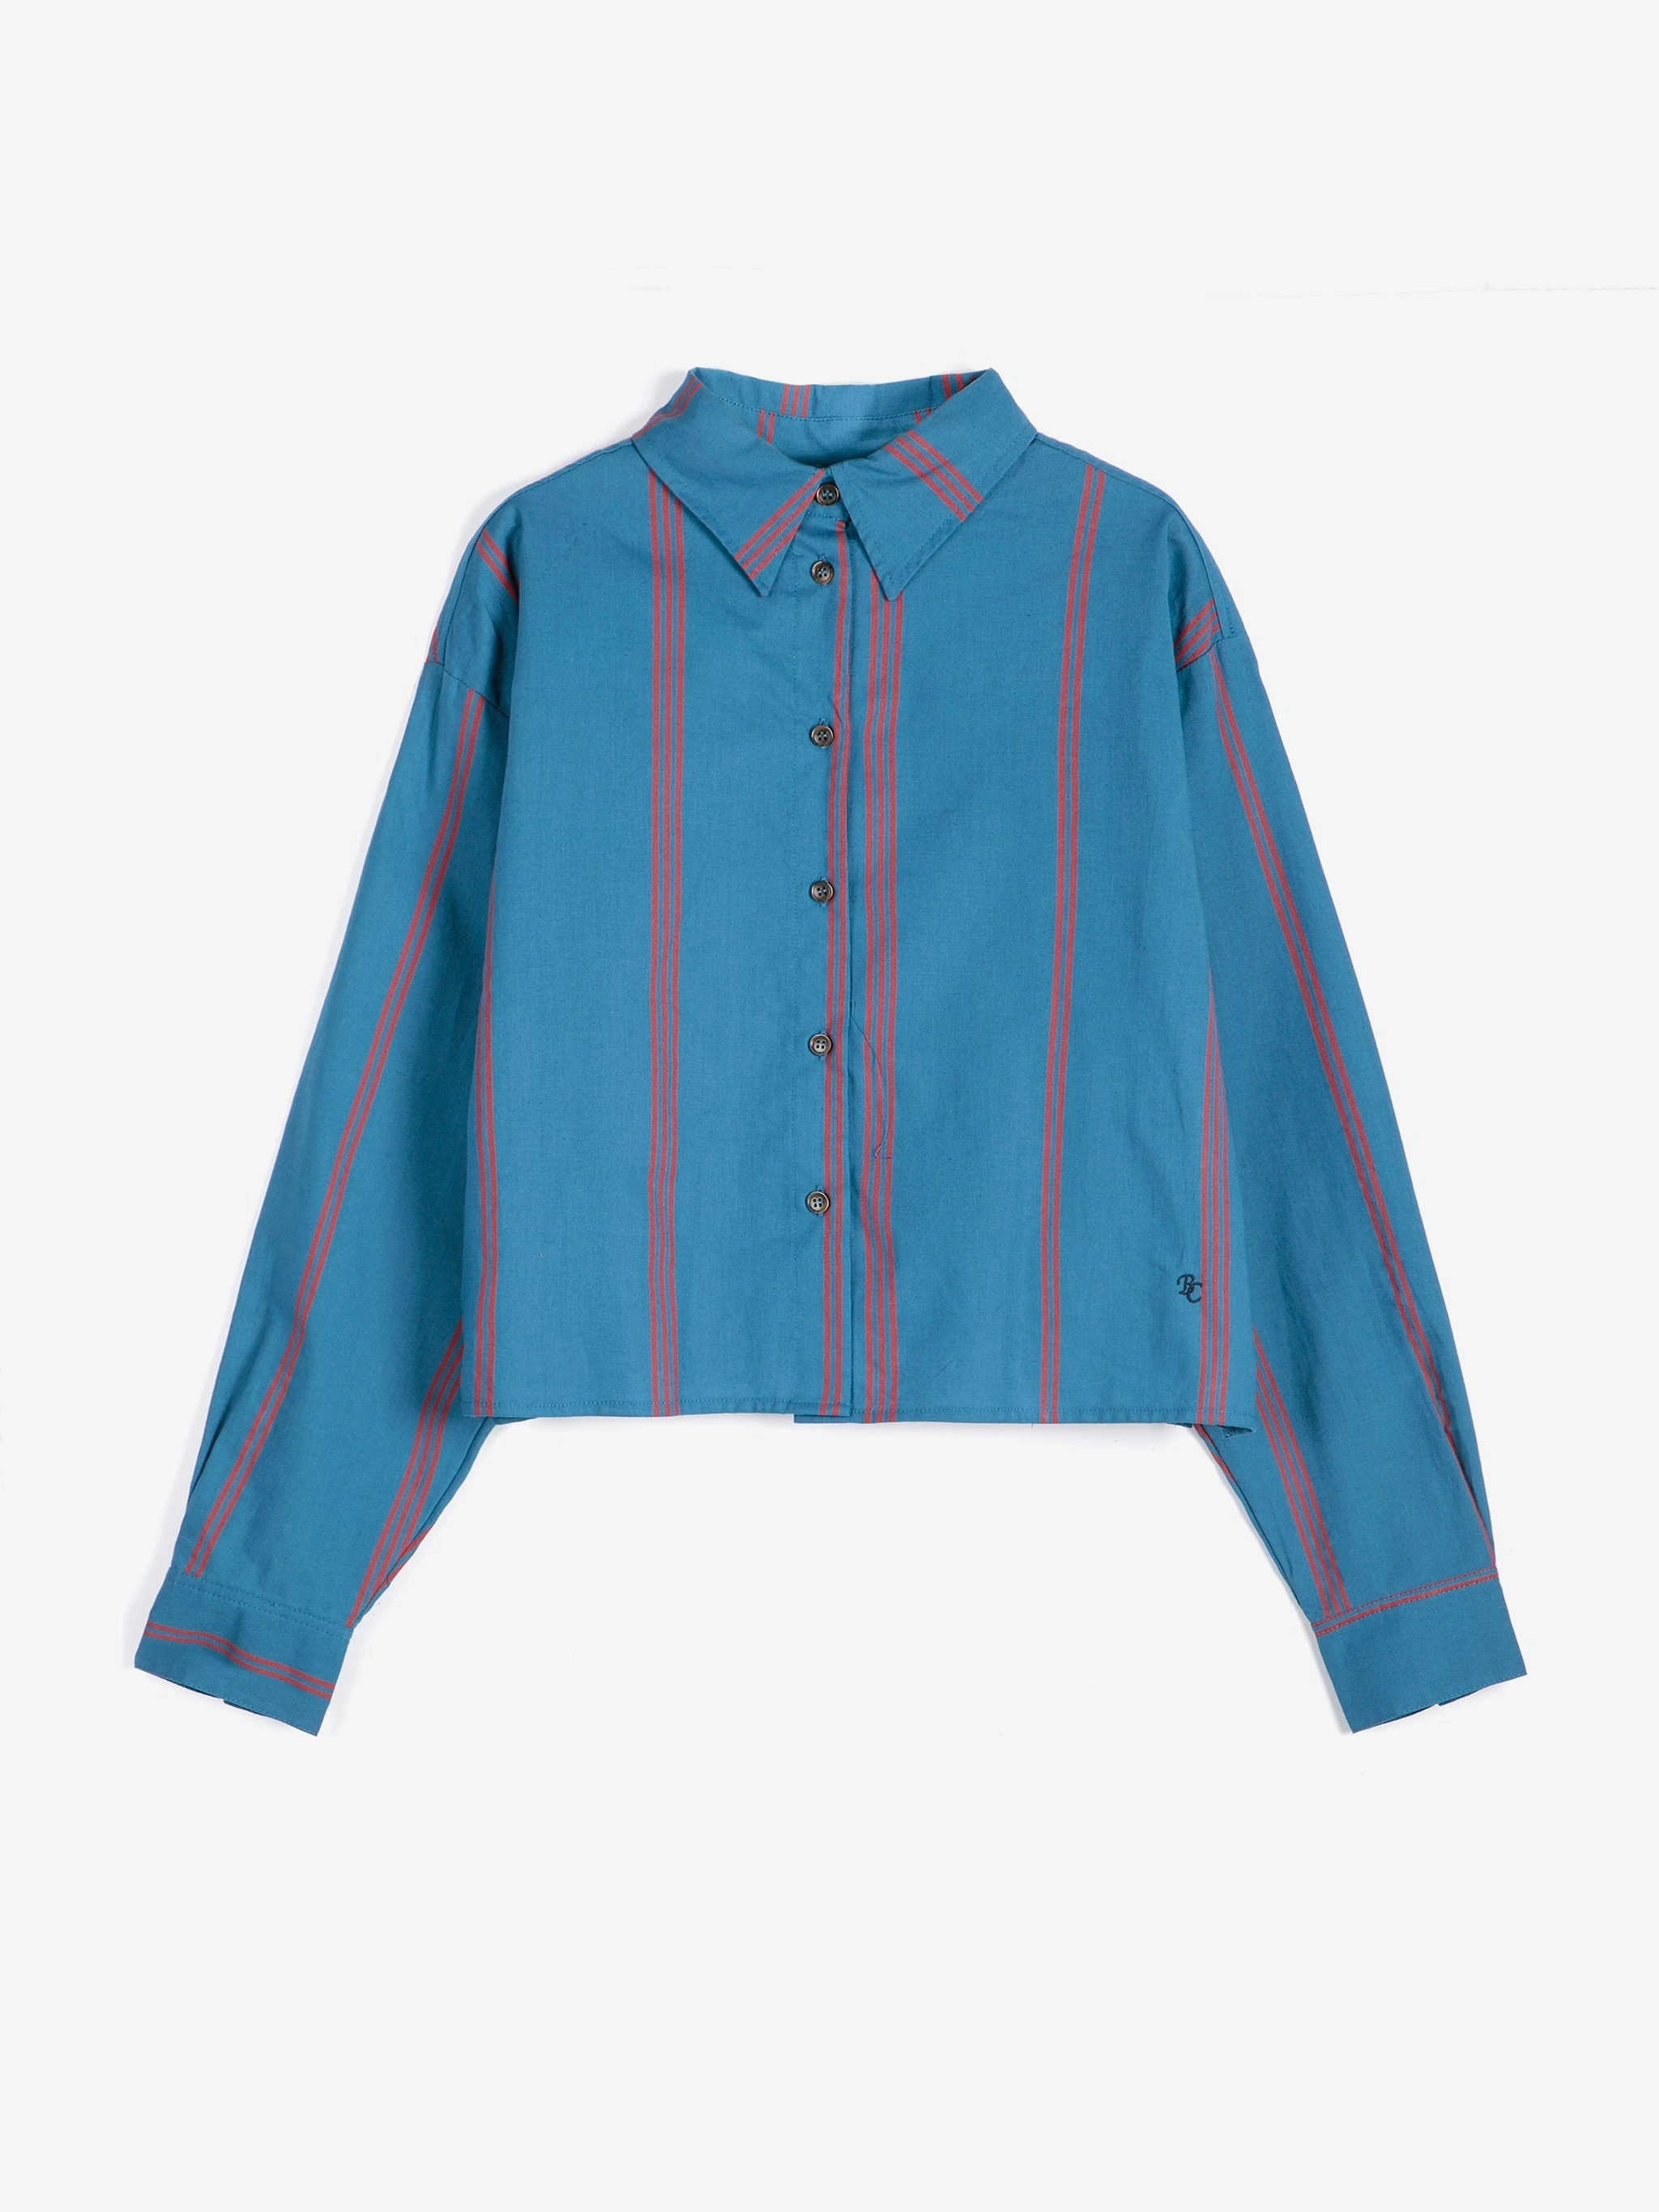
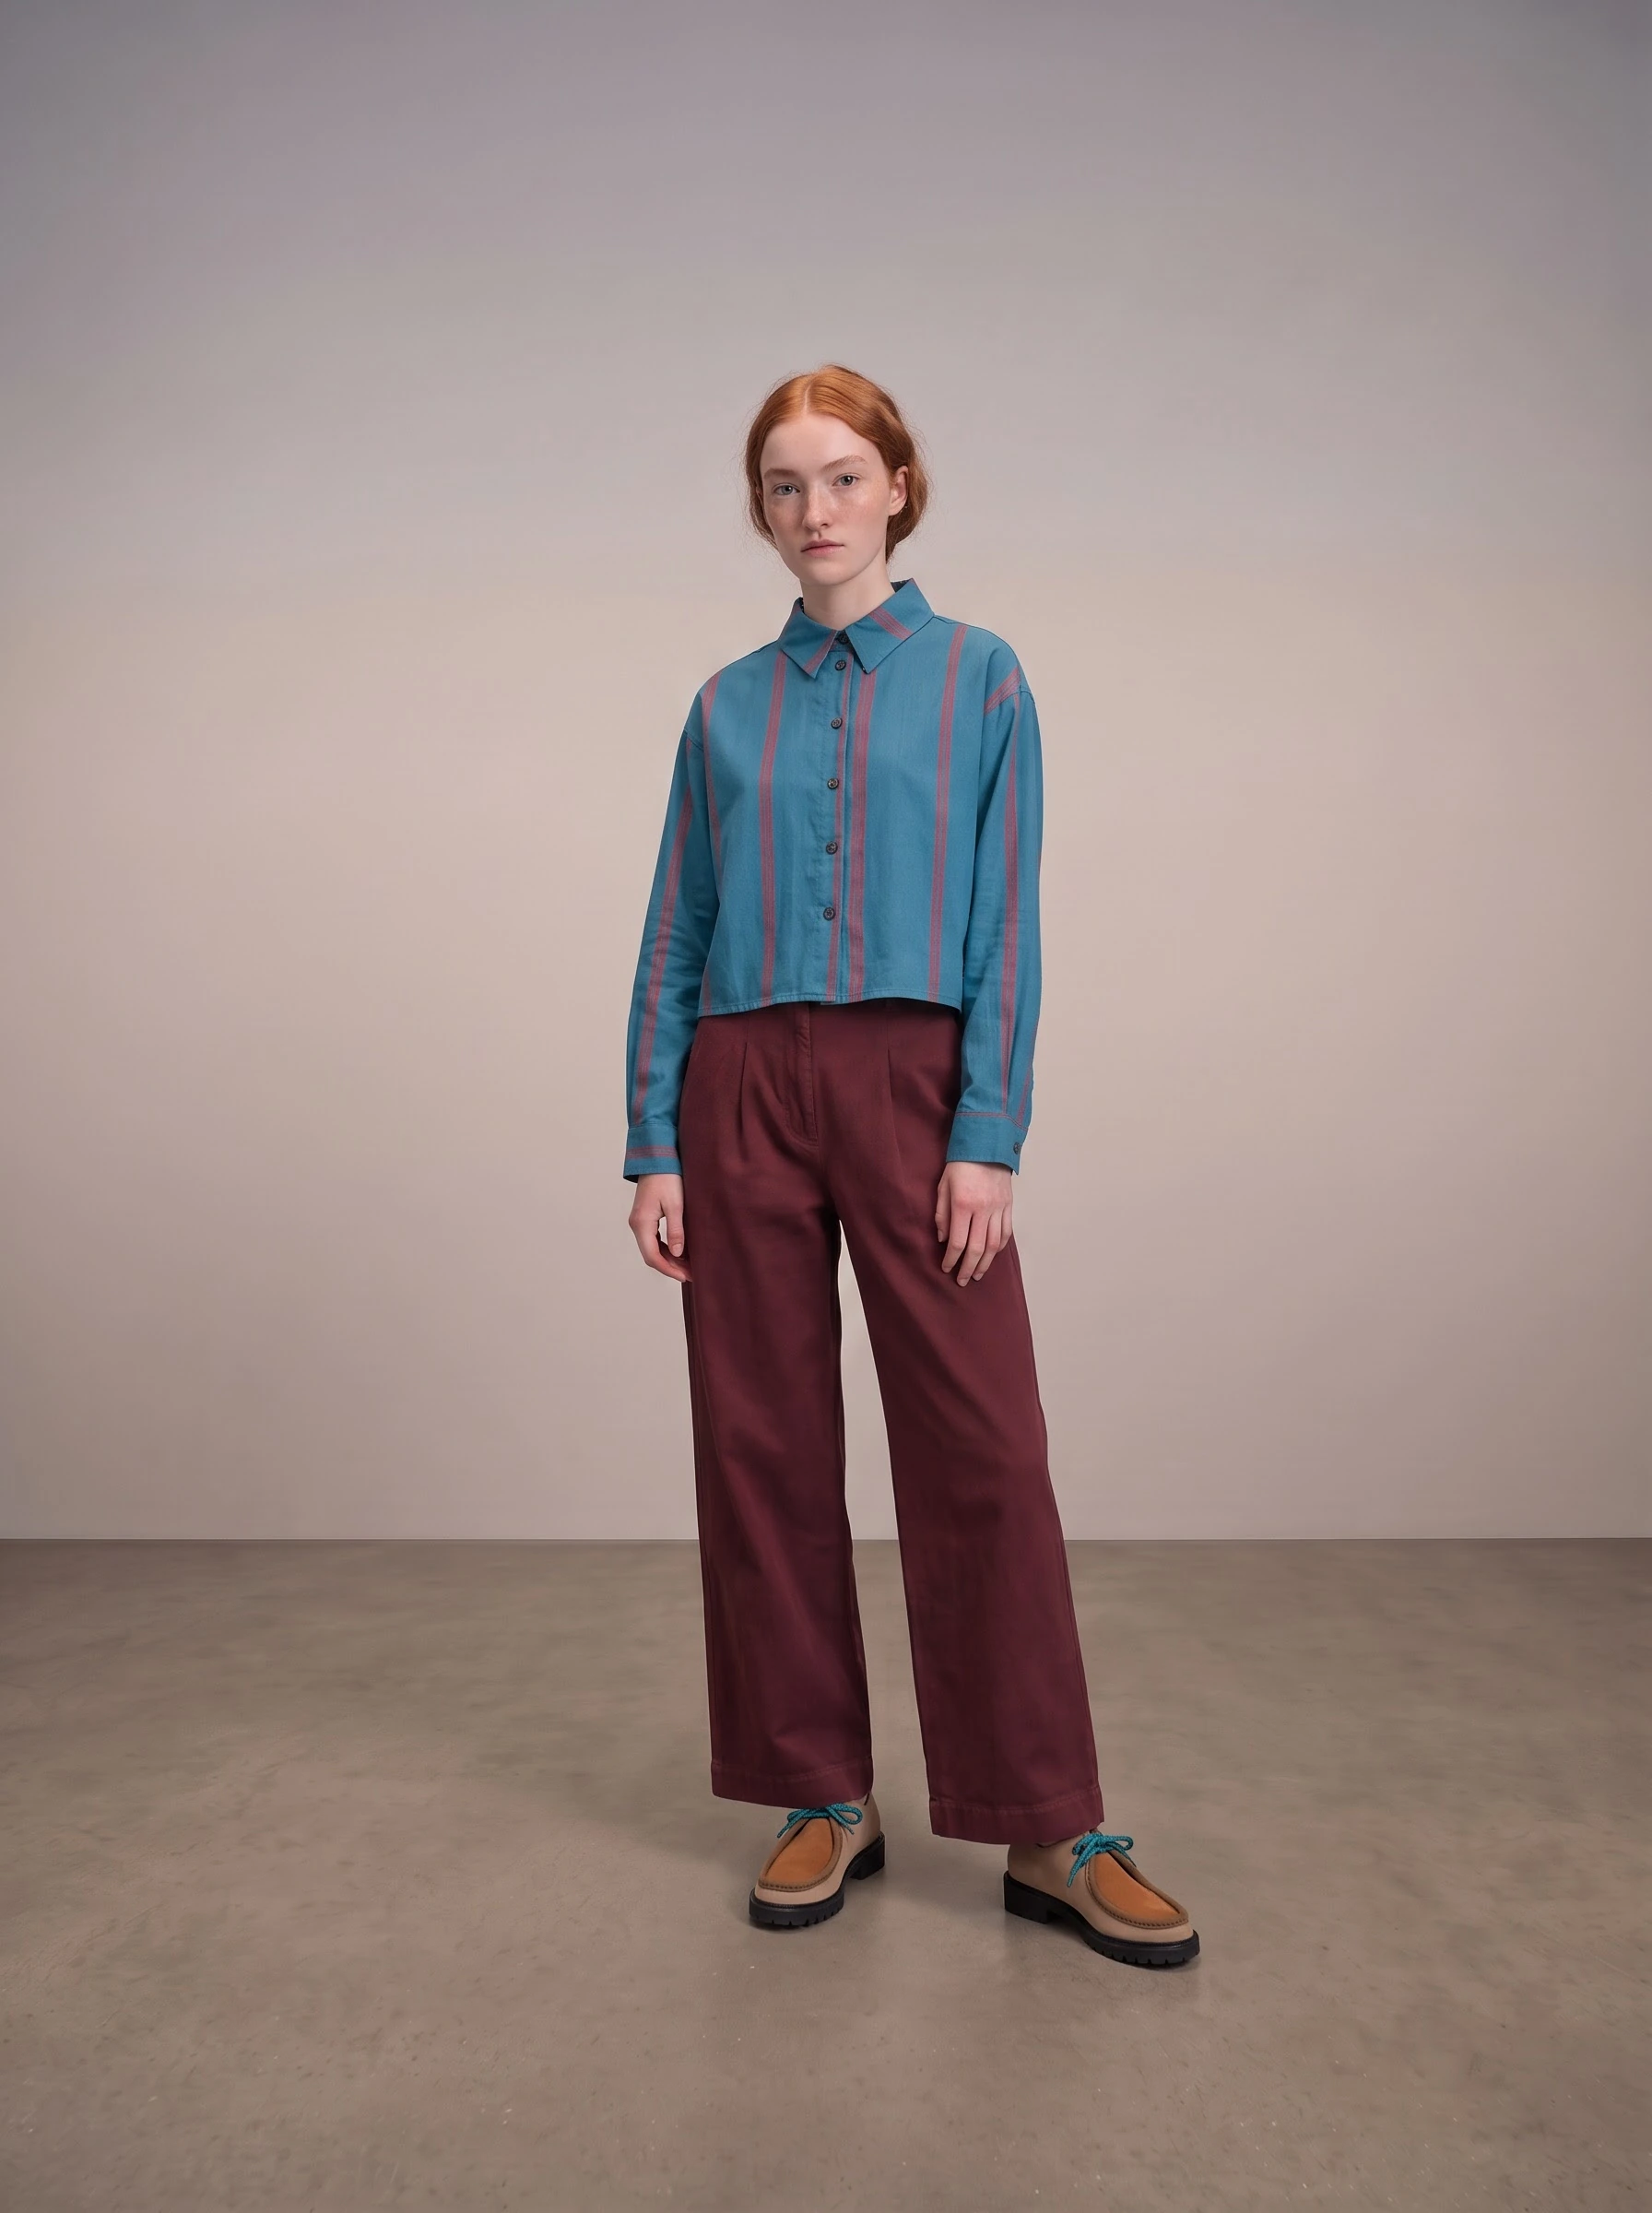
See the controls in Create a template and Run it on a new product.
Prepare different outfits in separate rows
A collection also needs styling decisions: which trousers go with a shirt, which shoes complete the outfit, and which model wears it.
Use Add row in the template to prepare another look. Select that row’s products and model, then check the outfit before adding the next one. The course pairs a cream shirt with burgundy trousers in one row and a blue striped shirt with cream trousers and blue flats in another.
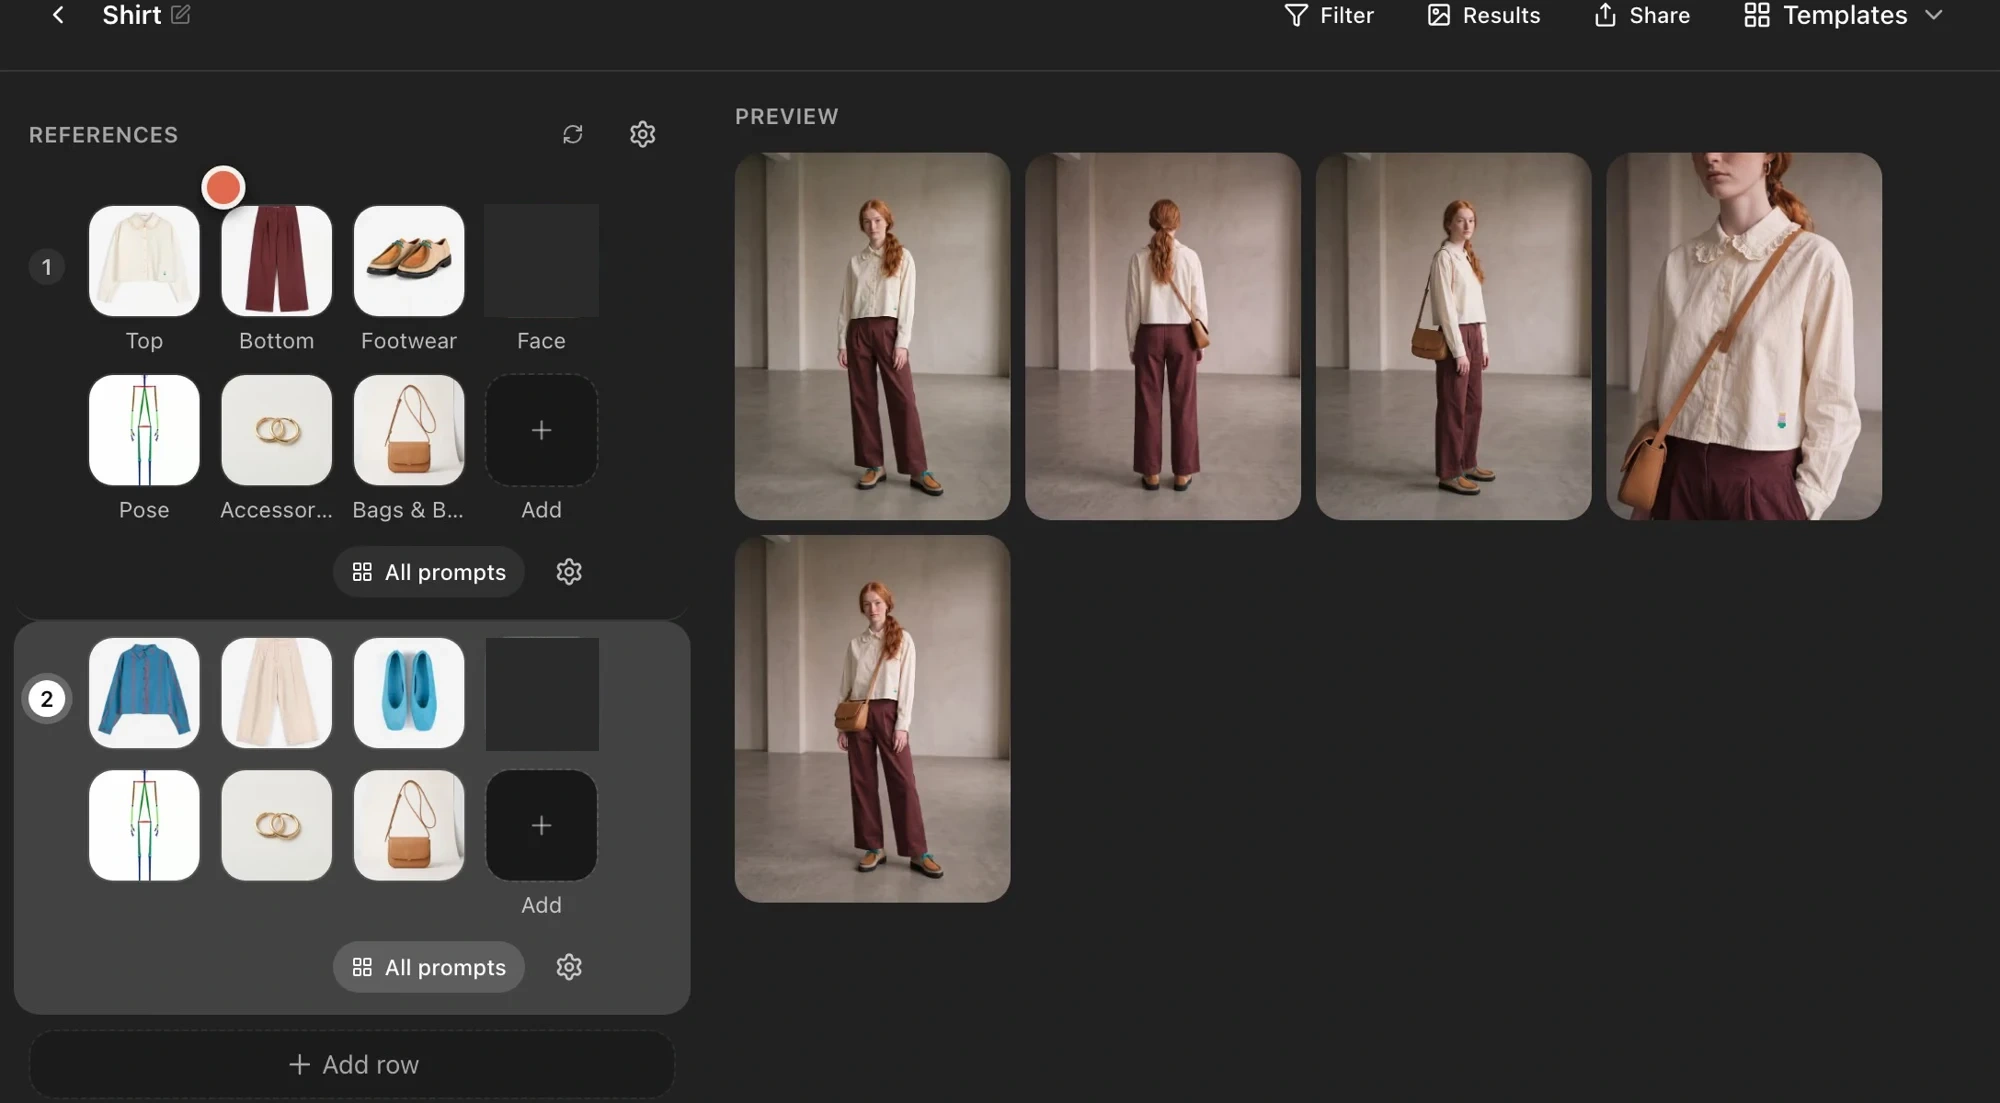
Once the rows are ready, generate them together. Compare each outfit’s results with its own product photographs, checking the clothes as well as the styling. The multiple-look workshop walks through both rows and their results.
For a mixed collection, keep templates suited to the garment. A dress may need full-length views, while a shirt needs a closer view of its collar. Category templates let you reuse those choices when the next collection arrives.
Frequently asked questions
Do I need to write new prompts for every SKU?
You can reuse a template’s saved shot instructions with another product’s references. Still choose the outfit for each row and check the result against that product’s photos. Change the instructions when the new garment needs different views or styling.
What product photos should I start with?
Use clear photographs that show the garment’s shape, color and important details. Add another view when it explains something the first photograph leaves out, such as a back print. The product-reference lesson shows how to choose useful inputs.
Open Astria to build your first look, or follow the course from the beginning.