Match Product Colors to a Reference in Astria Darkroom
Color match in Astria Darkroom brings a selected part of your photo closer to the color of a product reference. Use it when the pose, composition and garment detail work, but a shirt reads too blue, a pair of trousers looks too light, or a product color has drifted from the approved photograph.
Select the area you want to correct, select the corresponding area in a reference, then adjust Amount and Tone. The correction follows the selected region and retains the photograph’s shading, so folds and shadows can still describe the material.
Pale gray-blue trousers back to indigo
The America Basics product photo shows deep blue denim. In the original render, the trousers look almost silver beside the brown sweatshirt. Compare the fabric across the thighs in all three panels.
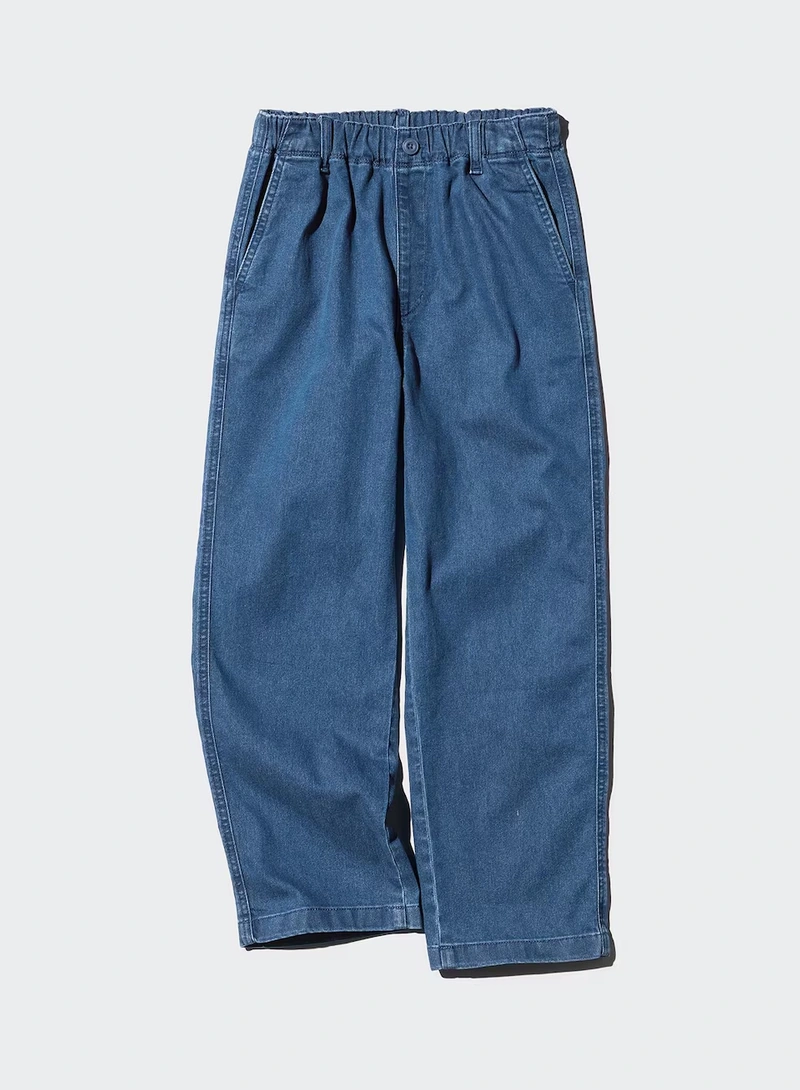
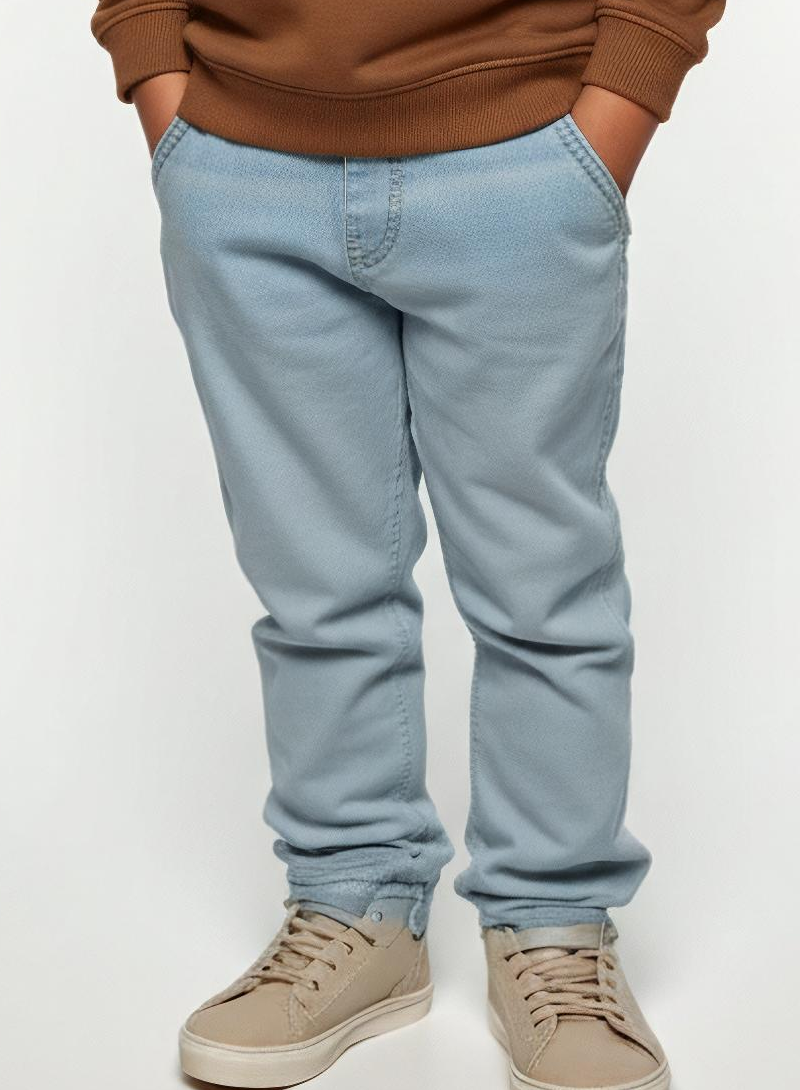
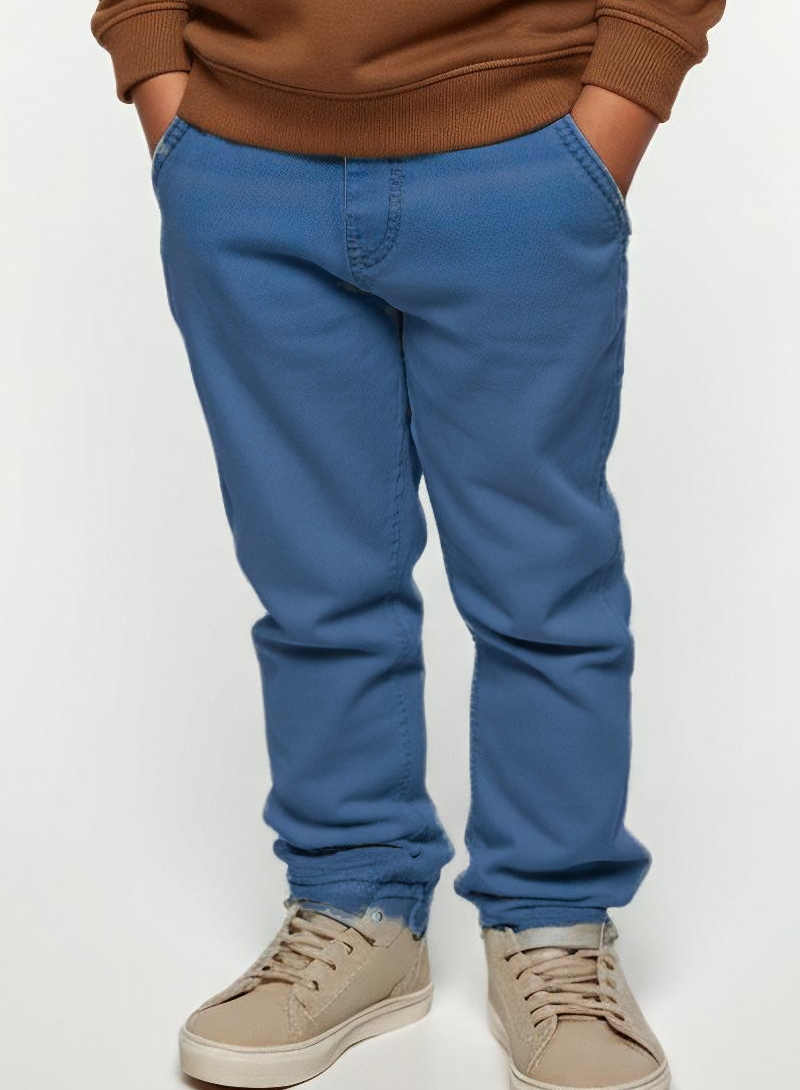
In Darkroom, select the trousers in Photo and the denim in Reference. Here Amount 100 brings back the blue and Tone 100 brings the washed-out fabric closer to the darker reference. The render also has a narrower leg than the product photo, a separate fit issue you can still see after the color correction. View the original America Basics render.
Watch the Color match walkthrough
Watch the denim example above in Darkroom. Click the pale trousers in the boy’s photo, then the indigo fabric in the product reference. Follow the change at his knees as you adjust Amount and Tone, then hold Before to compare the result before downloading it.
See Color match on existing workspace photos
These examples use existing photos and product references from Great Sports, Maison Urban and America Basics. Each pair uses the same photo and Darkroom export framing. Before has no correction; After uses the settings listed beneath it, with no other grading adjustments. No new images were generated.
A blue sweatshirt matched to violet-blue
The Great Sports portrait has a brighter, bluer sweatshirt than its product reference. Color match moves the fabric toward the reference’s deeper violet-blue. The broad chest and sleeve panels make the hue change easy to compare; the black and white bands help you inspect the garment detail.
Great Sports sweatshirt before and after Color match
Move the Scan line across the blue chest and sleeve to see the hue shift.
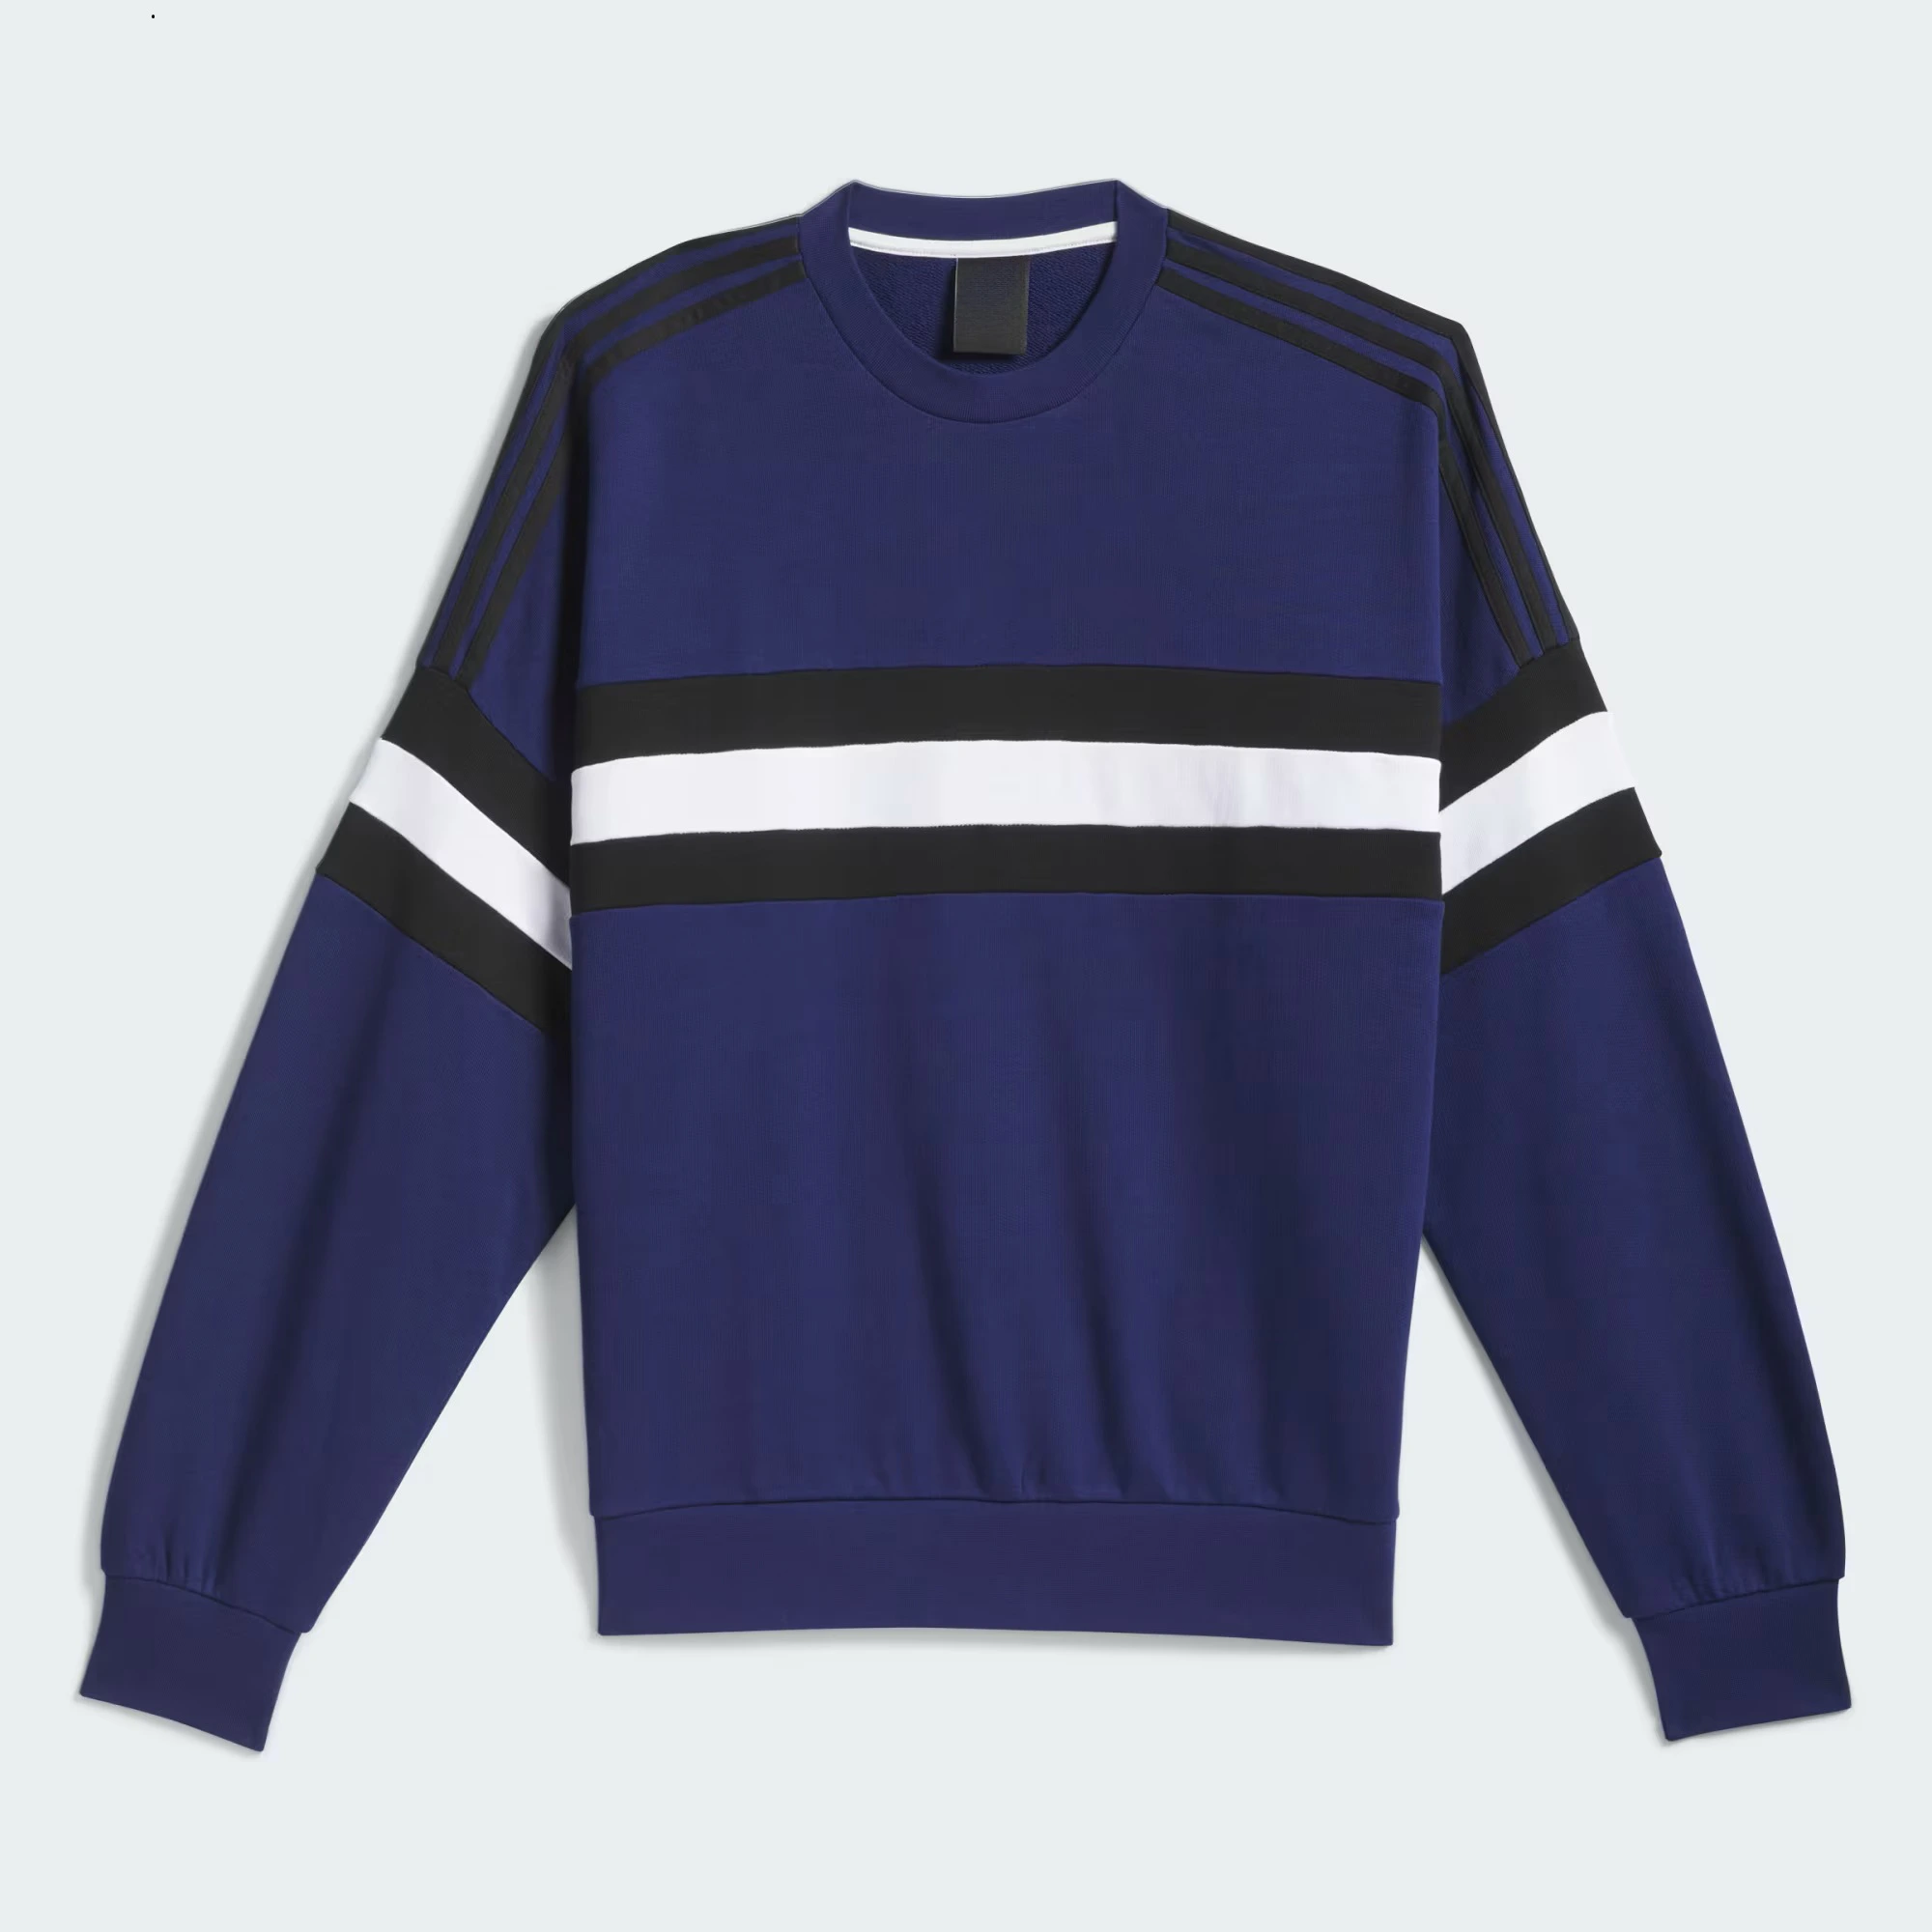
The original sweatshirt packshot supplies the target color.
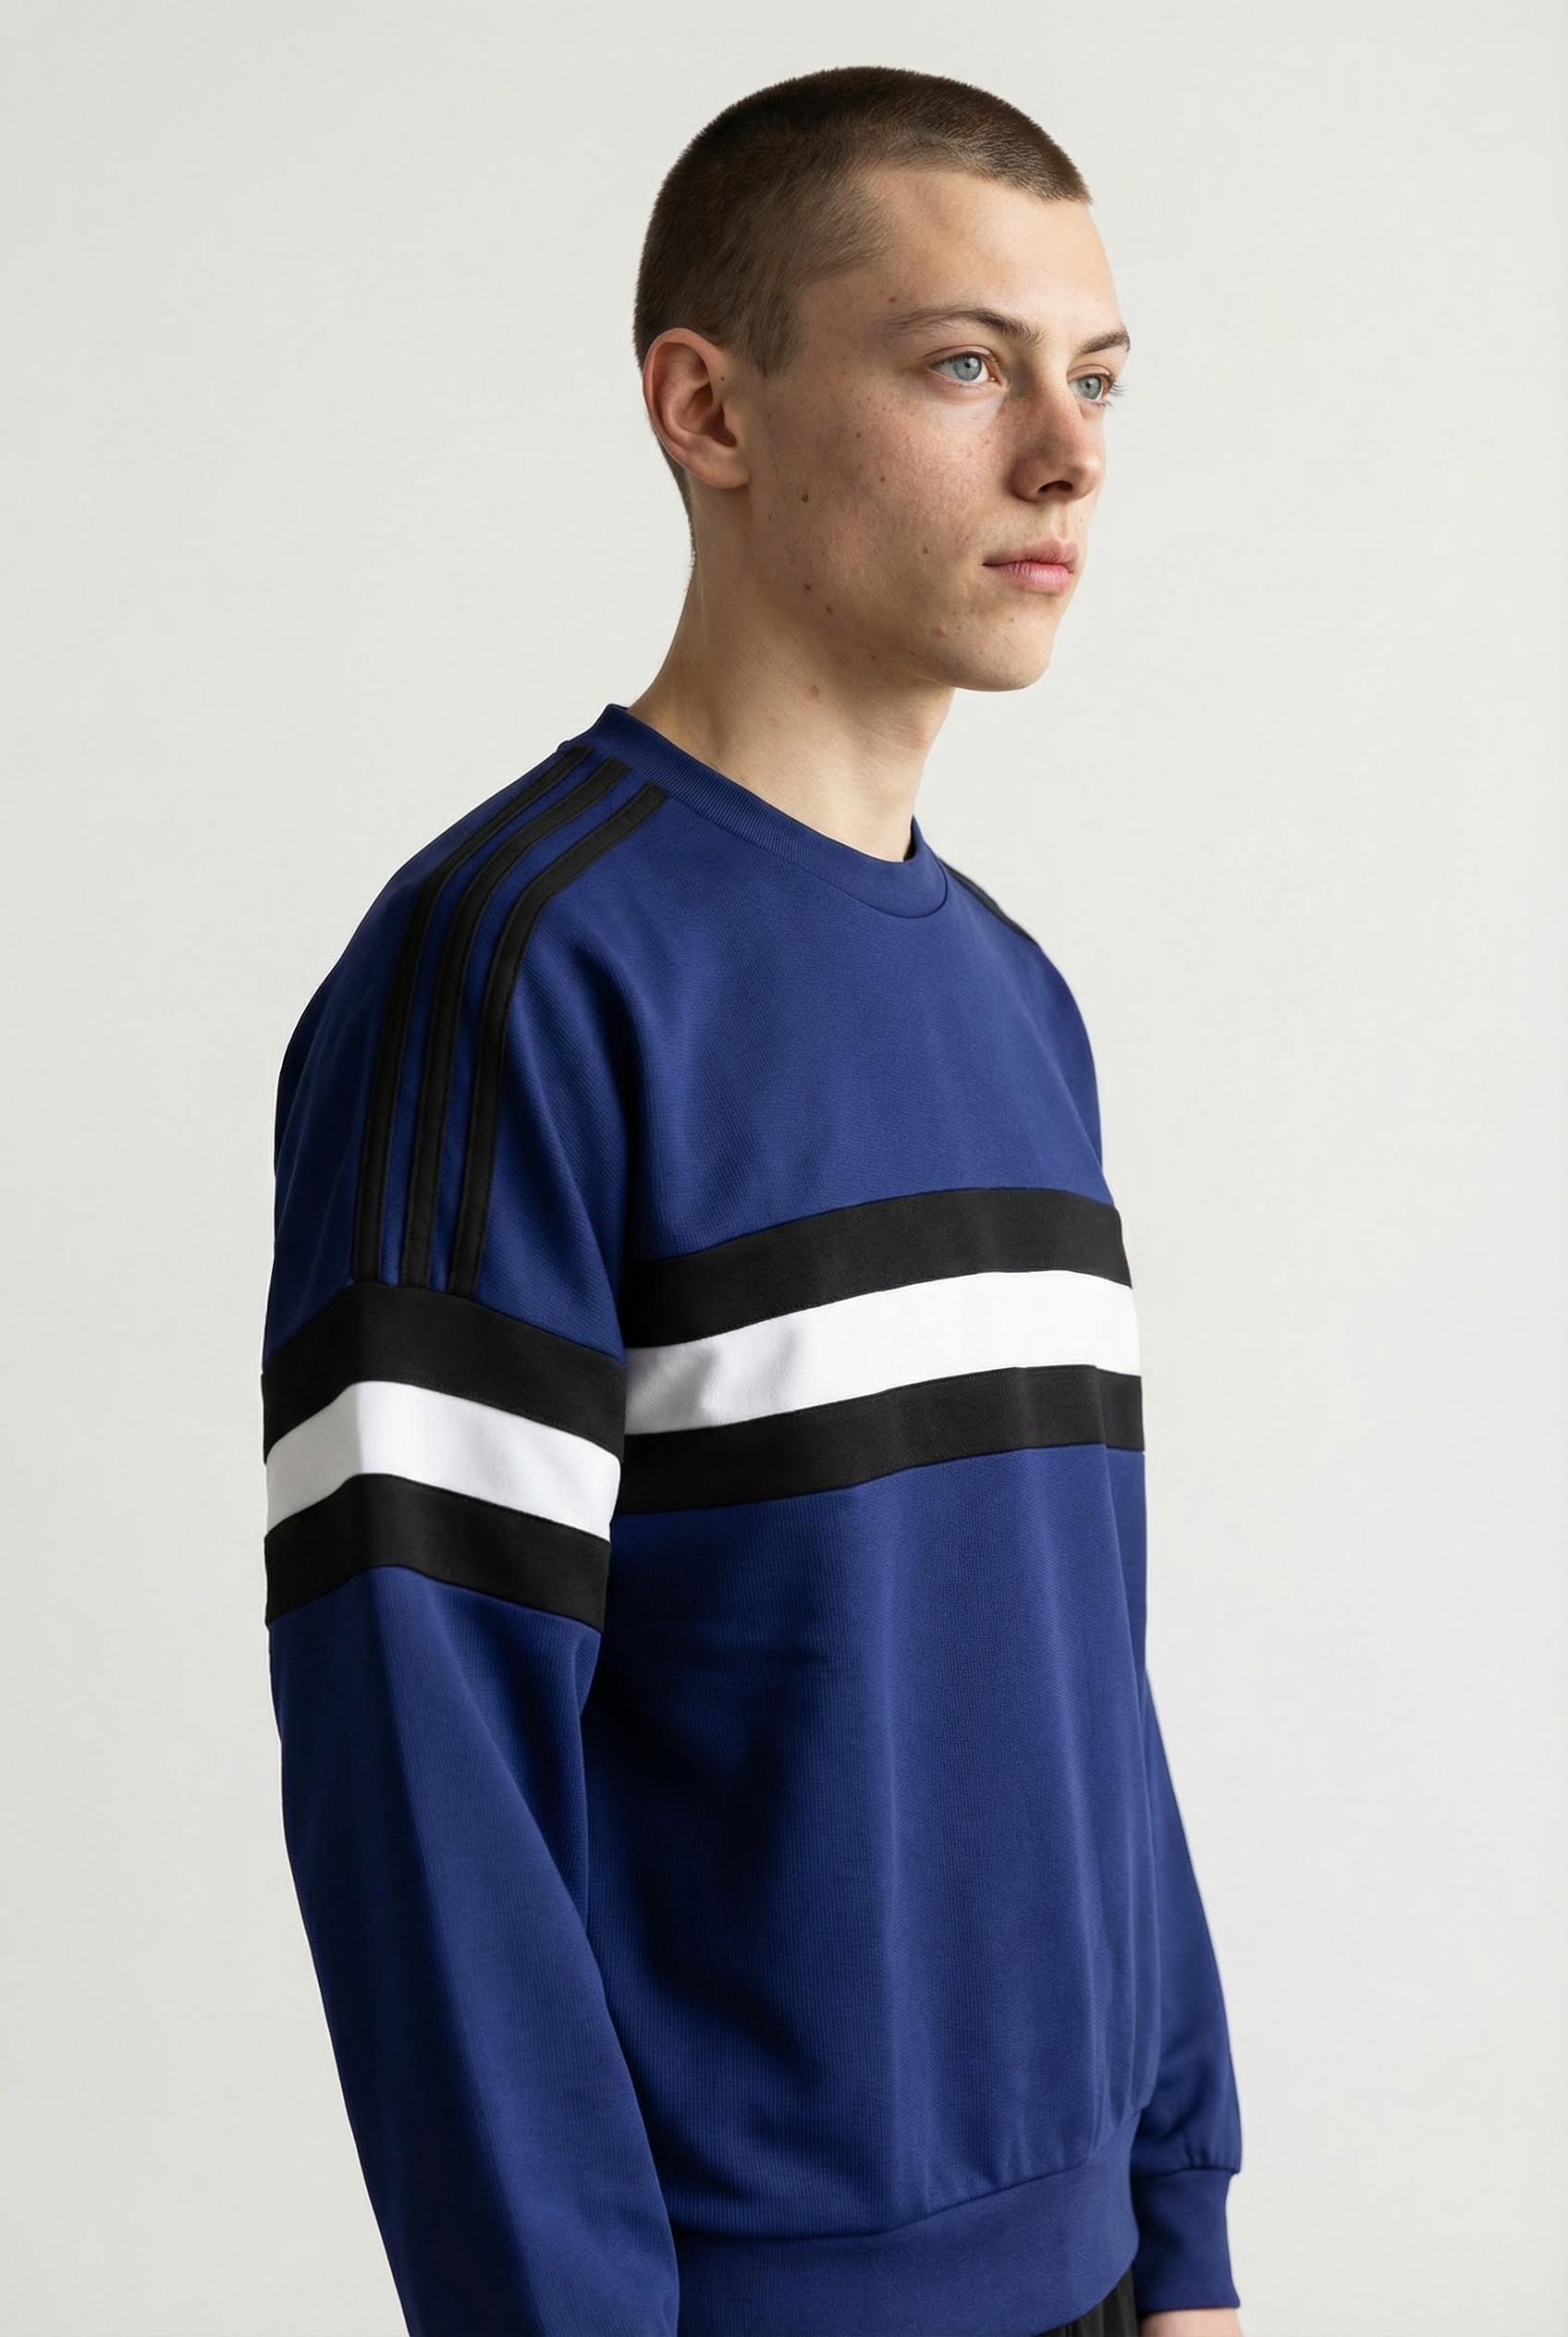
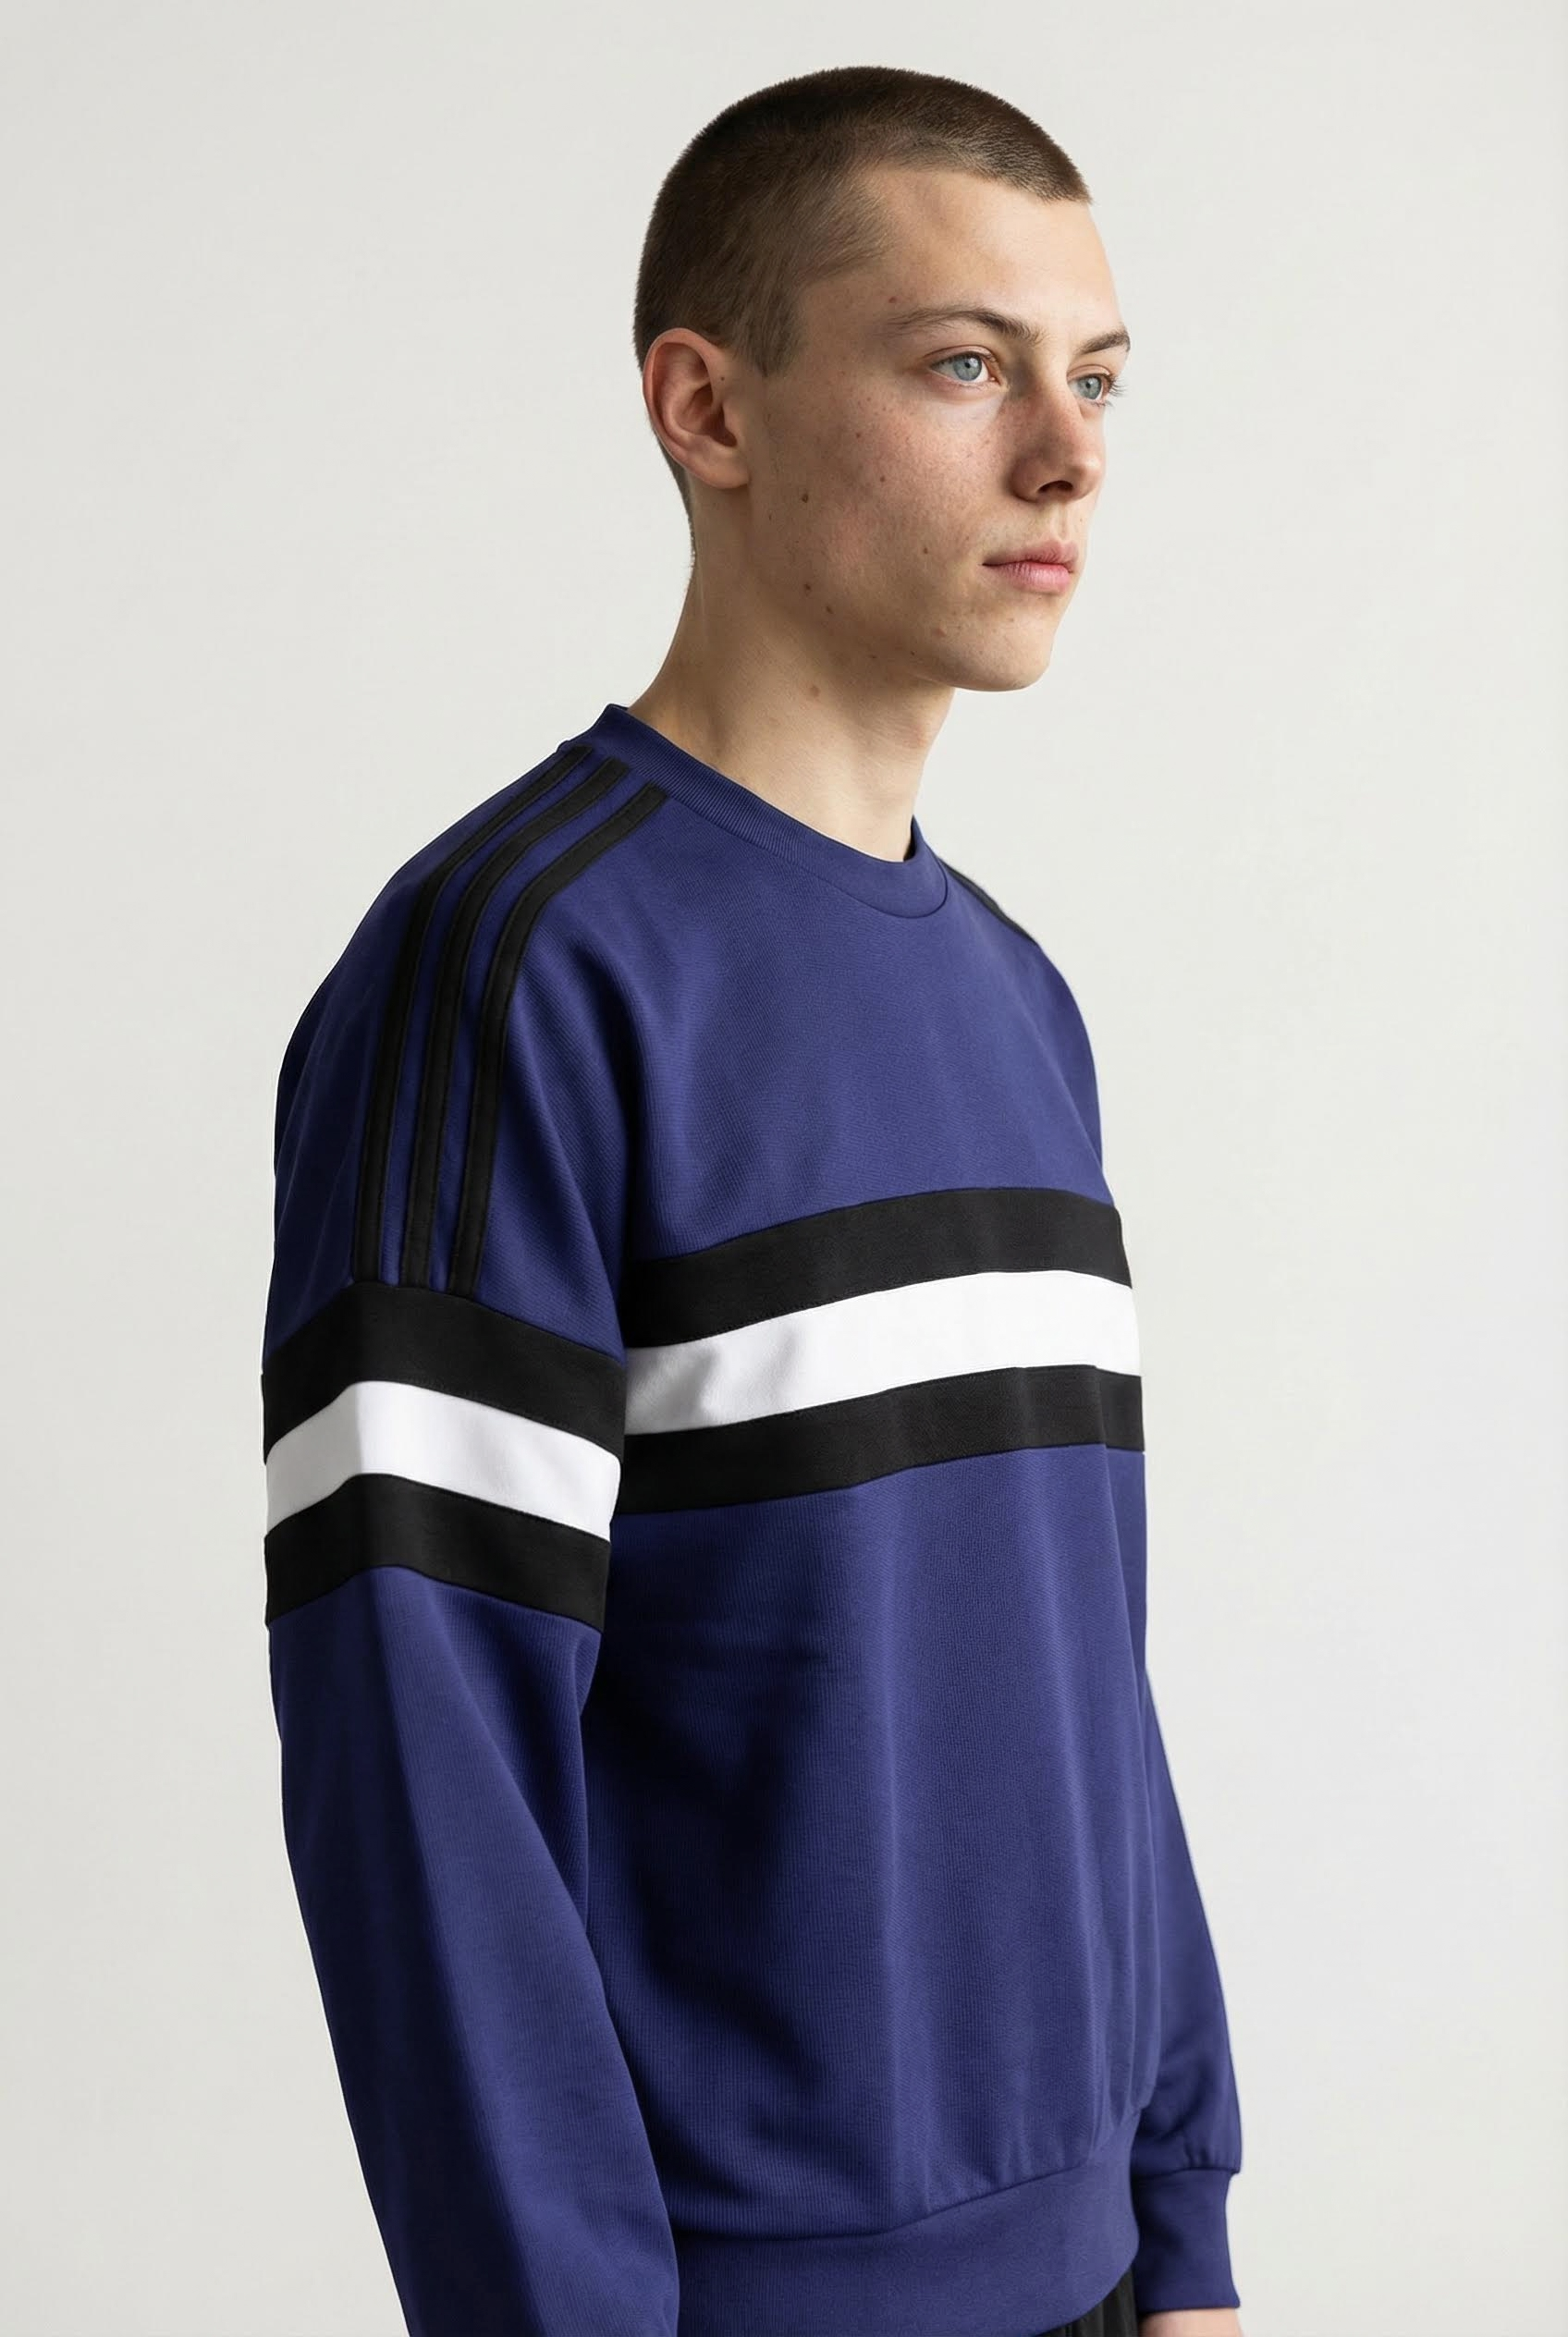
View the original Great Sports sweatshirt photo.
A brown patterned knit in outdoor light
The Maison Urban street portrait gives the knit a dark, slightly olive cast. Matching it to the warmer brown product photograph makes the change visible across the torso and sleeve. Here Amount 60 and Tone 40 temper the correction and retain more of the outdoor lightness. Check the pale pattern too: a selection covering a whole patterned garment can also warm its lighter yarns.
Maison Urban brown knit before and after Color match
Compare the brown torso and sleeve, then inspect the pale knitted pattern.
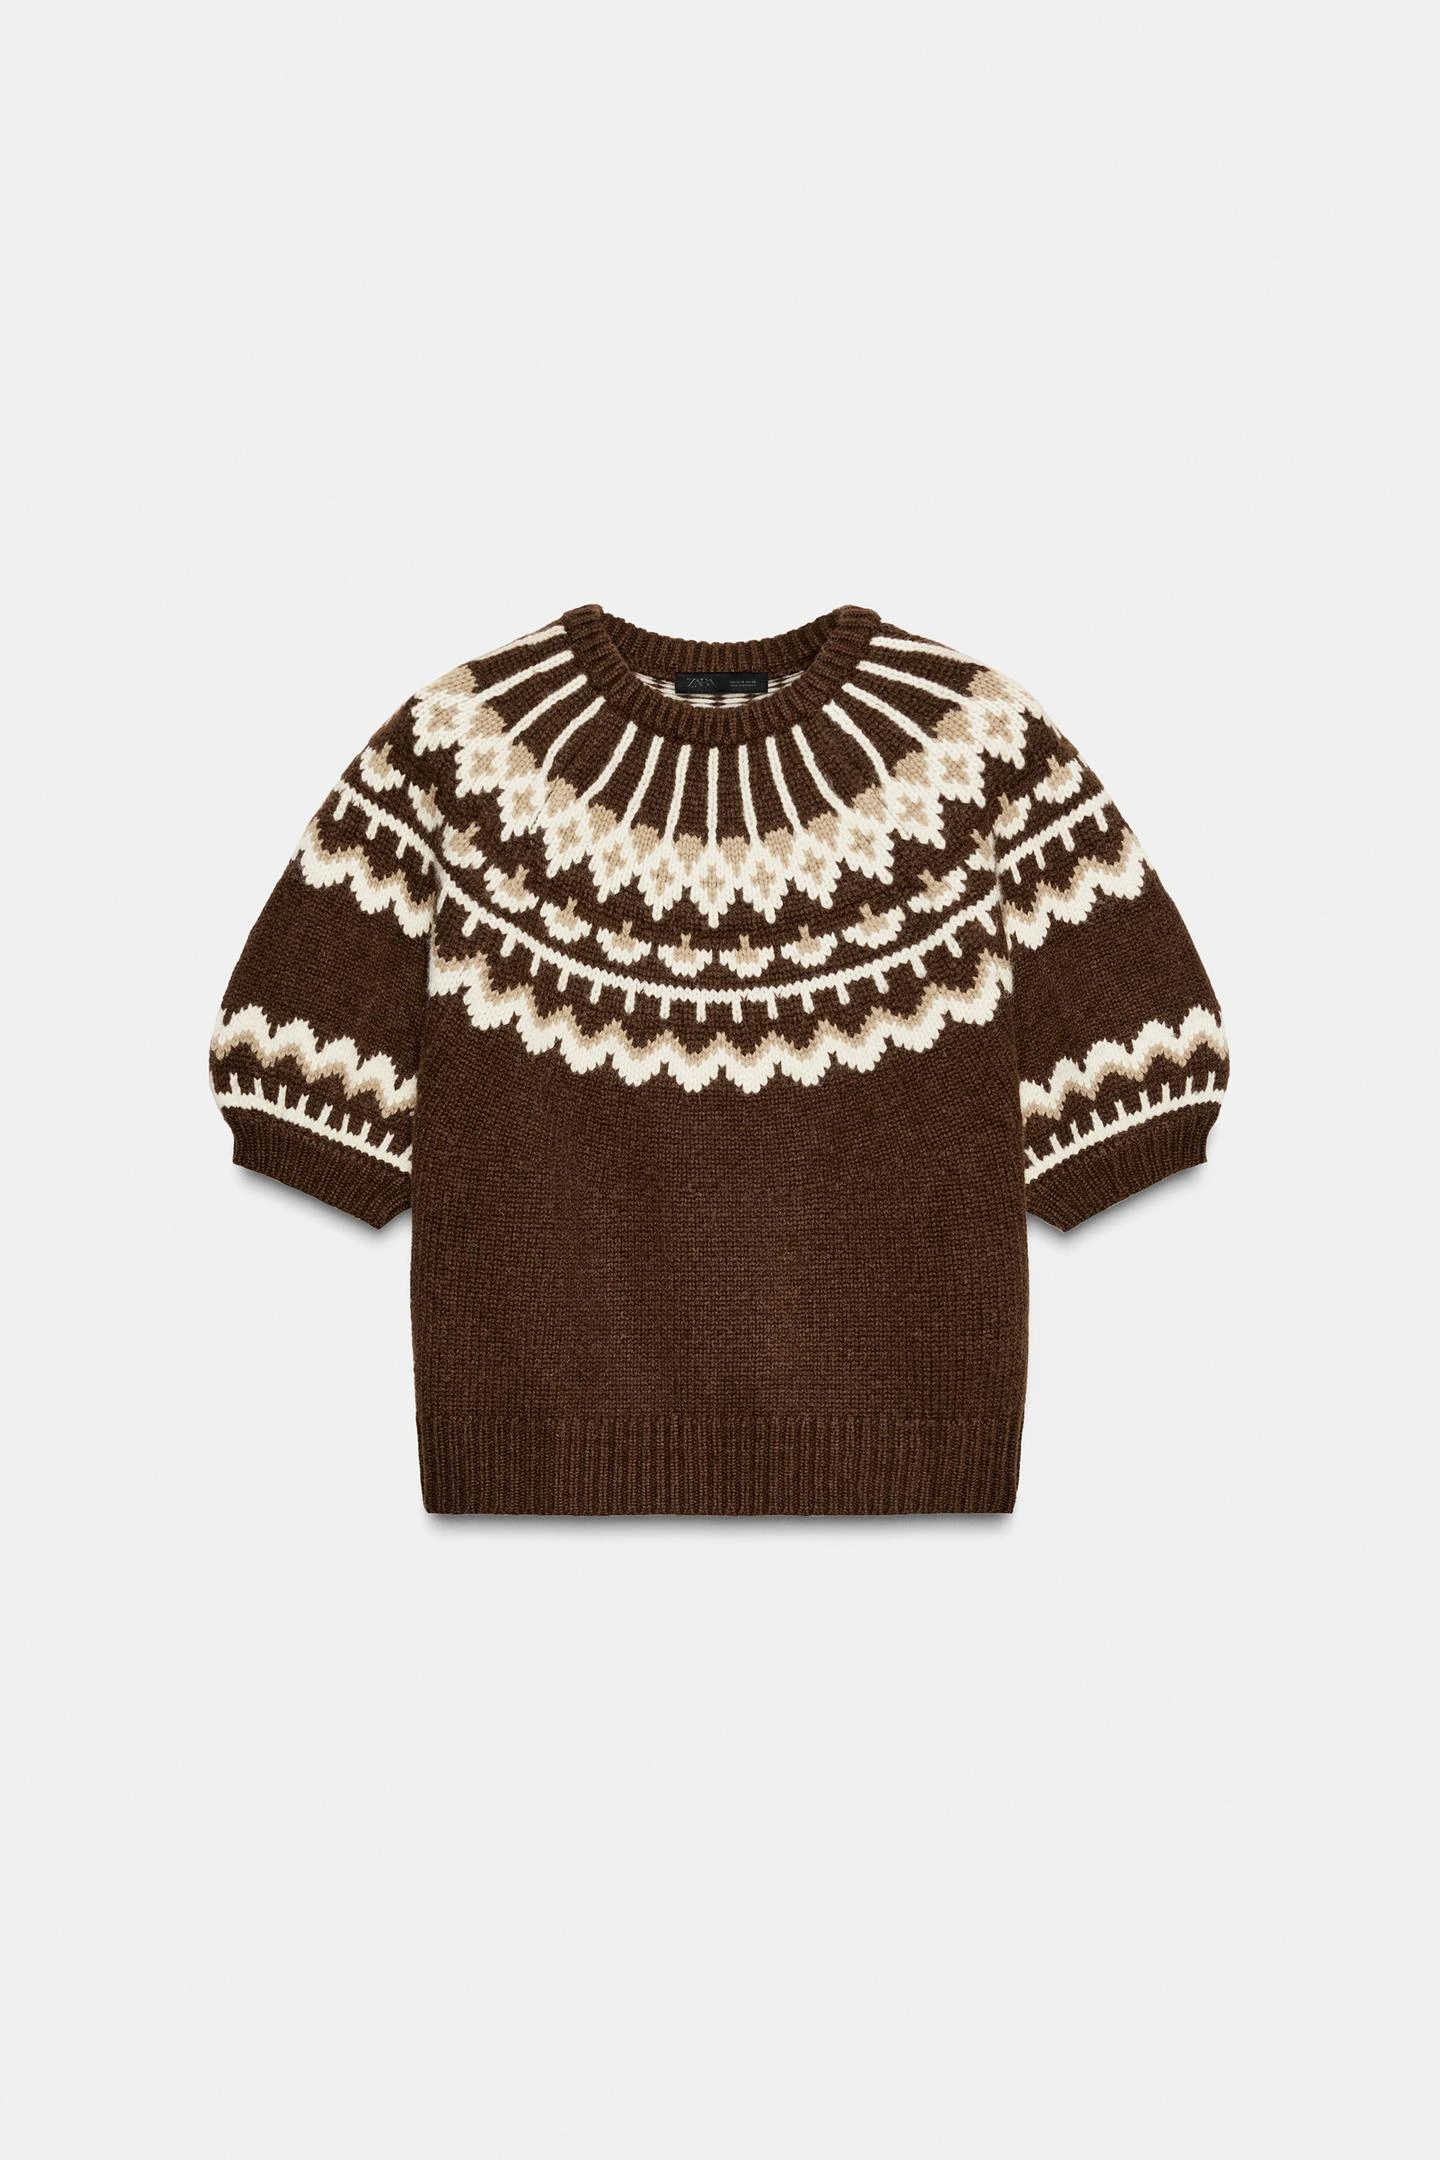
The product reference supplies the warmer brown target.
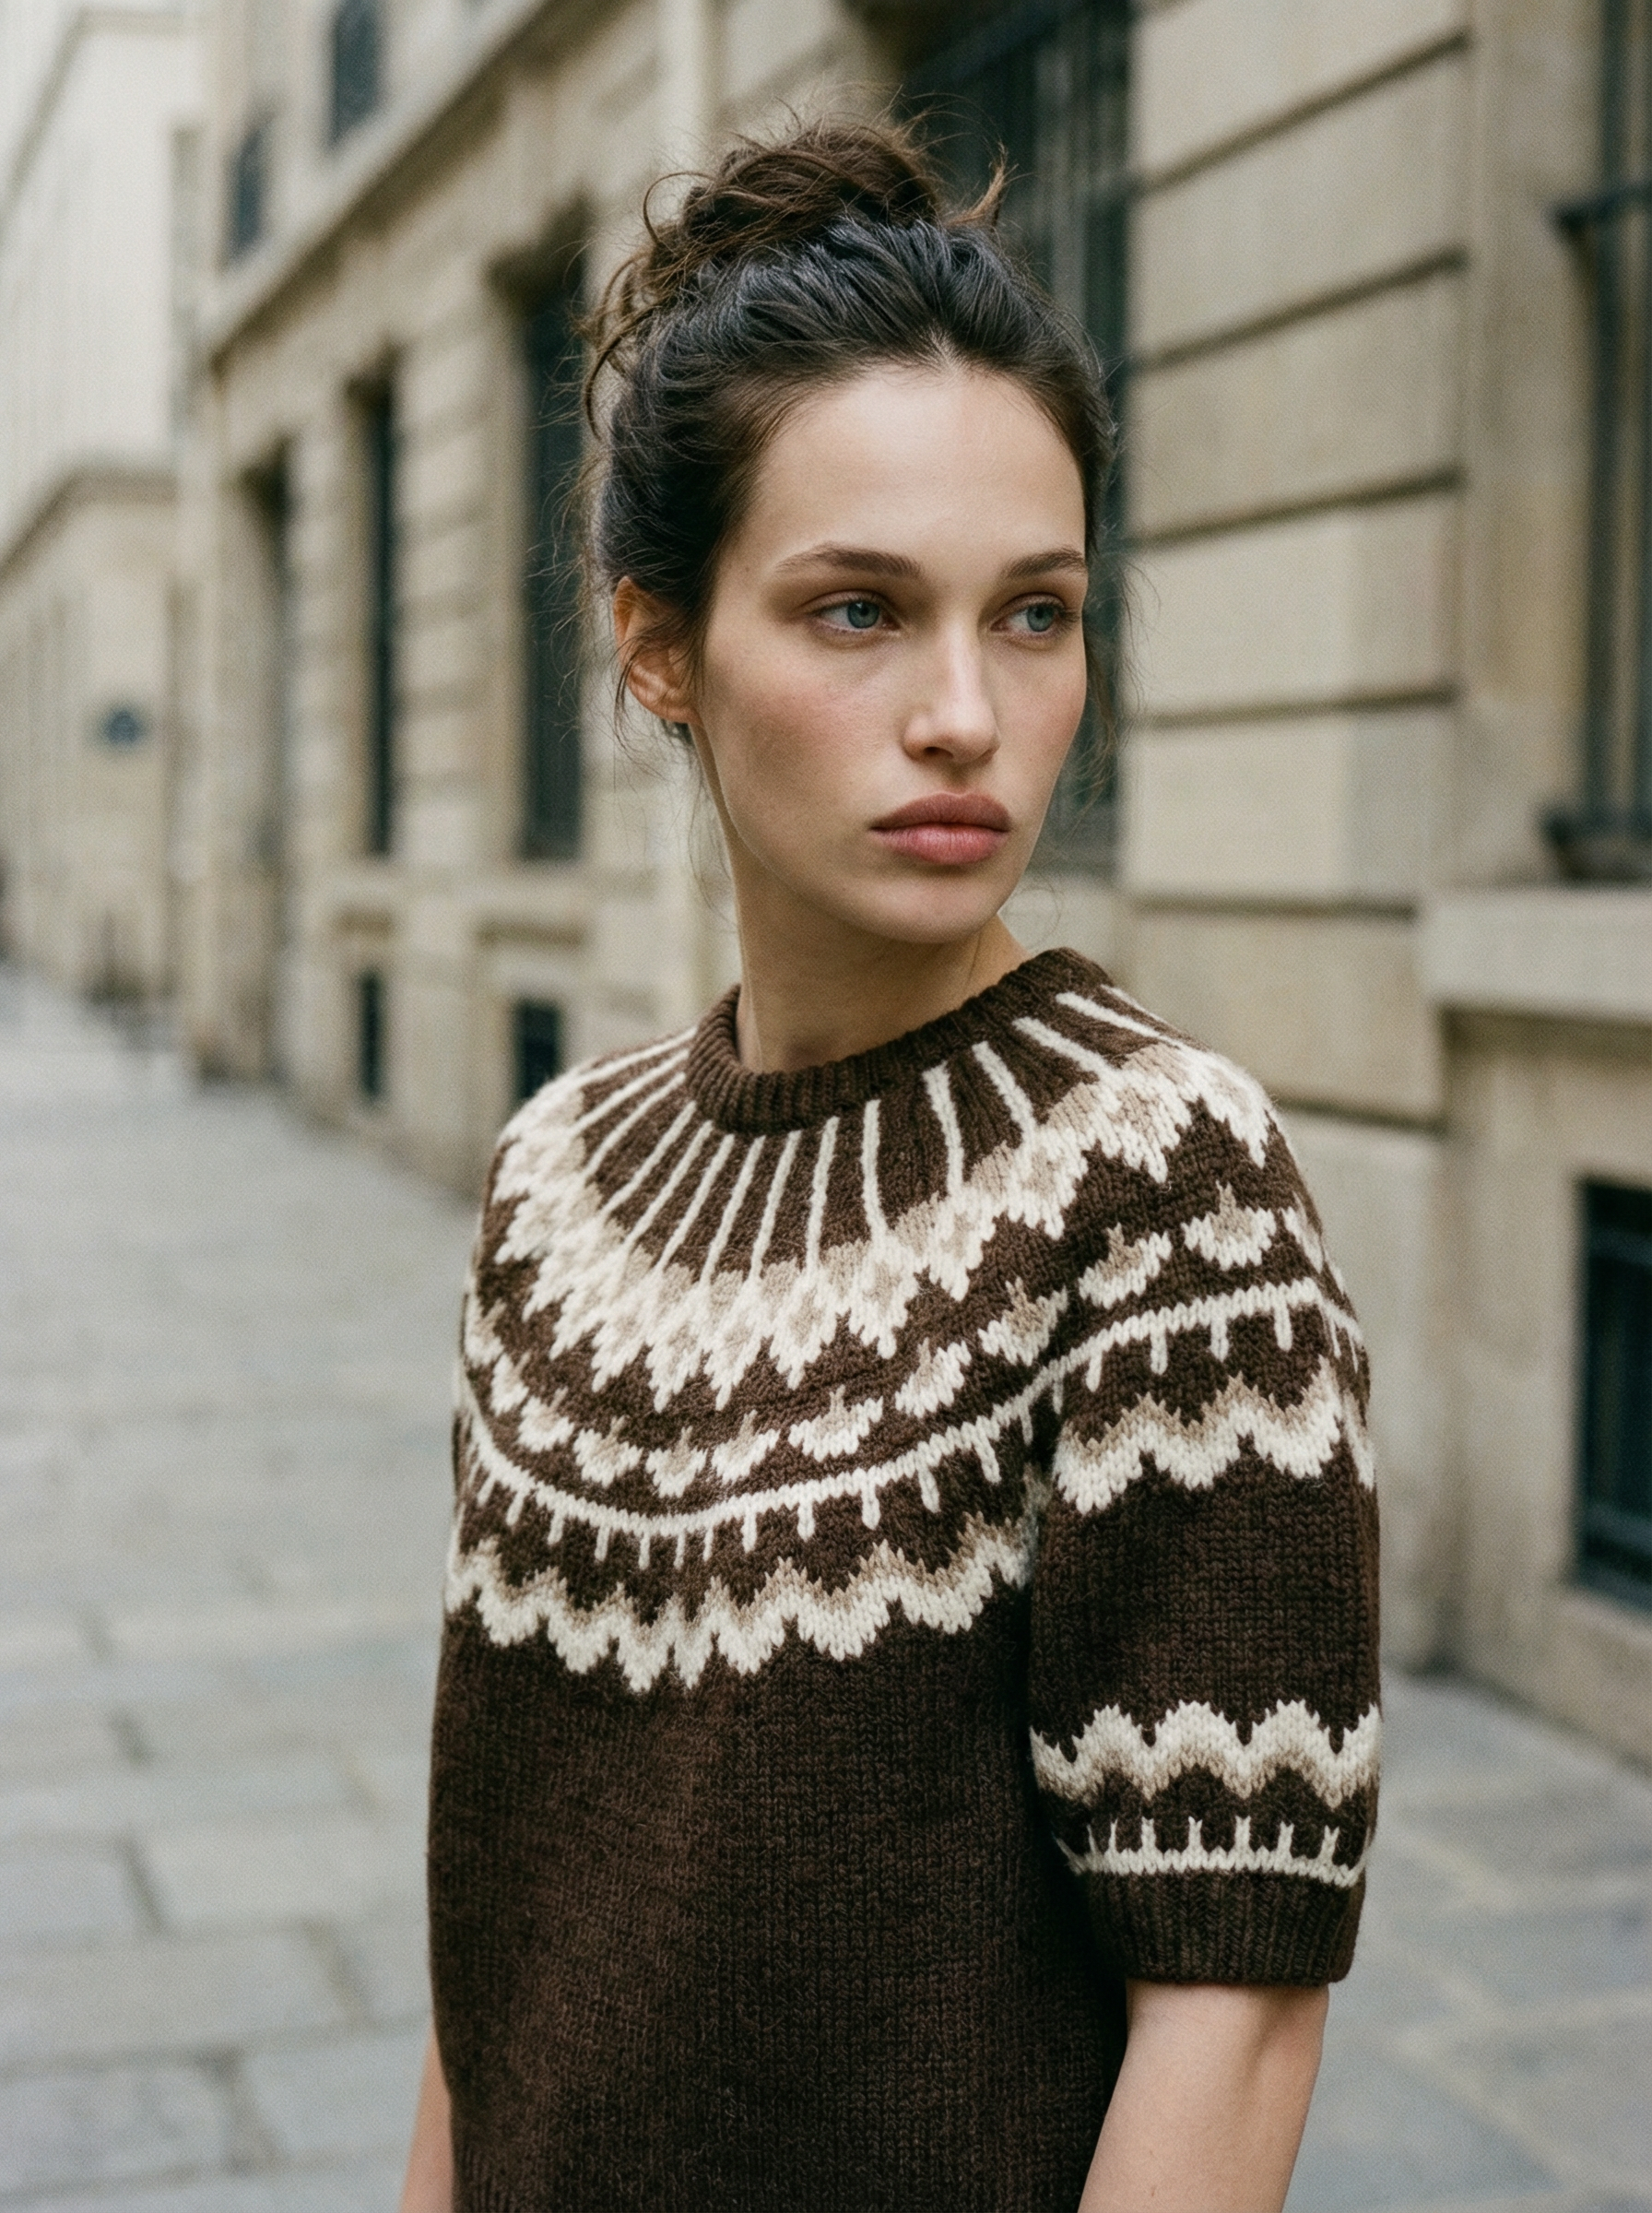
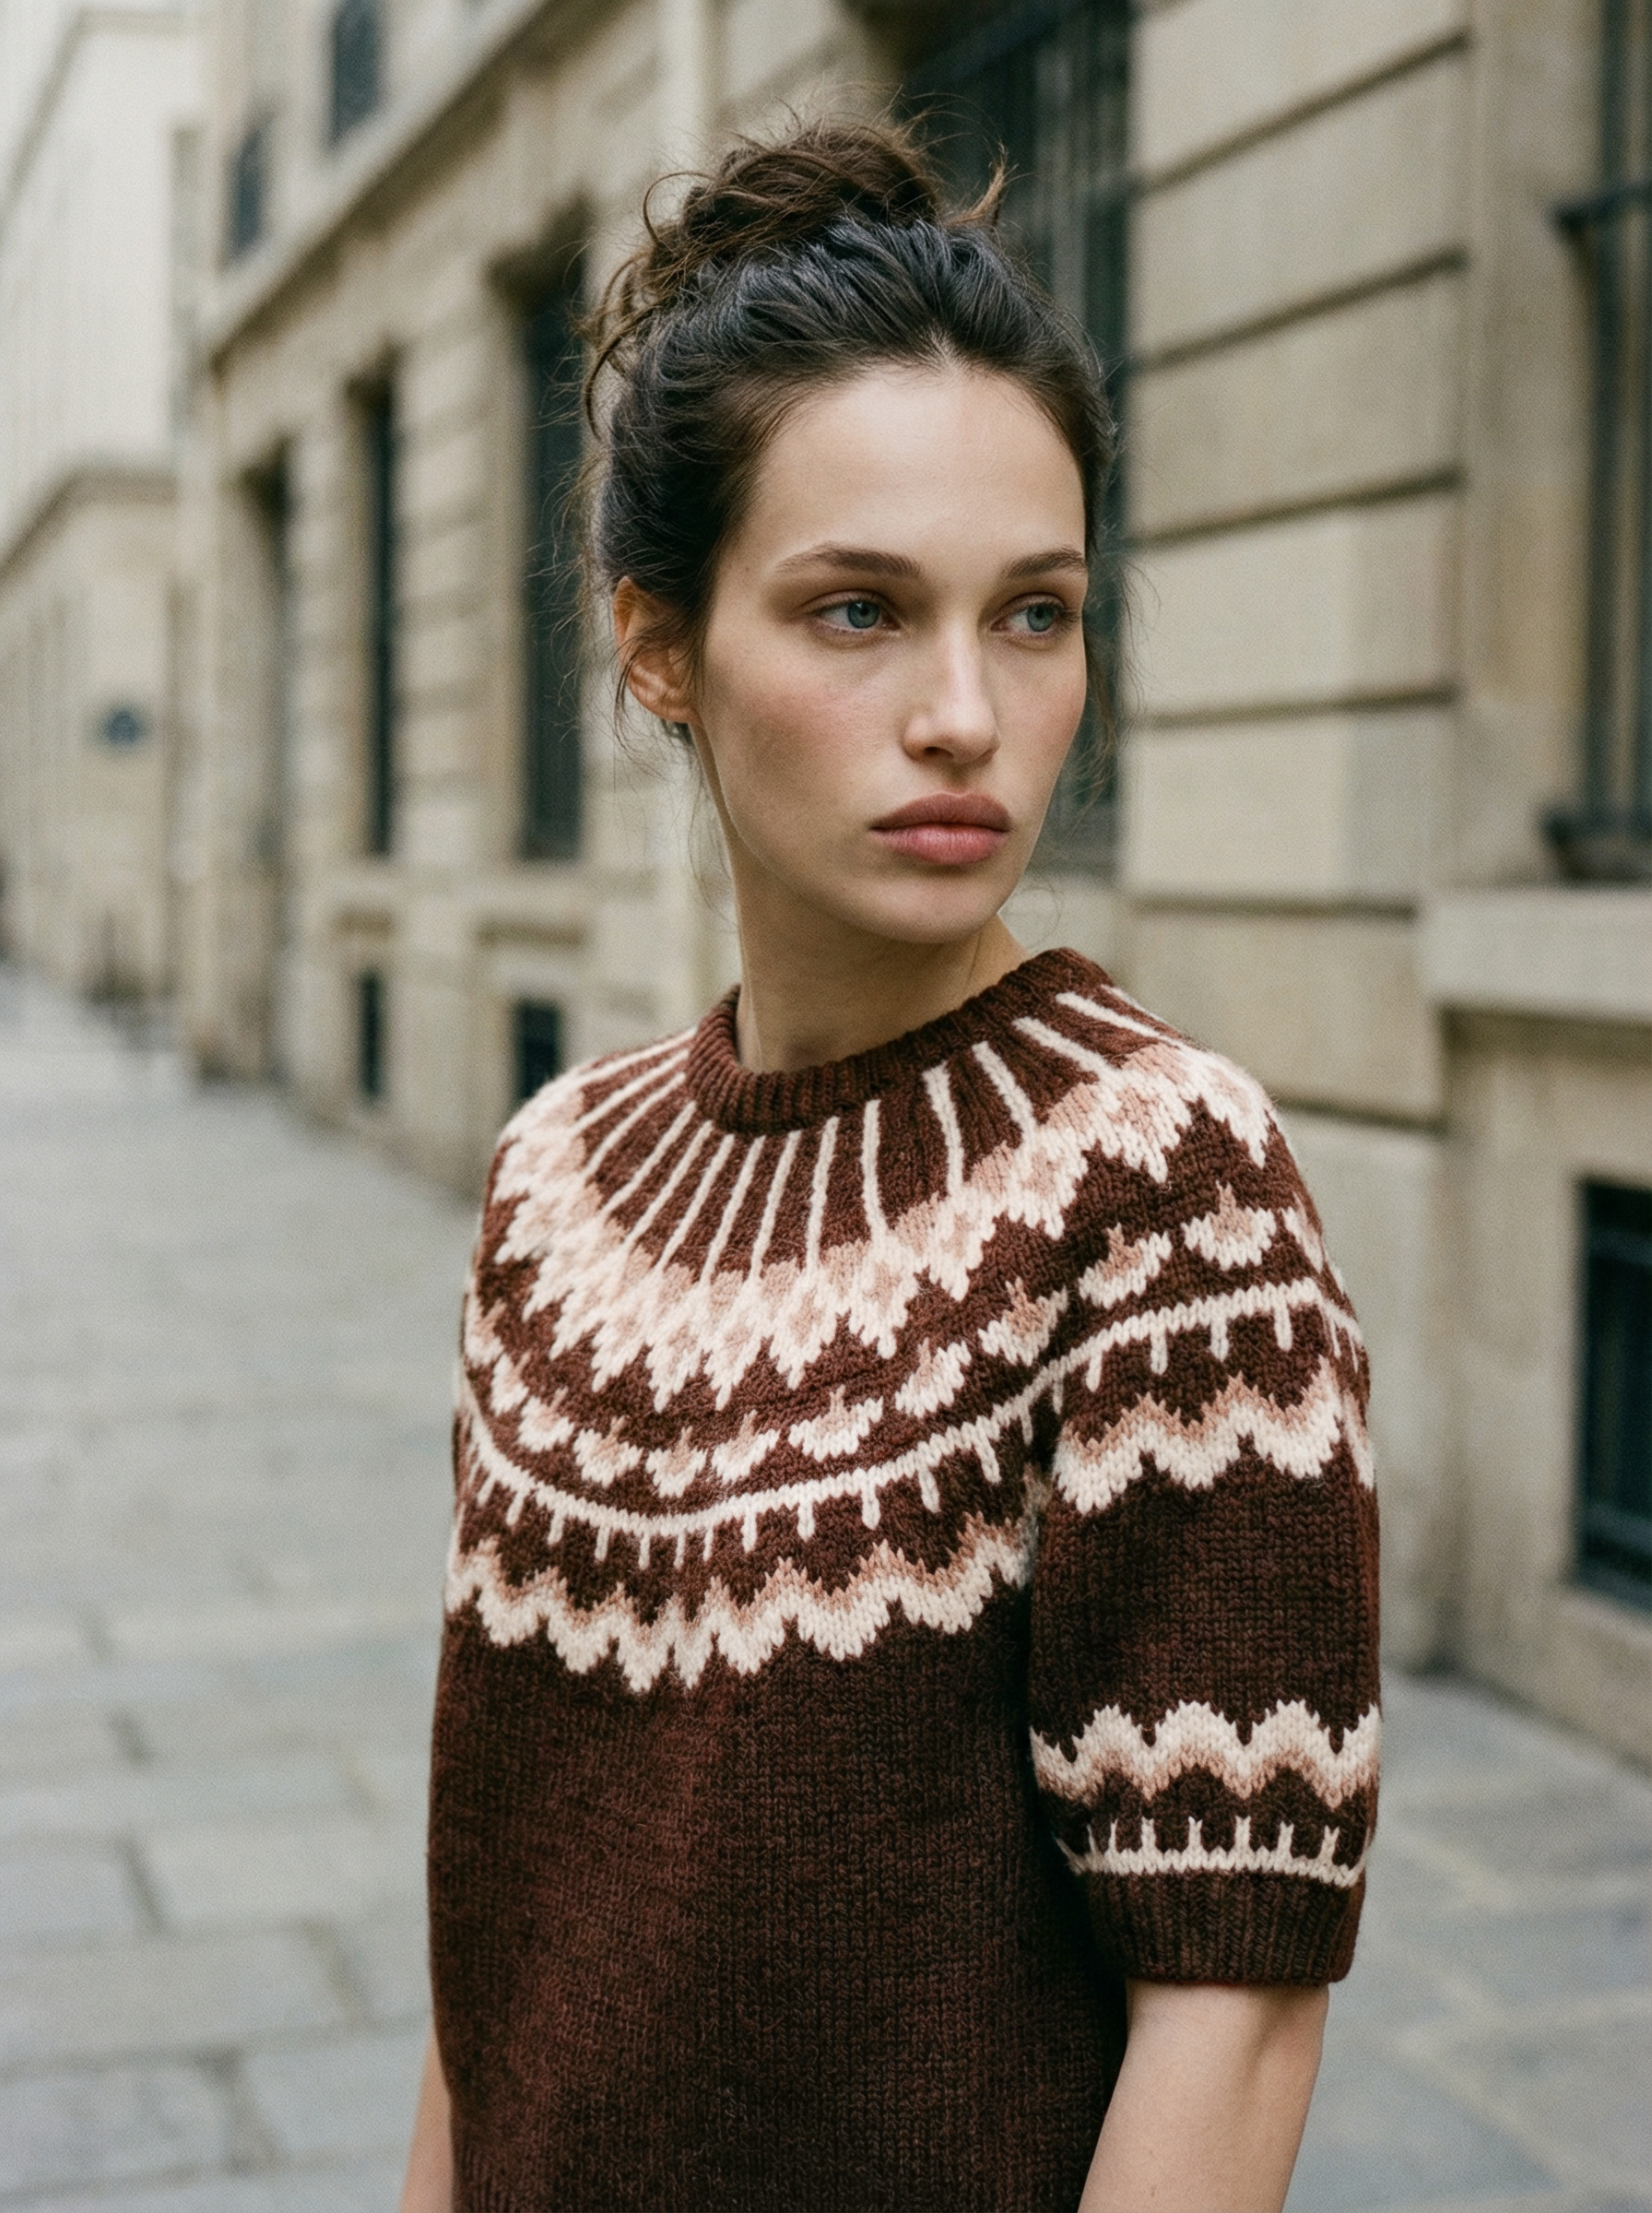
View the original Maison Urban knit photo.
A beige jacket, close enough to inspect the seams
This Great Sports close-up makes a neutral-color adjustment easier to see than a full-body image. The jacket moves from gray-beige toward the packshot’s pinker beige. Look across the large shoulder panel, collar and zipper; the close crop also makes it easier to review the selection along the neck.
Great Sports jacket detail before and after Color match
Use Scan line across the collar and shoulder to compare the beige tones and fabric detail.
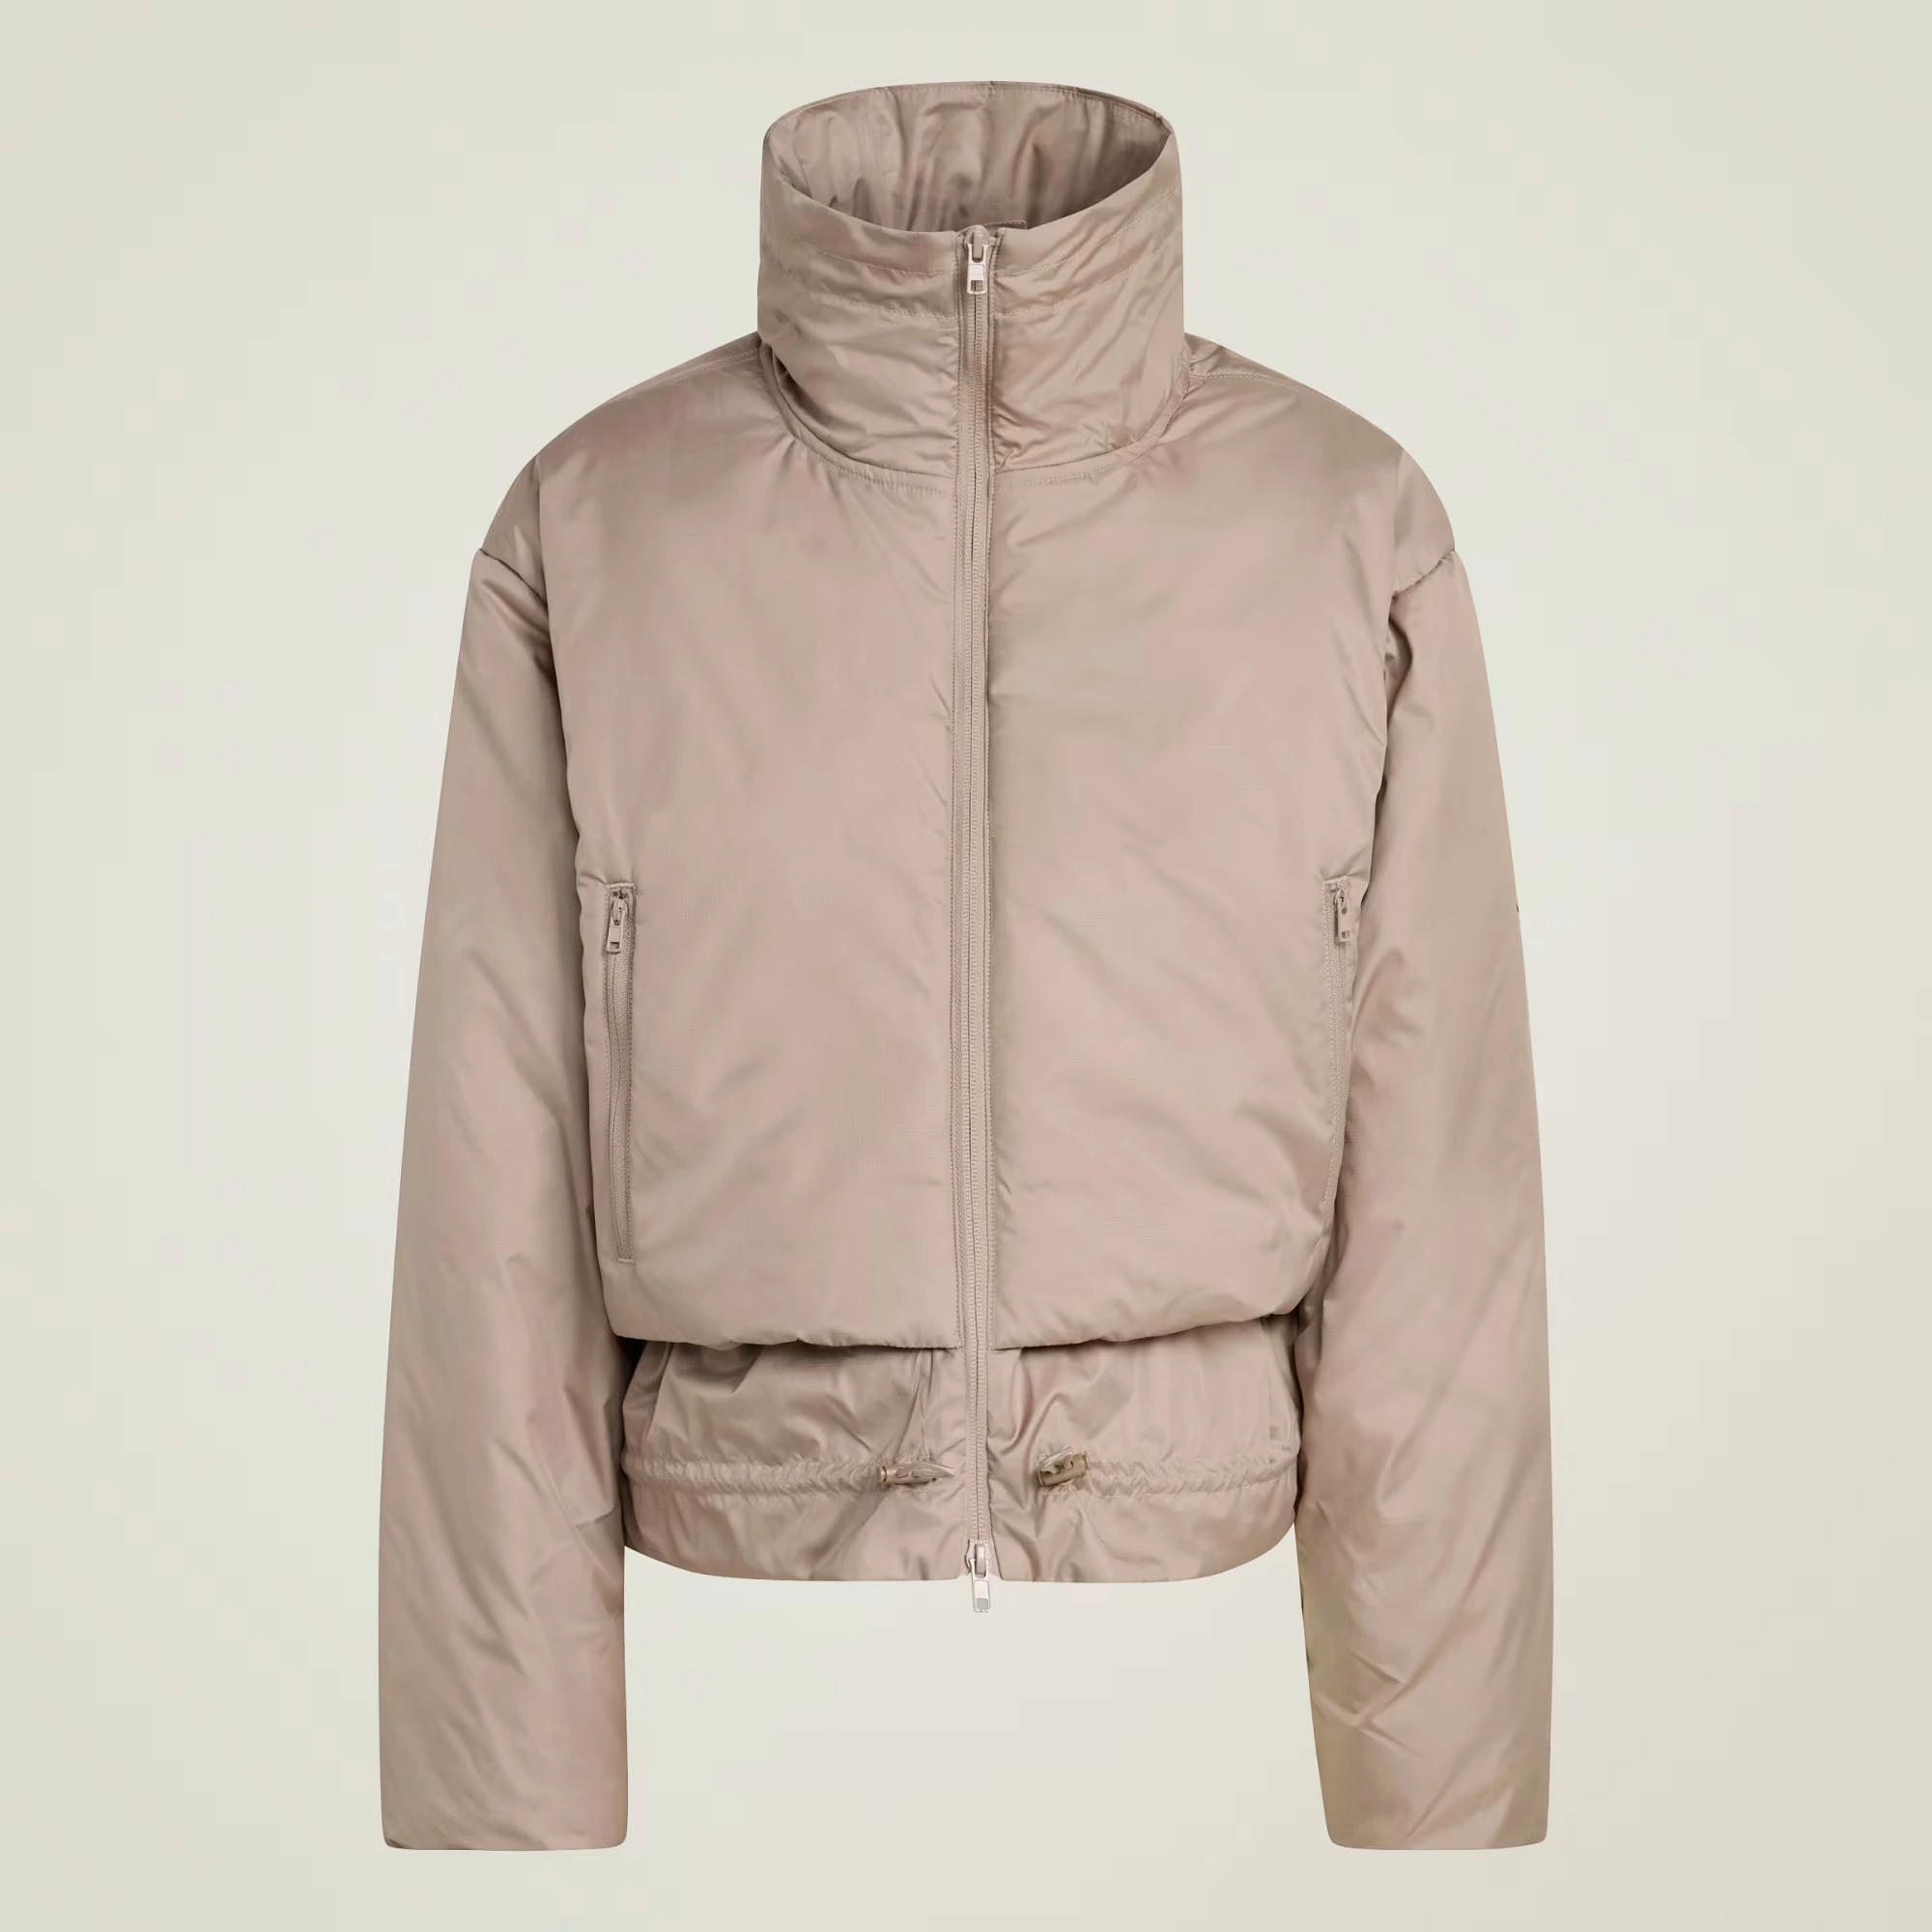
The jacket is selected separately from its packshot background.
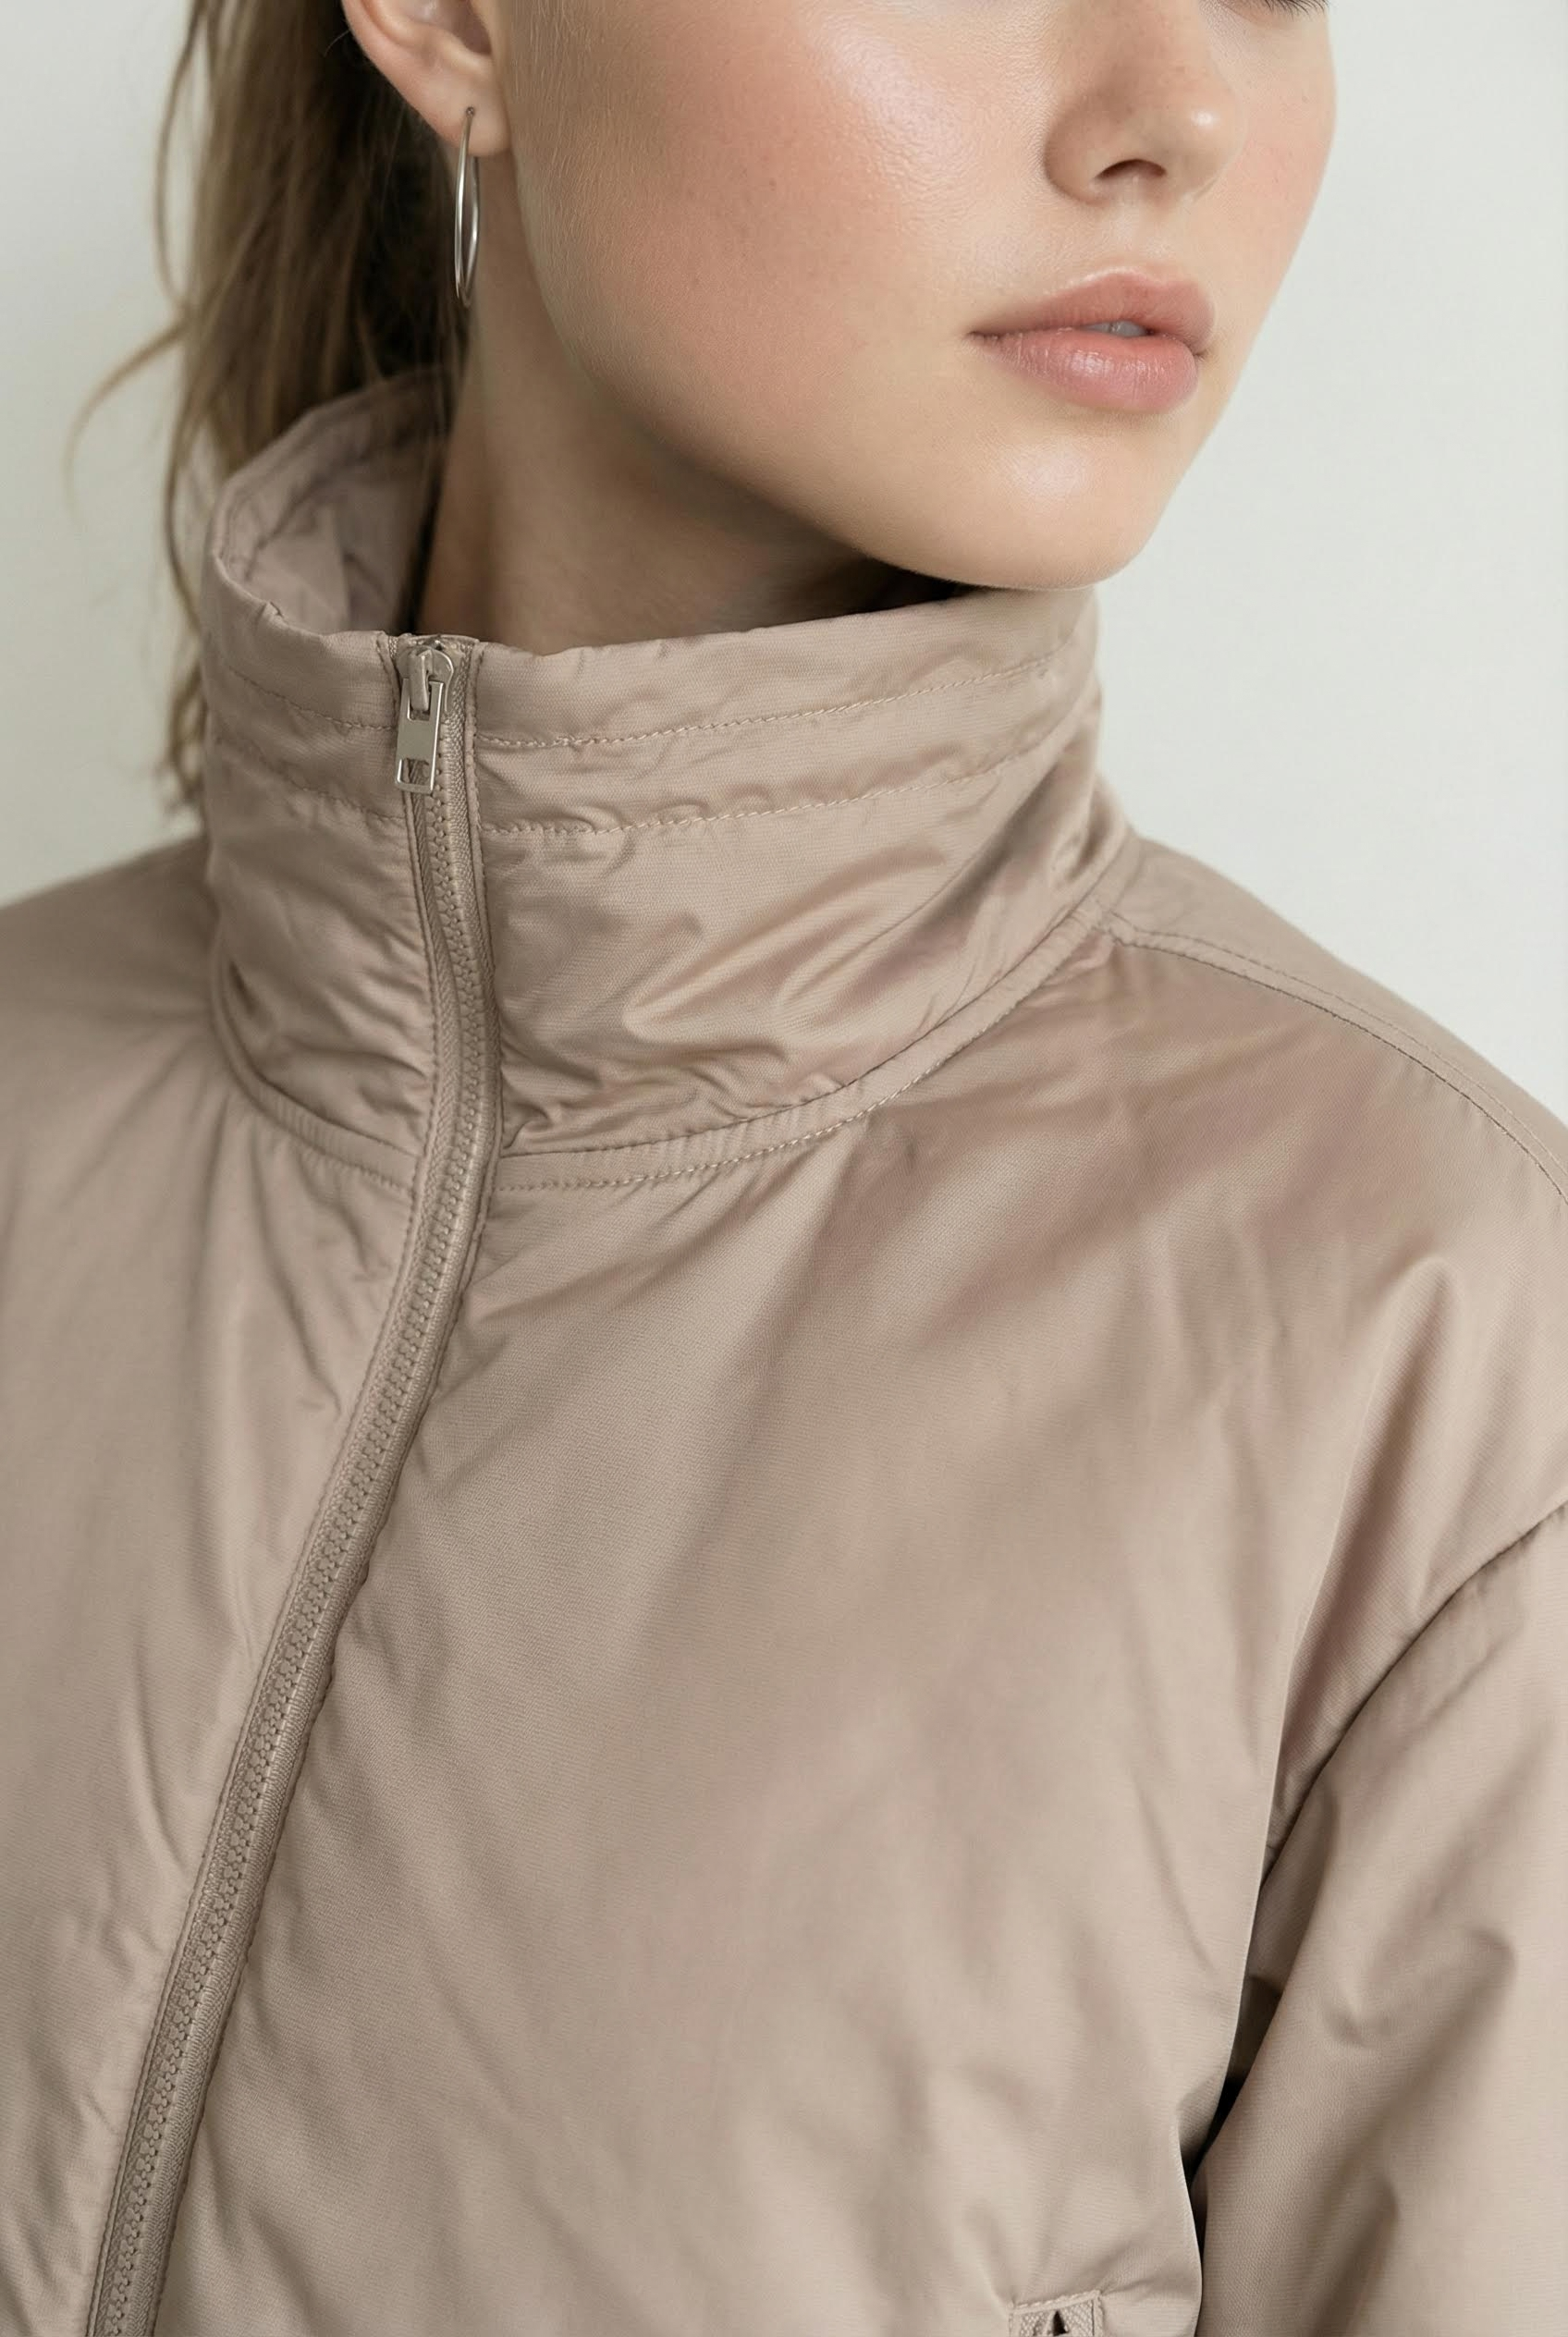
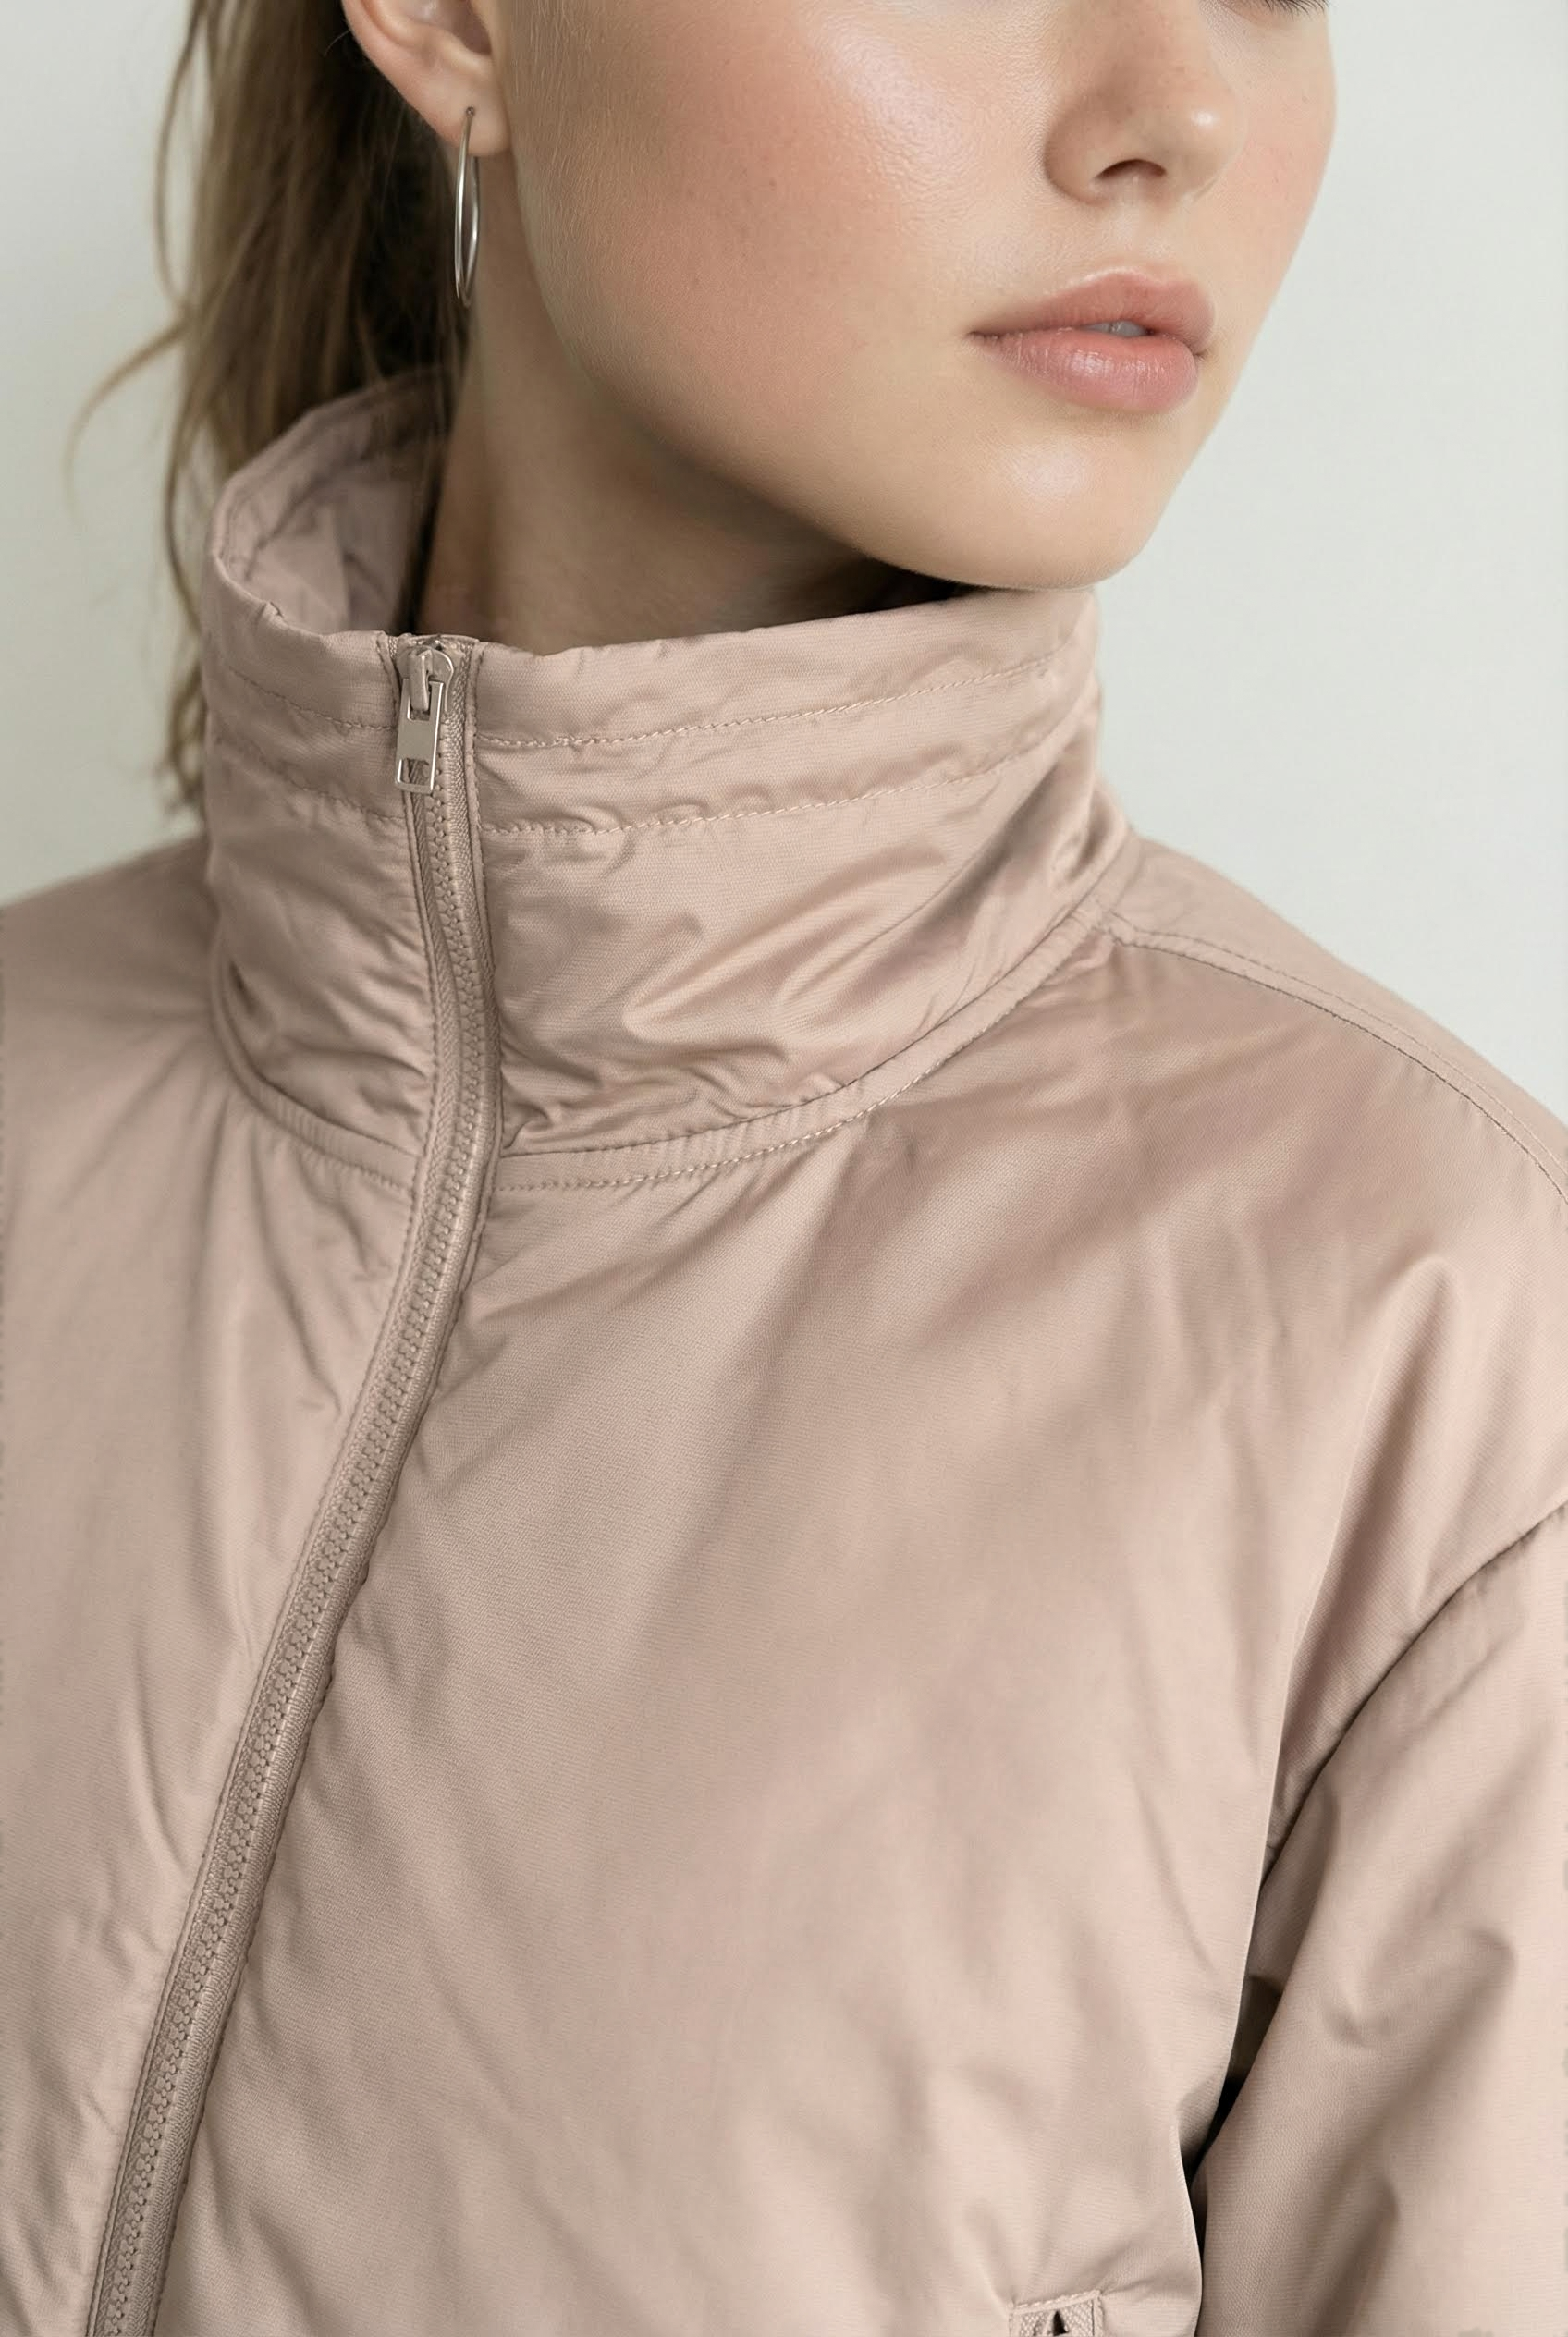
View the original Great Sports jacket photo.
Charcoal trousers in a studio portrait
The America Basics trousers read slightly warmer in the original portrait than in their product photograph. Color match moves the selected fabric toward the cooler charcoal reference. Inspect the waistband, pocket and folds; the cream shirt and skin provide useful checks for color spilling beyond the trousers.
America Basics trousers before and after Color match
Use Scan line to compare the trouser color in the same pose and lighting.
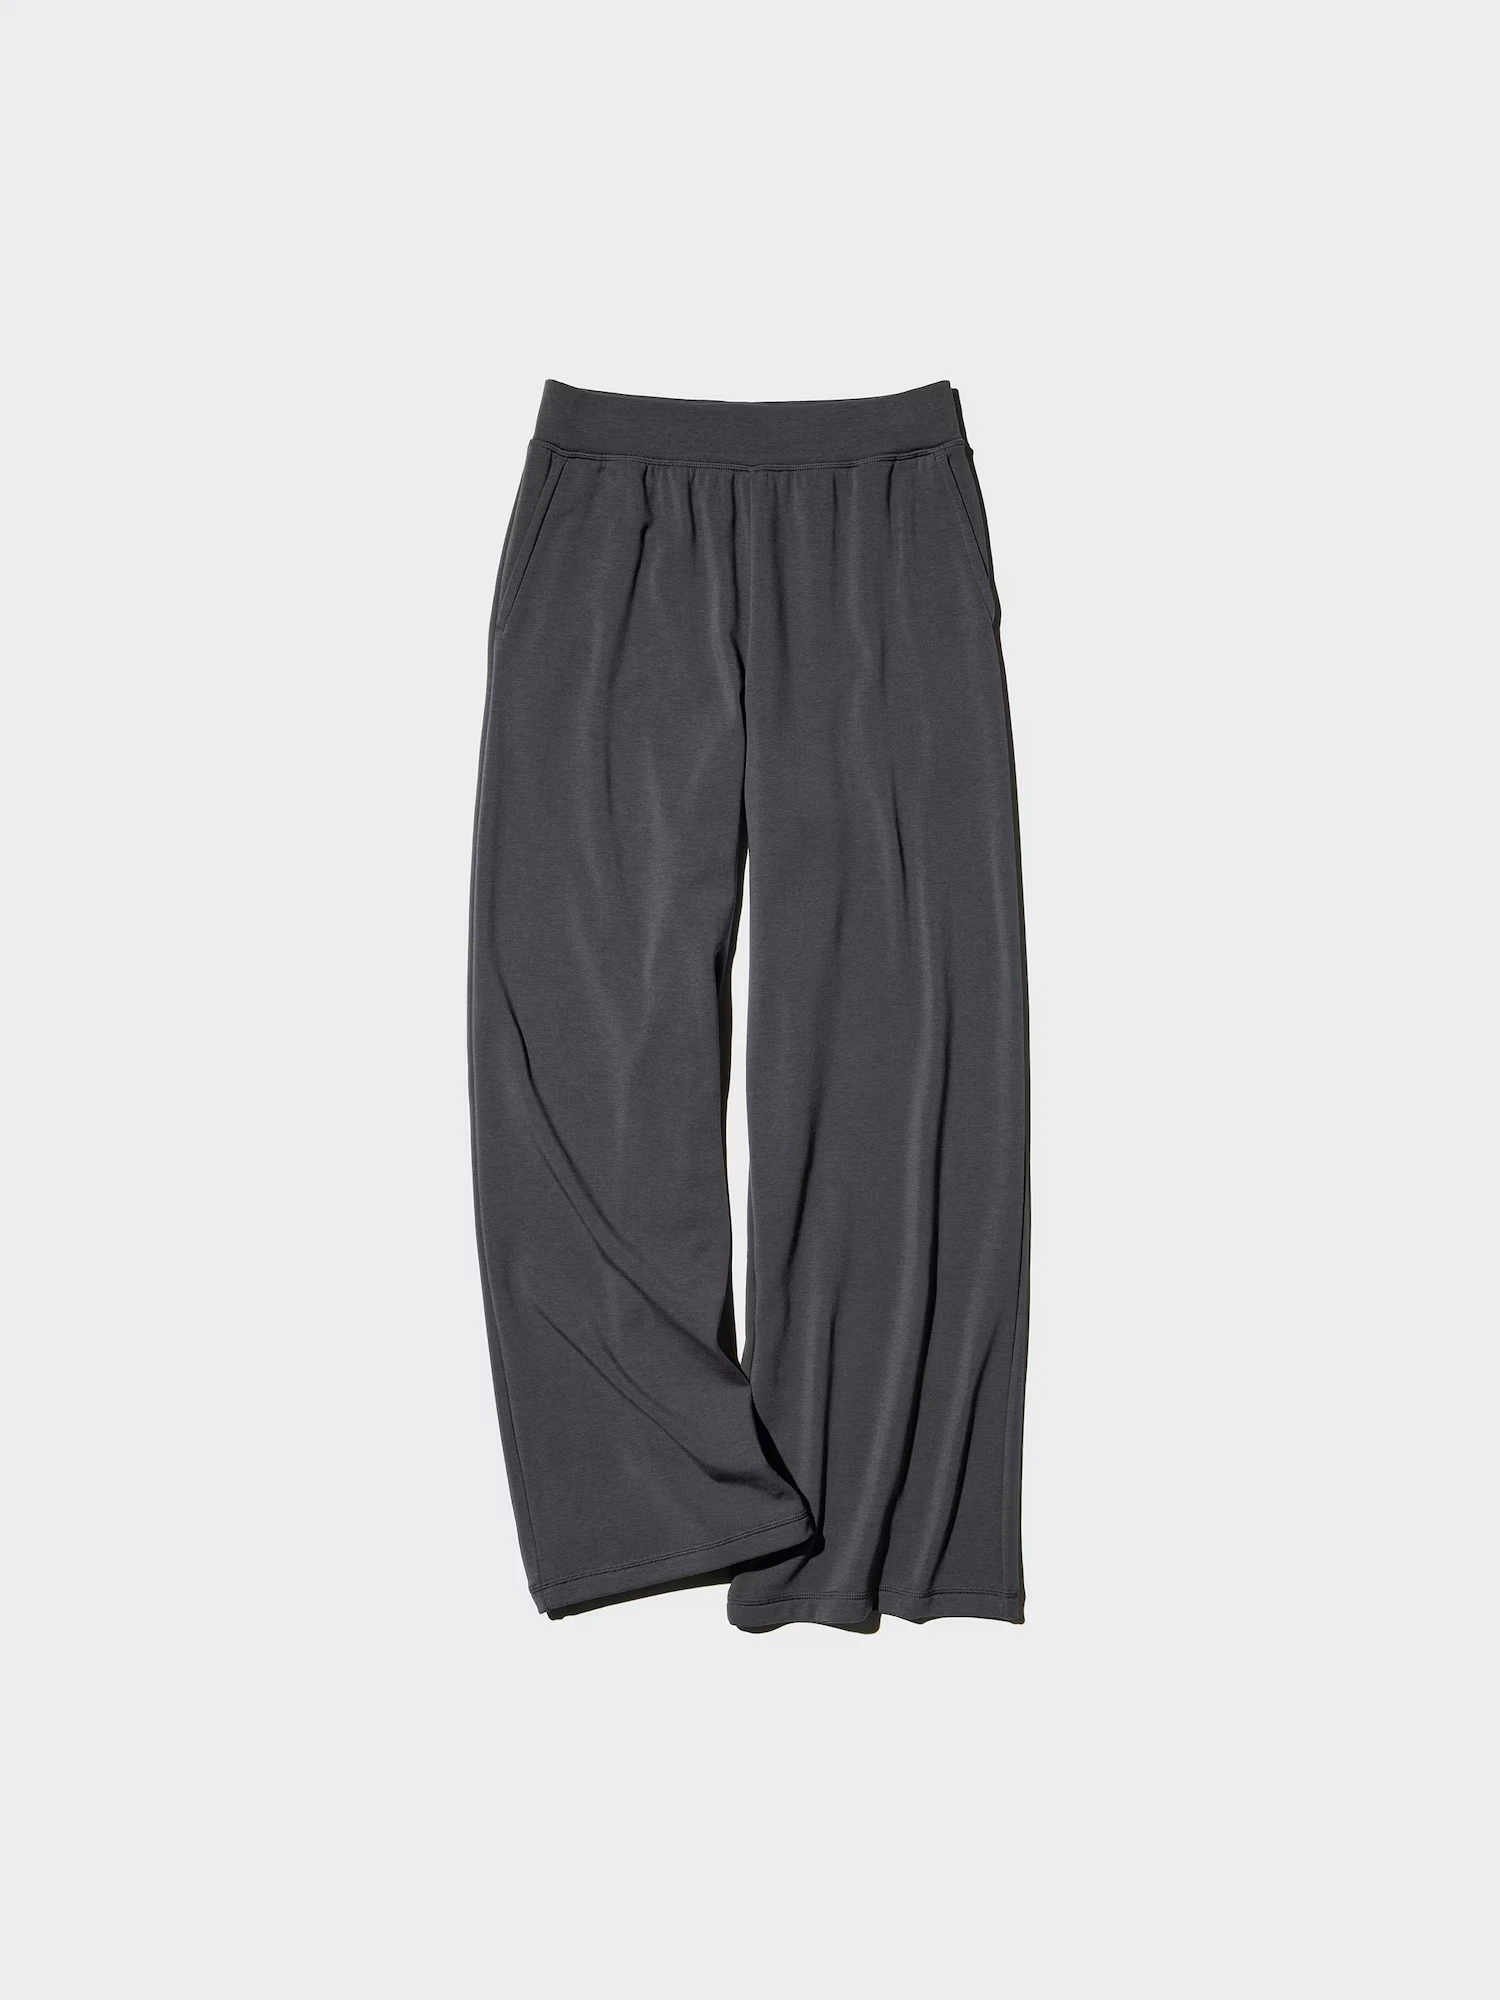
The trousers are selected separately from the light background.
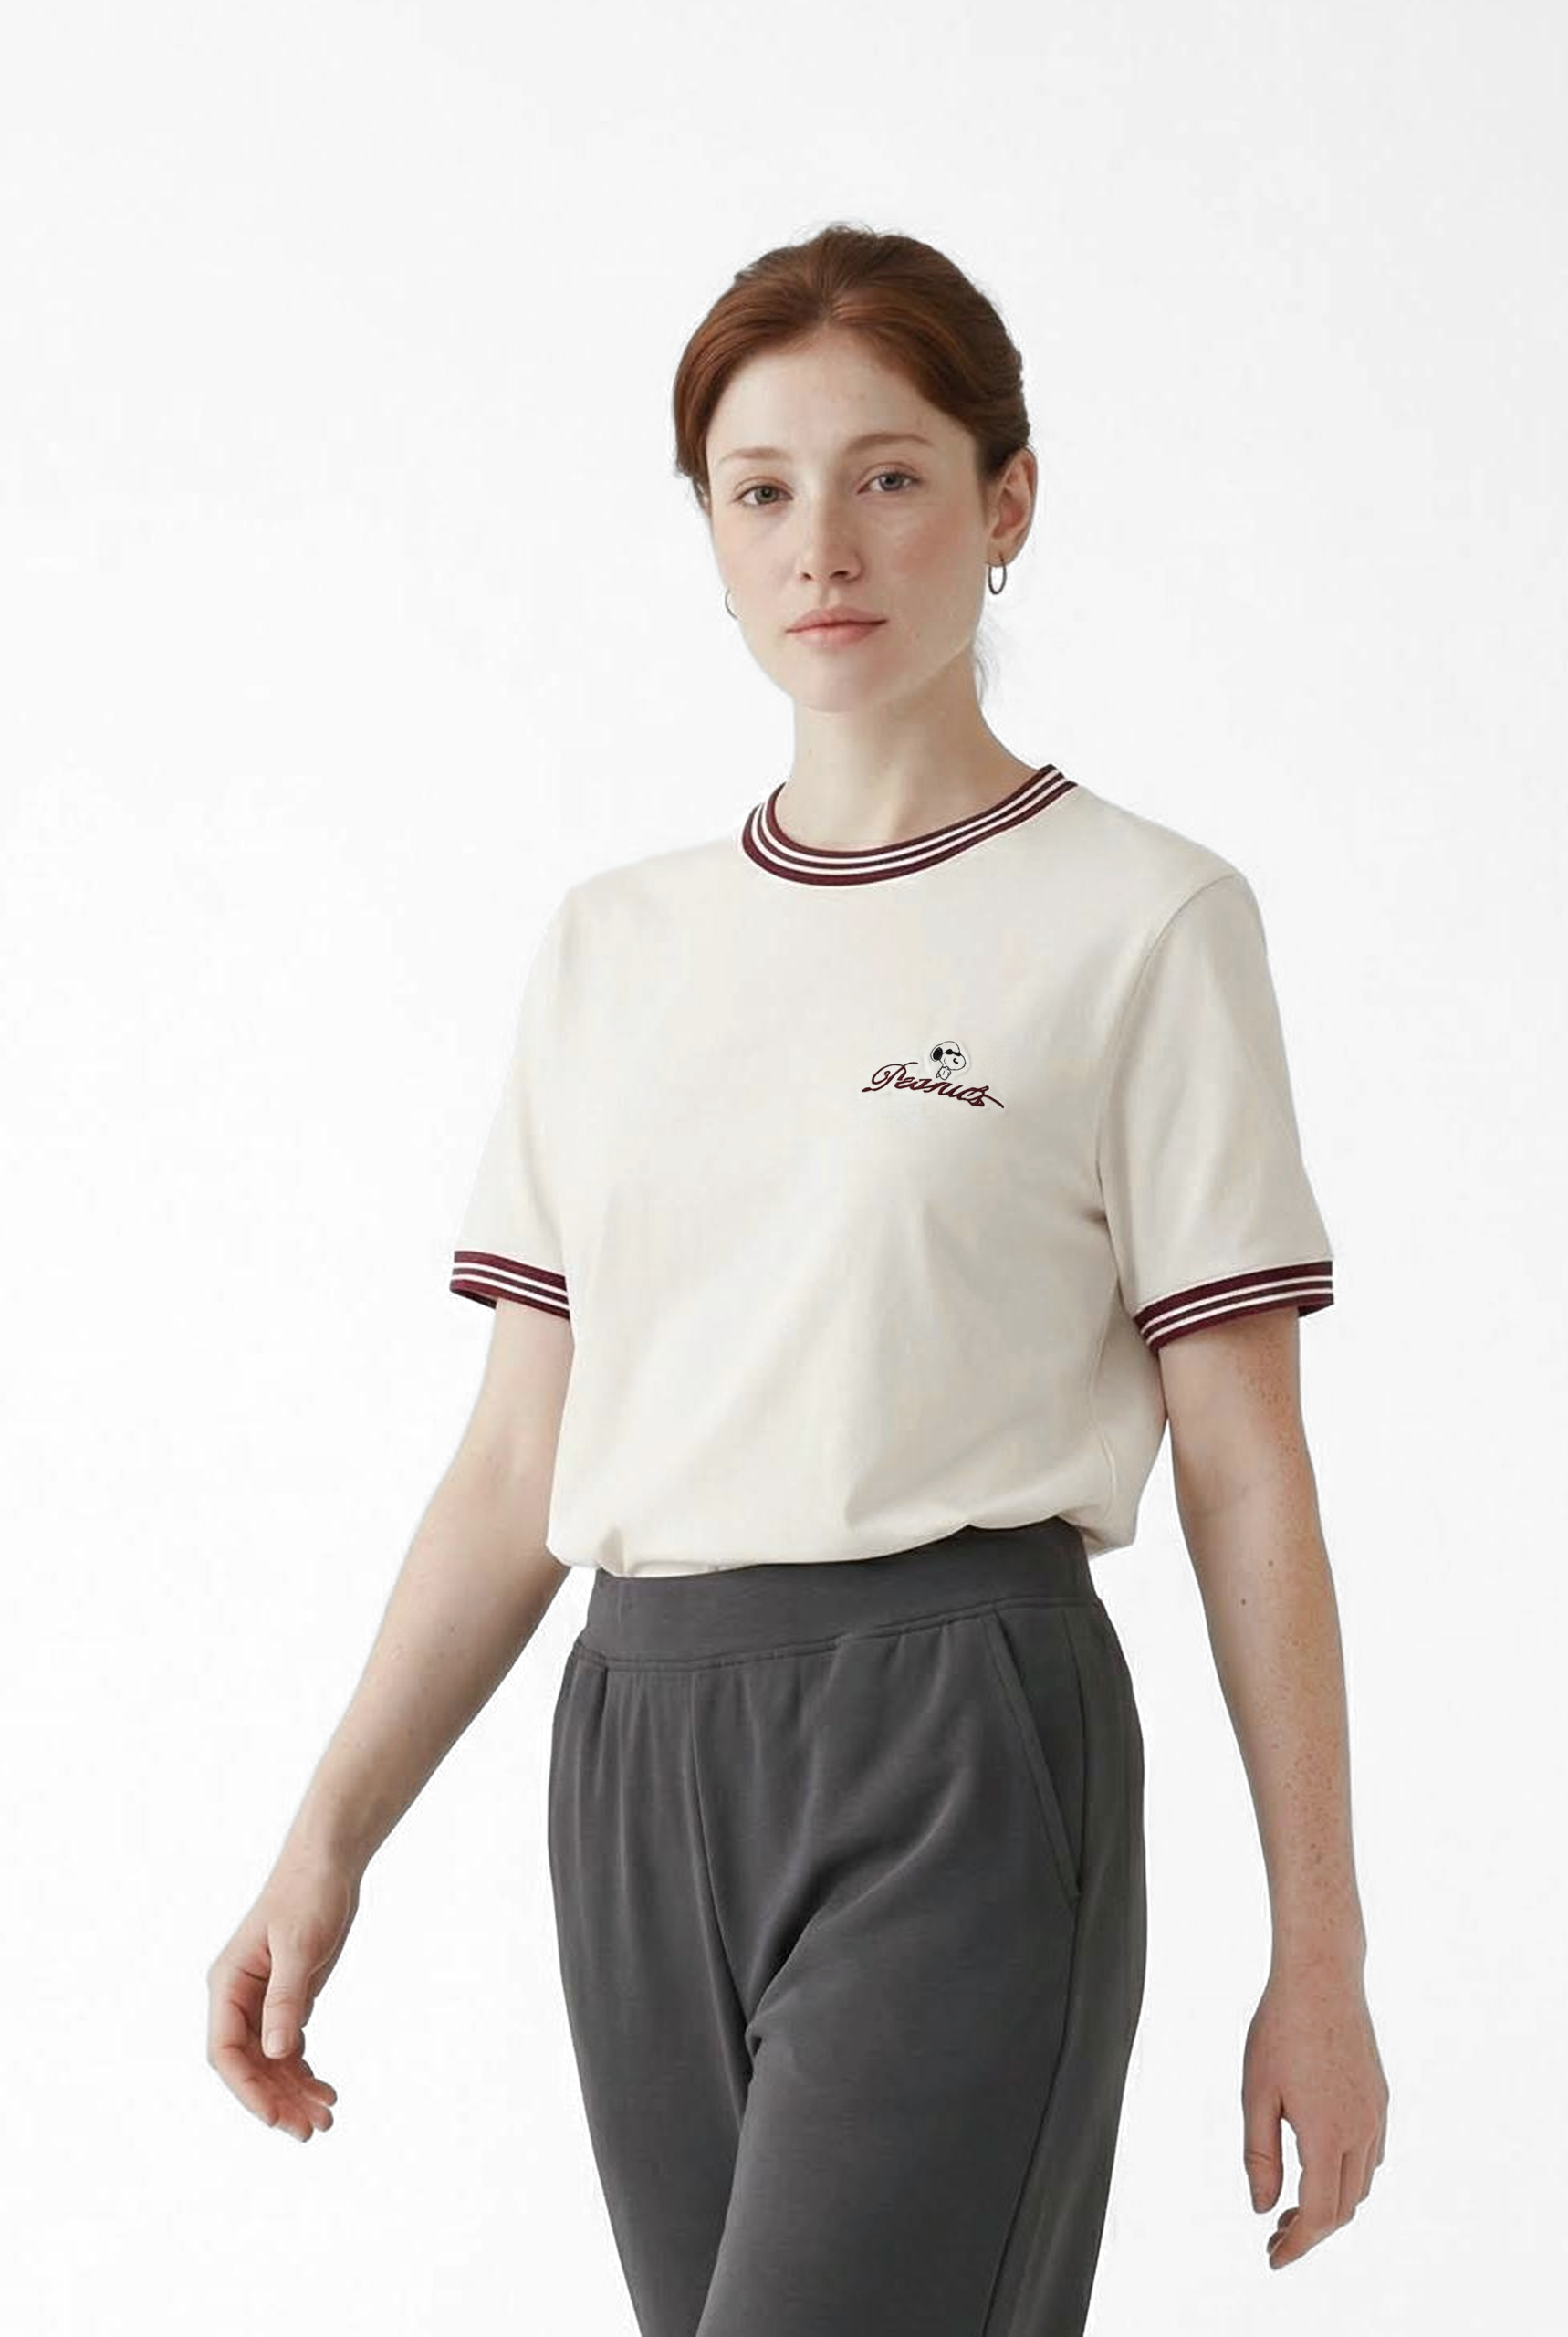
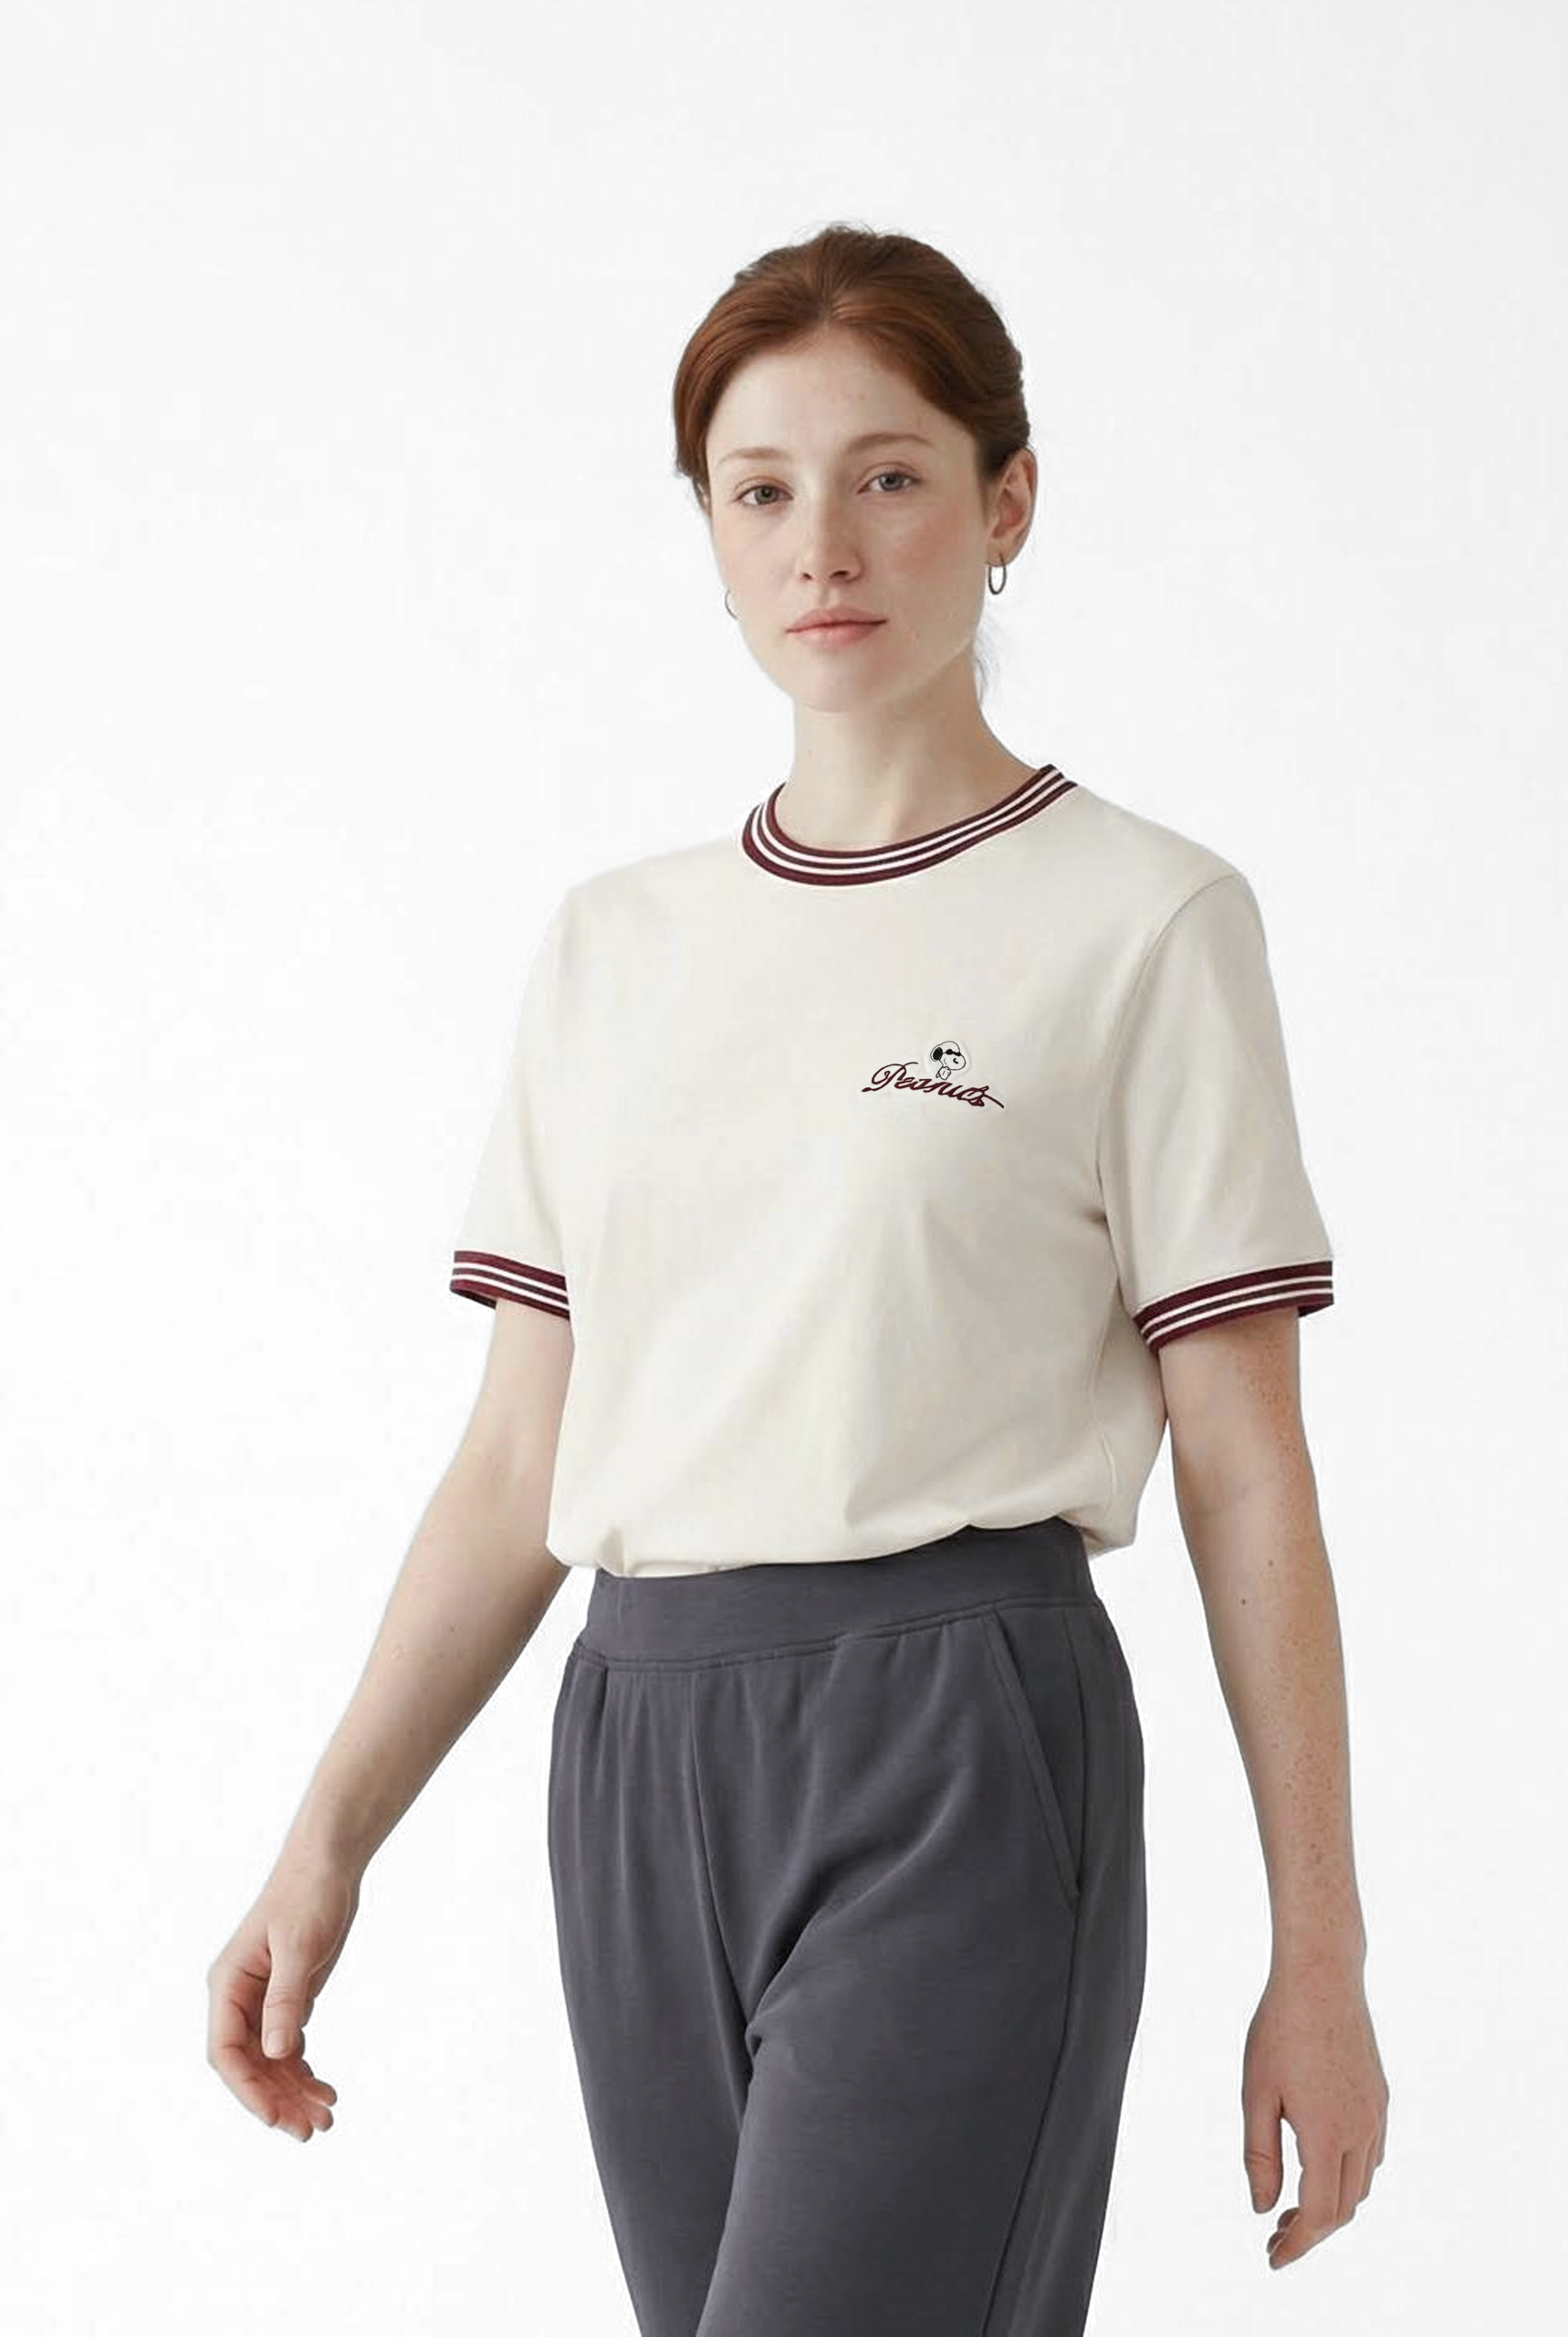
View the original America Basics photo.
These examples are finishing corrections to an already usable photograph. If a full lightness match is too strong for your scene, reduce Tone as described below.
Start with a reliable color reference
Choose a clear photograph of the actual product in the intended colorway. Prefer an image with even lighting and visible material detail. A strong color cast or an overexposed reference gives you a poor target for matching.
Keep the reference focused on the material you want to match. For a navy jacket with cream trim, select the navy fabric separately from the trim. For more guidance on source images, see how to choose product reference photos.
Step 1: Open the photo in Darkroom
Open your image in Astria’s image viewer and choose Darkroom. Expand Color match, then select Add area. The editor shows your photo alongside a reference pane.
Step 2: Select the area to recolor
Click the garment or product surface in the Photo pane. Wait for the selection to appear, then check its coverage. Click additional parts to include them; Shift-click to subtract unwanted parts. On first use, the selection model may need to download before it can trace the area.
Look closely around cuffs, collars, straps and places where the product touches skin or the background. A clean selection helps keep the correction on the intended material.
Step 3: Choose the matching reference area
Choose an image from the reference thumbnails, or use Upload image to bring in another product photograph. Click the corresponding material in the Reference pane. You can refine that selection with additional clicks and Shift-clicks too.
The reference strip also includes This photo, useful when another part of the same image supplies the color you want. Pick a color lets you use a solid color swatch instead of an image.
Once both areas are selected, review the live match and choose Done. This finishes the area selection; you still need to save or download the finished image.
Step 4: Balance Amount and Tone
Each area has its own controls. The two small swatches show the selected photo color and reference color. The colored dot beside Area 1 identifies the selection; it is not the target color.
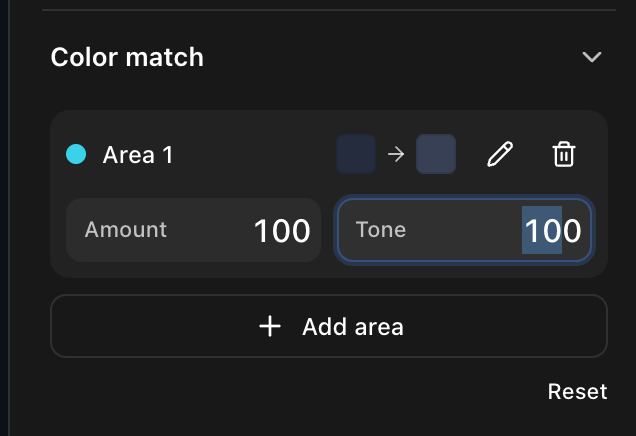
| Control | What it changes | When to adjust it |
|---|---|---|
| Amount | The overall strength of the match, from 0 to 100. At 0, this area’s color correction is off. | Lower it if the full correction is stronger than you want. |
| Tone | How much of the reference’s lightness comes with the color match, from 0 to 100. At 0, the correction retains the photo’s lightness; at 100, it applies the full lightness match. | Lower it when the reference was lit differently and the product becomes too bright or too dark. |
For example, imagine a navy shirt that looks too purple in your finished photo. Select the shirt and its navy product reference, then inspect the full match. If the hue looks right but the shirt becomes too bright under the scene’s lighting, reduce Tone. If the overall correction feels too strong, reduce Amount.
Use the pencil icon to revisit an area’s selection or reference, and the trash icon to remove that area. Add area creates another independent correction, with up to four areas per photo. The Reset inside Color match removes all color-match areas.
Step 5: Compare and save the finished image
Hold Before to see the original photograph. Check the full image, then inspect the corrected area closely. Review the material’s folds and texture, the selection edges, and any nearby skin, trim or background. If you also applied a Darkroom look or other grading adjustments, judge the product color with those settings active.
Choose Save to prompt to keep the finished image with its prompt, or PNG to download it. Save or download before leaving Darkroom: area selections belong to the current editing session and are not restored as editable selections when you reopen the image.
For a collection, compare each finished image against the same approved product reference. Darkroom’s Copy settings and Paste settings transfer grading settings, but do not transfer color-match areas between photos. Select the relevant material in each image.
Frequently asked questions
Does Color match regenerate the image?
Color match applies a local color correction to the existing photo. You select the area and source color, then adjust the result in Darkroom without writing a new generation prompt.
Can I match more than one garment?
Yes. Add separate areas for different garments or materials. Each area has its own reference, Amount and Tone, with up to four areas in a photo.
Can I use Color match on video?
Color match is available for still images. The area-selection controls are not available in video Darkroom.
Does it guarantee an exact product color?
It helps bring a photo closer to the selected reference. Lighting, the reference itself and the final grading still affect how the product reads. Compare against your approved product photograph before using the image on a product page, and review pattern, logos and construction separately. The lookbook review guide covers those checks.
Try Color match on your next product photo
Open Astria, choose a photo, and use Darkroom → Color match to match it to your product reference. See the Color match product announcement for the original workflow demonstration.