How to Edit a Video in Astria Darkroom
Watch the walkthrough
Follow a narrated edit of a 12-second fashion film. See how Darkroom finds the changes between shots, then remove a close-up, add music under the original audio, and export from the editor.
Darkroom is Astria’s editor for videos you’ve already made. You can shorten a shot, put several videos in order, and add a soundtrack to make one finished MP4. If a shot needs to play in slow motion or fast forward, change its speed before adding it to Darkroom.
1. Open your video in Darkroom
- Open the video you want to edit in Astria’s viewer.
- Choose Darkroom. The video opens on the Edit tab.
- Look below the preview. The strip with thumbnails is the timeline, which shows your clips in the order they’ll play. The thin white line is the playhead. Click along the time ruler to choose what moment you see in the preview.
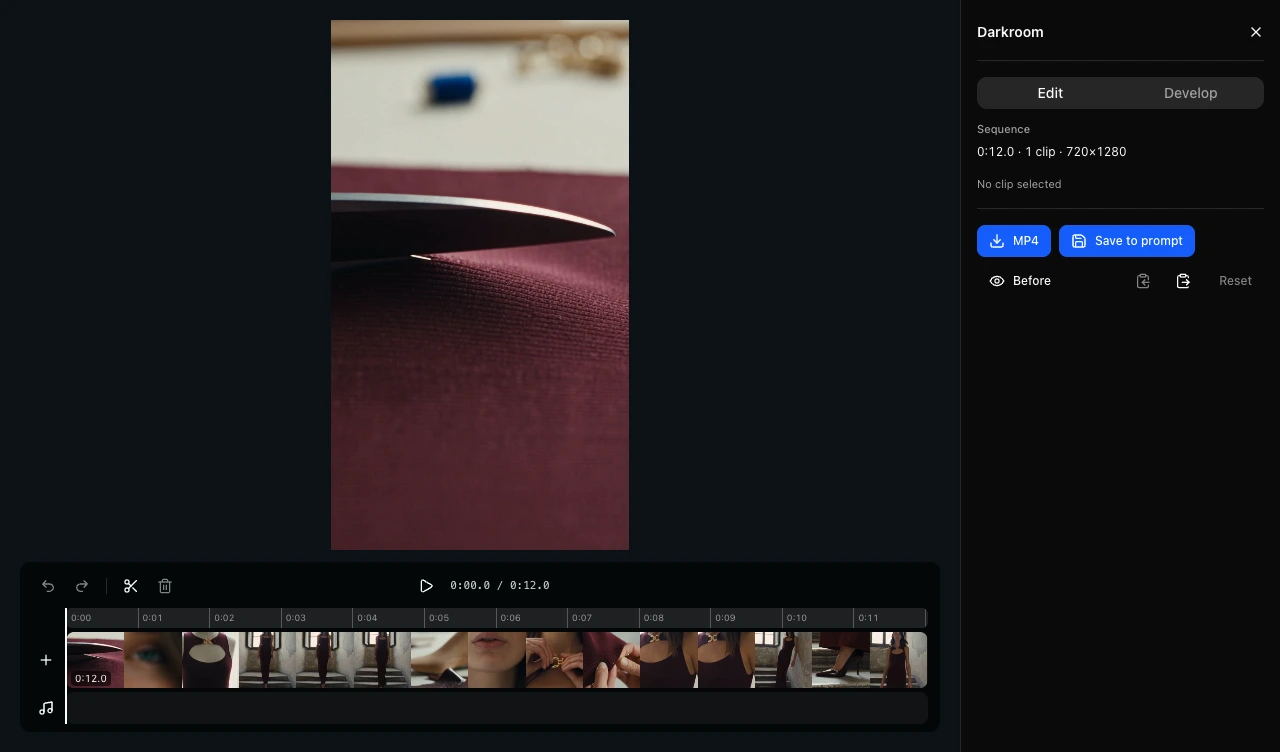
2. Find the cuts between shots automatically
- Click the video strip on the timeline to select it.
- In the Edit panel, click Detect cuts under Scene detection.
- Check the timeline. The example starts as one 12-second video and splits into 13 clips. Click a few of the clips to check where the new shots begin. The full video still runs for 12 seconds.
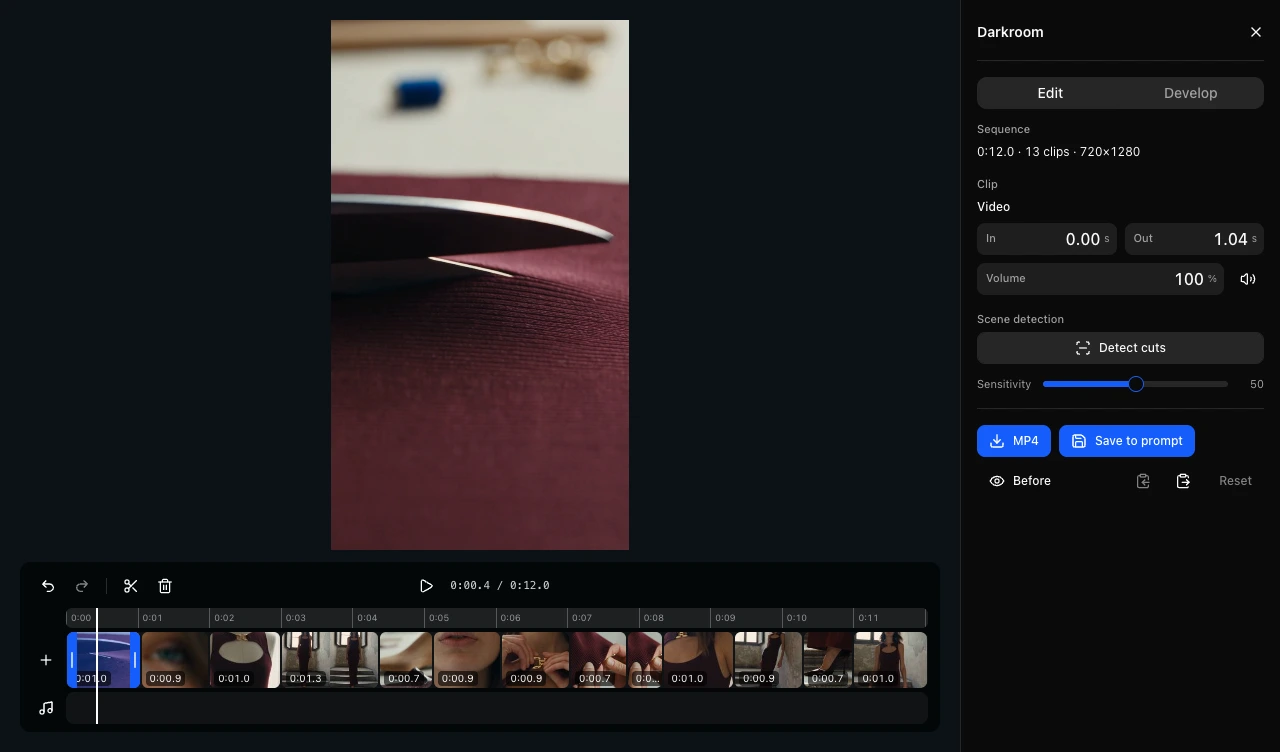
If Darkroom misses a change, raise Sensitivity. Lower it if Darkroom splits a shot you want to keep together. Check the result before you start trimming or moving clips. If you know exactly where to cut, select the video strip, click the time ruler at that moment, then click the Split scissors.
3. Remove a shot and close the gap
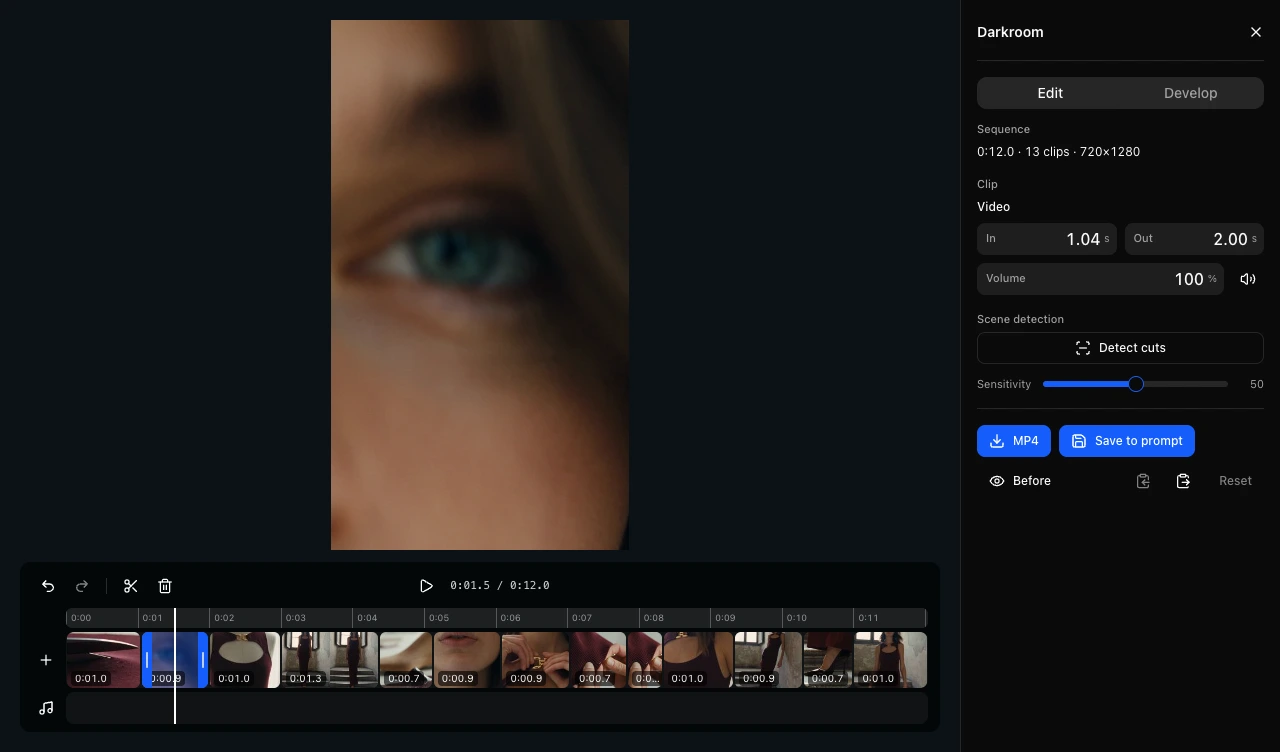
- Click the shot you want to remove. In this edit, we select the second clip, a close-up of the model’s eye, so the film gets to the dress sooner.
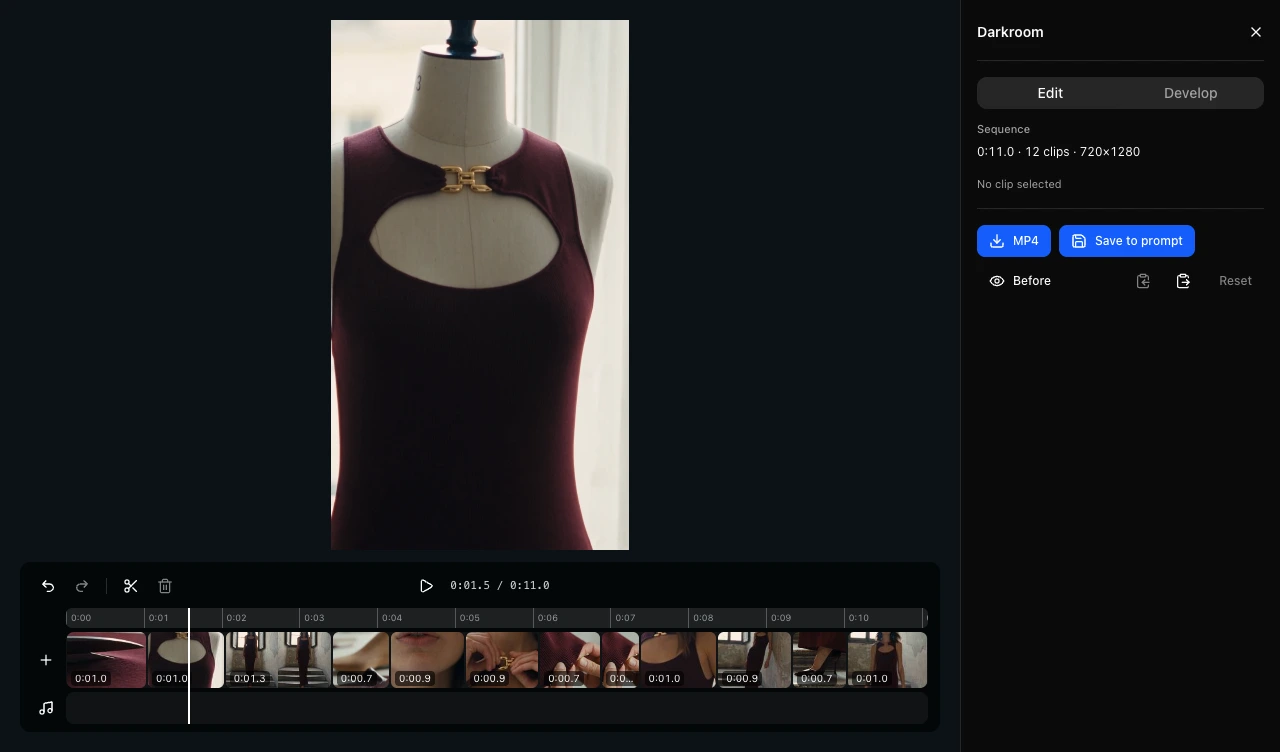
- Click Delete, the trash can above the timeline. The clips on either side move together automatically.
- Click the ruler just before the new join and press Play. Here the scissors cut straight to the dress form and the edit runs for about 11 seconds. Click the curved Undo arrow if you want the shot back.
4. Add music, a voice-over, or another sound
- Click the music note beside the lower track. This is Add music.
- Pick a song from a previous Astria generation, or click From computer and choose an audio file such as an MP3. The audio appears below the video as a strip with a waveform.
- Select the audio strip, then adjust Volume in the Edit panel. In the example, we set the new track to 30% so you can still hear the original fabric and footsteps. Play it back to check the balance.
- To turn down the sound from a video clip, select that video clip and adjust its Volume, or click its speaker button to mute it. You can also trim the ends of an audio clip with its handles.
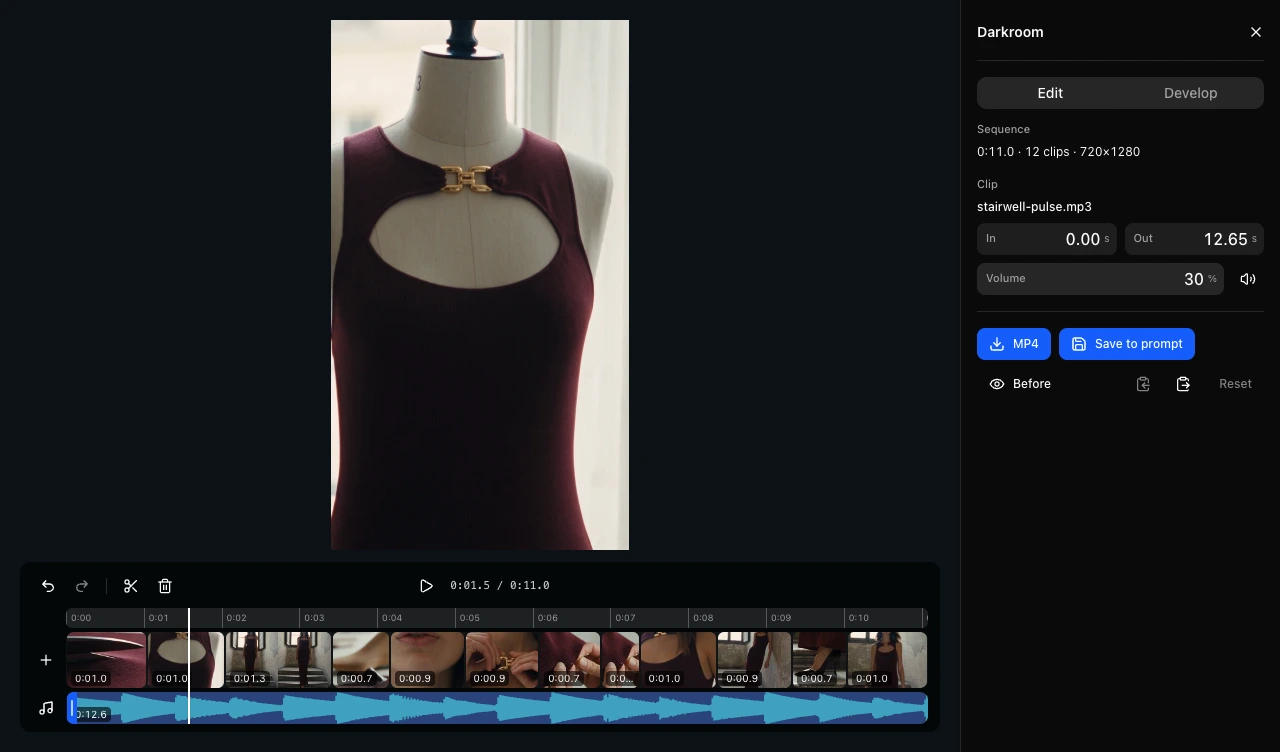
The picture determines how long the result runs. If your music is longer, it stops when the picture ends.
5. Watch the whole edit and download it
Click near the start of the time ruler, then press Play. Check the opening, each cut, and the last second with sound on. When you’re happy with it, click MP4 to download one file with your clips and audio together. If you opened Darkroom from an Astria generation, choose Save to prompt to keep a rendered copy with that generation. Export before closing the editor so you have a copy of the finished cut.
Download the music track to try it with your own video.
6. Trim the start or end of a shot
- Click the clip you want to shorten. A handle appears at each end.
- Drag the left handle to the right to remove part of the beginning. Drag the right handle to the left to remove part of the ending.
- Click Play and watch across the join. Darkroom brings the next clip up to meet the trimmed one.
To remove a piece from the middle, Split at both ends of that piece, click the middle clip, then click the Delete trash can. Use Undo if you cut too much.
7. Slow down or speed up a shot before importing it
Use a video editor with a speed control for this step. A four-second shot takes eight seconds at 0.5× speed and two seconds at 2×. For example, slow down a close-up to give viewers time to see a detail, or speed up a long camera move to get to the product sooner.
- On Mac with iMovie, add the shot to a new movie, select it on the timeline, click the speedometer, and choose Slow or Fast. Click Share, then Export File. Choose Medium quality to save an MP4. See Apple’s speed controls and export steps.
- In Clipchamp, add the shot to the timeline, select it, and open Speed in the side panel. Set the speed, then choose Export to save an MP4. See Microsoft’s speed controls and export steps.
Watch the exported clip once, including its sound if it has any. Use that file in the next step.
8. Join your videos in order
- Click the + beside the video track. This is Add clip.
- Pick a video from a previous Astria generation, or click From computer and choose a video file. Darkroom adds it to the end.
- To change the order, drag a clip left or right into the order you want. Play from the beginning to check the order and timing.
Your edit can be up to three minutes long. The first clip on the timeline sets the shape of the finished video. Start with a tall clip if you want a tall video. Clips with a different shape can have black bars around them.